


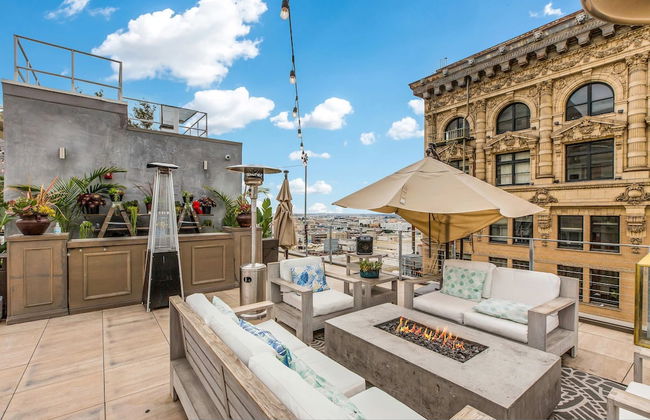
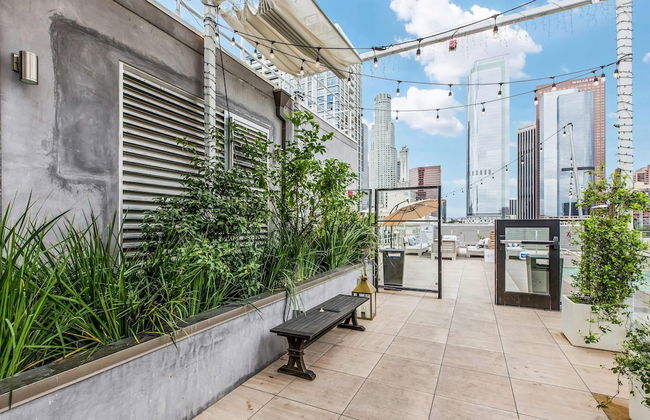
TENTEN Wilshire - Official
Los Ángeles - Downtown Los Angeles - A 1.1 km del centro
- 4 personas
- Aire acondicionado
- Calefacción
- Terraza
- Piscina
- Parking
- Ascensor
- Jardín
- Lavadora
- Chimenea
- Barbacoa
- Toallas
- Sábanas


Downtown LA Luxury Two Bedroom Apartment
Los Ángeles - Downtown Los Angeles - A 940 m del centro
- 76 M2
- 6 personas
- Aire acondicionado
- Calefacción
- Piscina
- Parking
- Ascensor
- Jardín
- Televisión
- Lavadora
- Barbacoa
- Toallas
- Sábanas


Iconic Heart of DTLA Loft with Rooftop Pool Jacuzzi Gym
Los Ángeles - Downtown Los Angeles - A 1.2 km del centro
- 63 M2
- 1 habitación
- 4 personas
- Aire acondicionado
- Calefacción
- Terraza
- Piscina
- Ascensor
- Jardín
- Barbacoa


The Haas, Trademark Collection by Wyndham
Los Ángeles - Downtown Los Angeles - A 670 m del centro
- 12 personas
- Aire acondicionado
- Ascensor
- Televisión
- Toallas
- Sábanas


Sky-Rise Apartments
Los Ángeles - Downtown Los Angeles - A 1 km del centro
- 85 M2
- 1 habitación
- 4 personas
- Aire acondicionado
- Calefacción
- Terraza
- Piscina
- Parking
- Ascensor
- Jardín
- Barbacoa


ViewPoint Suites
Los Ángeles - Downtown Los Angeles - A 2.1 km del centro
- 75 M2
- 1 habitación
- 4 personas
- Aire acondicionado
- Calefacción
- Terraza
- Piscina
- Parking
- Ascensor
- Jardín
- Barbacoa


Luxury Highrise Living Downtown LA
Los Ángeles - Downtown Los Angeles - A 1.2 km del centro
- 95 M2
- 2 habitaciones
- 6 personas
- Aire acondicionado
- Calefacción
- Terraza
- Piscina
- Parking
- Ascensor
- Jardín
- Barbacoa


Top Floor 3 Bed 3 Bath Penthouse Living In Luxury
Los Ángeles - Downtown Los Angeles - A 1.2 km del centro
- 186 M2
- 3 habitaciones
- 8 personas
- Aire acondicionado
- Calefacción
- Piscina
- Parking
- Ascensor
- Jardín


NYC Styled Loft In DTLA, sleeps 4 with Free Parking!
Los Ángeles - Downtown Los Angeles - A 1.2 km del centro
- 65 M2
- 1 habitación
- 4 personas
- Aire acondicionado
- Calefacción
- Piscina
- Parking
- Ascensor
- Jardín


DTLA prime one bedroom steps away from Crypto
Los Ángeles - Downtown Los Angeles - A 1.8 km del centro
- 10 M2
- 1 habitación
- 4 personas
- Aire acondicionado
- Calefacción
- Terraza
- Piscina
- Parking
- Jardín


Stunning 1 BDR 1 BTH Modern Loft with Pool, Jacuzzi in DTLA!
Los Ángeles - Downtown Los Angeles - A 1.2 km del centro
- 74 M2
- 1 habitación
- 4 personas
- Aire acondicionado
- Calefacción
- Terraza
- Piscina
- Ascensor
- Jardín


Industrial Style 2BR Condo Downtown LA With Rooftop!
Los Ángeles - Downtown Los Angeles - A 1.2 km del centro
- 96 M2
- 2 habitaciones
- 6 personas
- Aire acondicionado
- Calefacción
- Terraza
- Piscina
- Ascensor
- Jardín


Stylish Deluxe 1BR At HWH by Oneluxstay
Los Ángeles - Downtown Los Angeles - En el centro
- 111 M2
- 2 habitaciones
- 3 personas
- Aire acondicionado
- Calefacción
- Terraza
- Piscina
- Ascensor
- Balcón
- Jardín
- Televisión
- Lavadora
- Barbacoa
- Toallas
- Sábanas


Stylish 3BR High-Rise with Pool, Hot Tub & Rooftop Views
Los Ángeles - Downtown Los Angeles - A 1.3 km del centro
- 139 M2
- 3 habitaciones
- 9 personas
- Aire acondicionado
- Piscina
- Parking
- Ascensor
- Barbacoa


Downtown LA's Most Requested Property, Sleeps 4 with Free Parking!
Los Ángeles - Downtown Los Angeles - A 1.2 km del centro
- 65 M2
- 1 habitación
- 4 personas
- Aire acondicionado
- Calefacción
- Piscina
- Parking
- Ascensor
- Jardín
- Barbacoa


Angel City 1 bedroom Apartment
Los Ángeles - Downtown Los Angeles - A 950 m del centro
- 120 M2
- 1 habitación
- 8 personas
- Aire acondicionado
- Calefacción
- Parking
- Ascensor


City View Suite - DTLA by Monthier
Los Ángeles - Downtown Los Angeles - A 1.1 km del centro
- 46 M2
- 2 personas
- Aire acondicionado
- Piscina
- Parking


Oneluxstay At HWH LA Downtown
Los Ángeles - Downtown Los Angeles - En el centro
- 4 personas
- Aire acondicionado
- Calefacción
- Piscina
- Televisión
- Lavadora
- Toallas
- Sábanas


Gorgeous Apartment 2-bedroom 2-bathroom
Los Ángeles - Downtown Los Angeles - A 880 m del centro
- 120 M2
- 2 habitaciones
- 10 personas
- Aire acondicionado
- Calefacción
- Parking
- Ascensor


Snug 3BR HighRise with Pool, Spa & Rooftop Views
Los Ángeles - Downtown Los Angeles - A 1.5 km del centro
- 121 M2
- 3 habitaciones
- 10 personas
- Aire acondicionado
- Calefacción
- Piscina
- Parking
- Ascensor
- Jardín