2529 Apartamentos en Sudáfrica
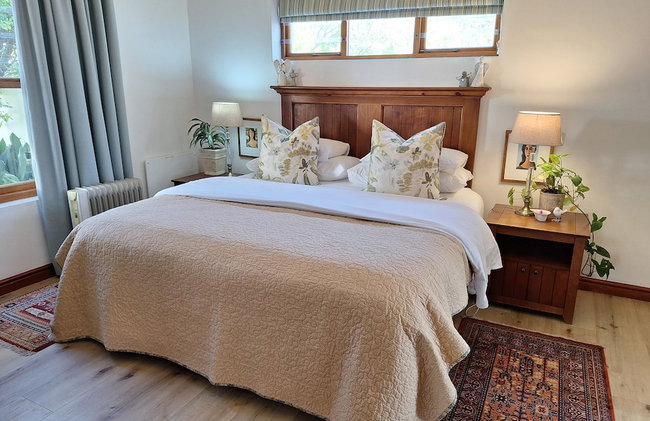
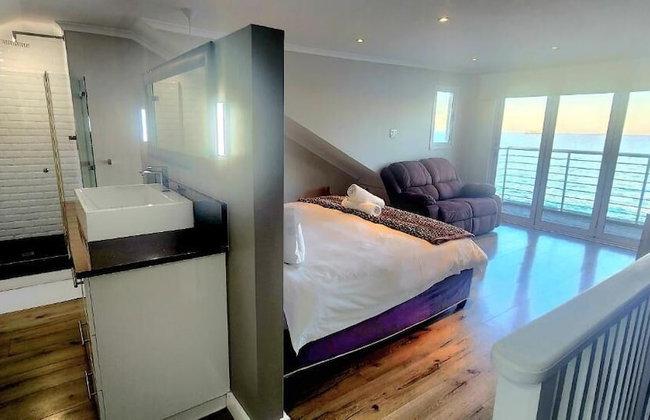
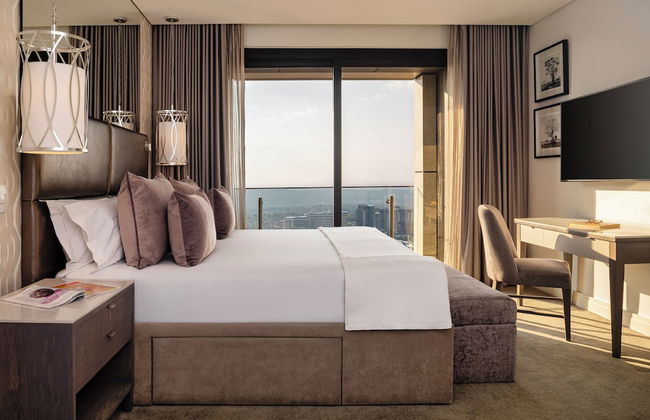
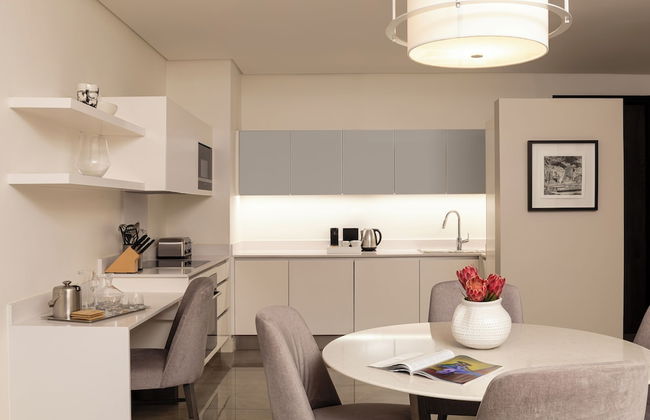
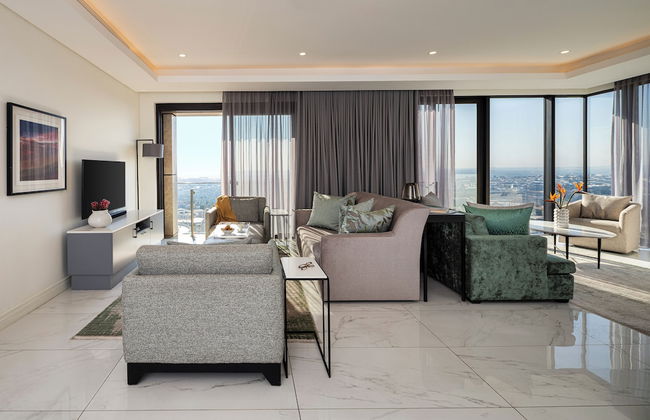
CB-ONE Luxury Stay - Foto 1
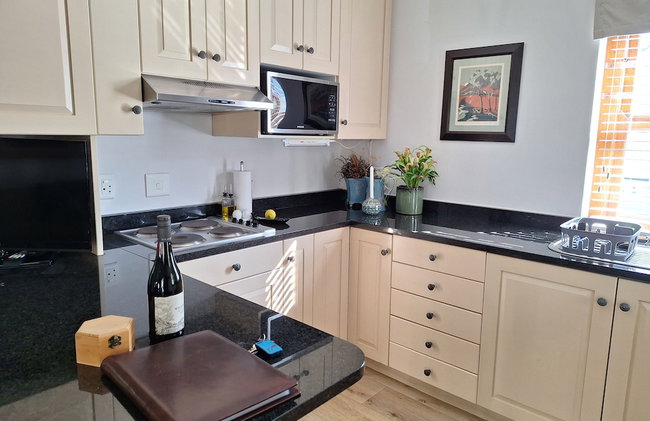
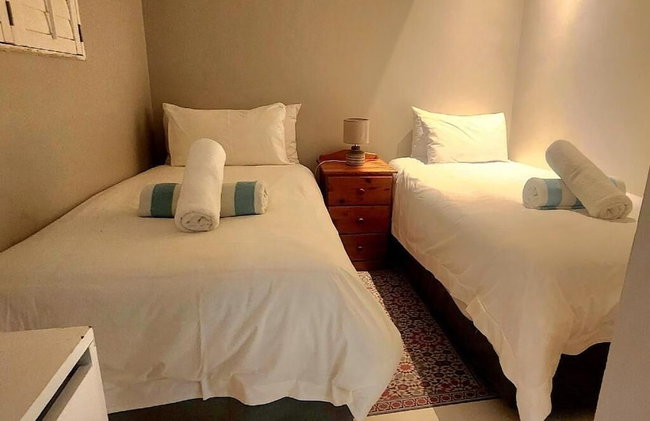
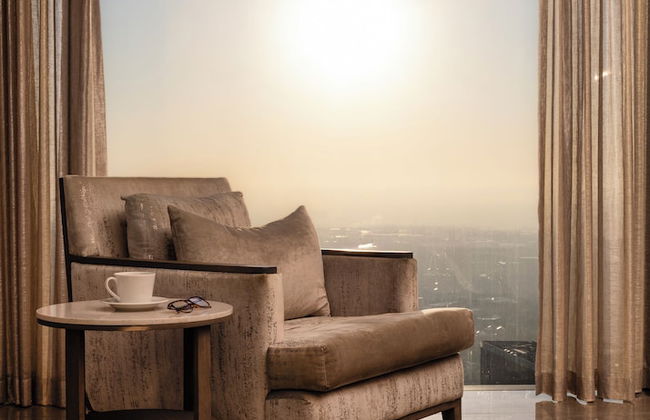
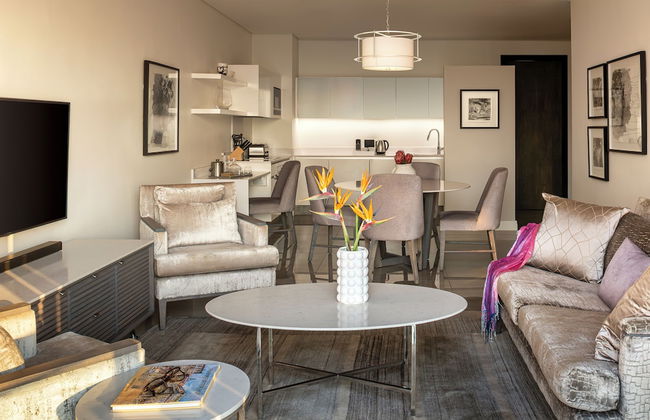
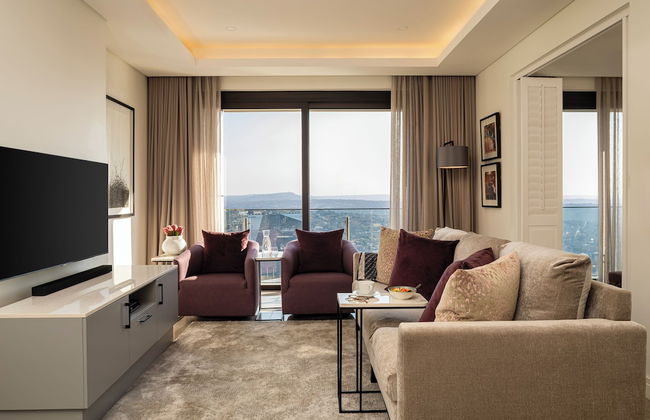
CB-ONE Luxury Stay - Foto 2
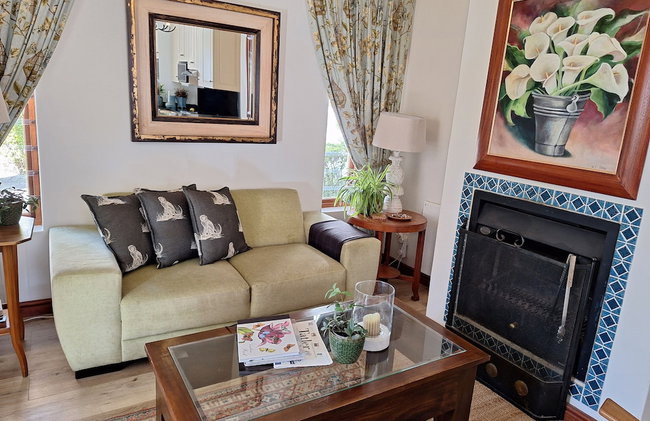
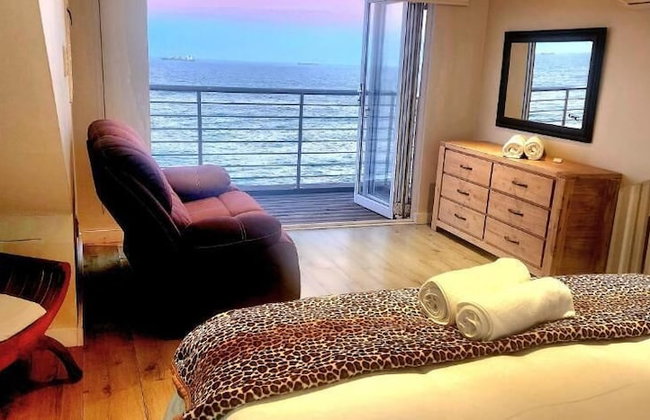
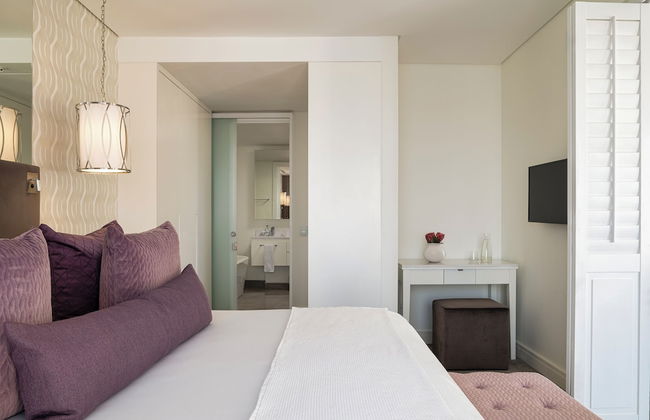
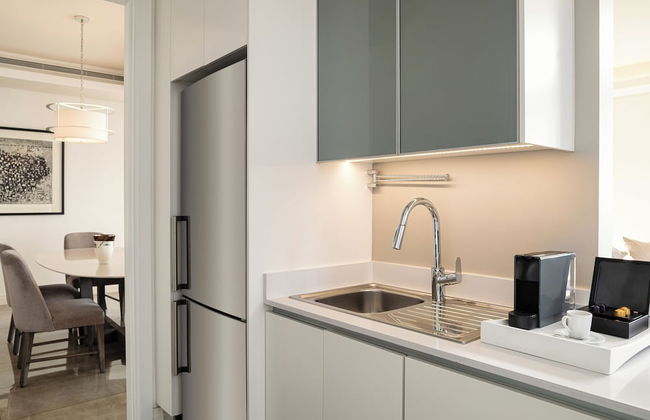
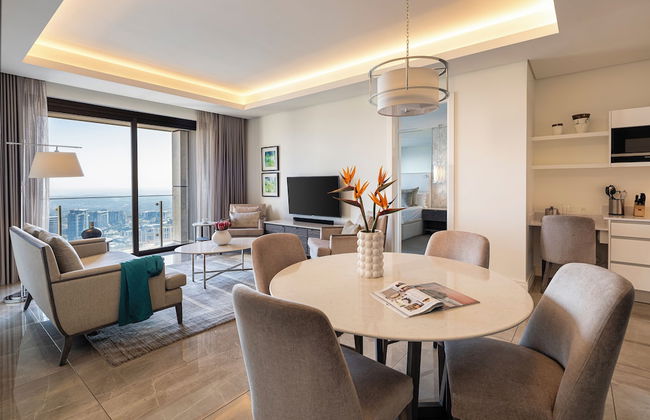
CB-ONE Luxury Stay - Foto 3
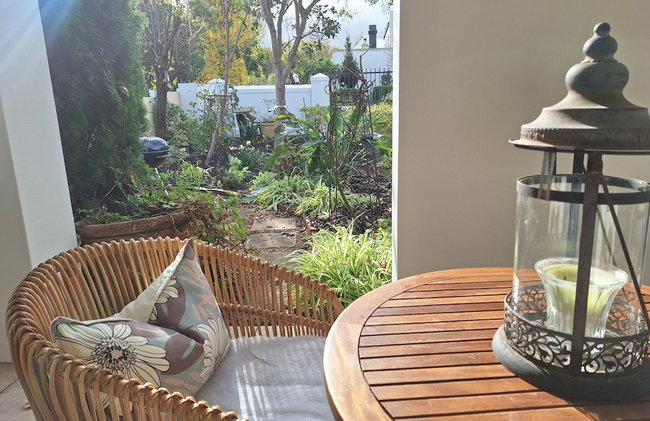
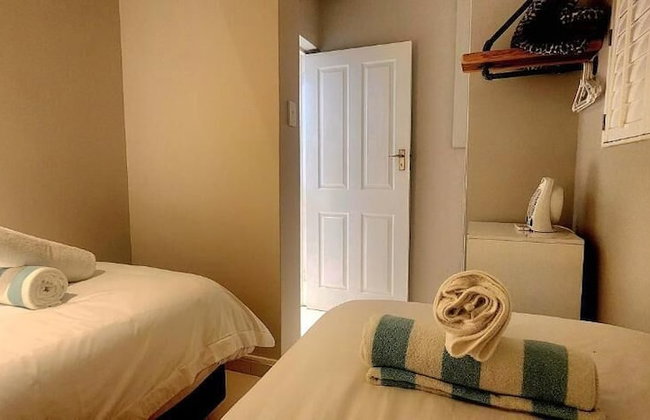
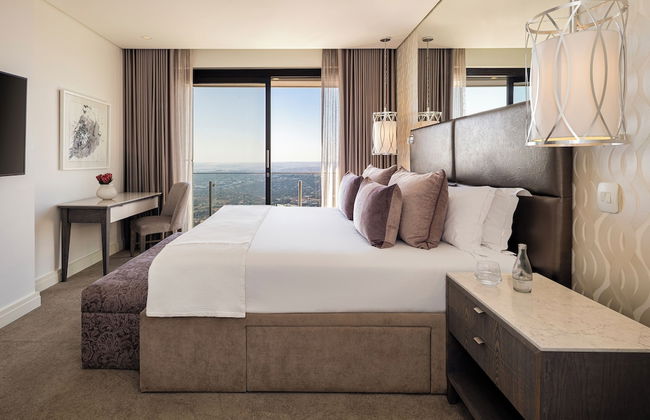
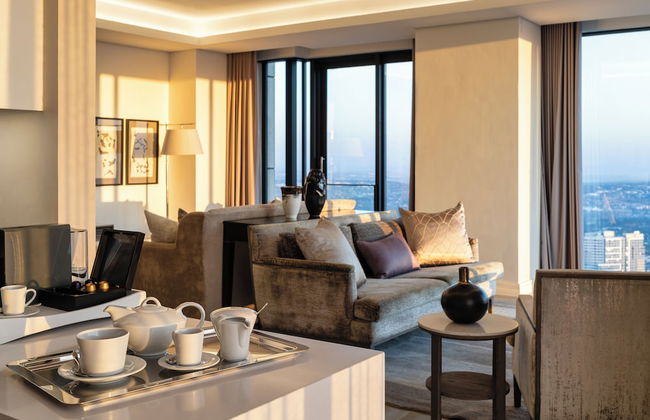
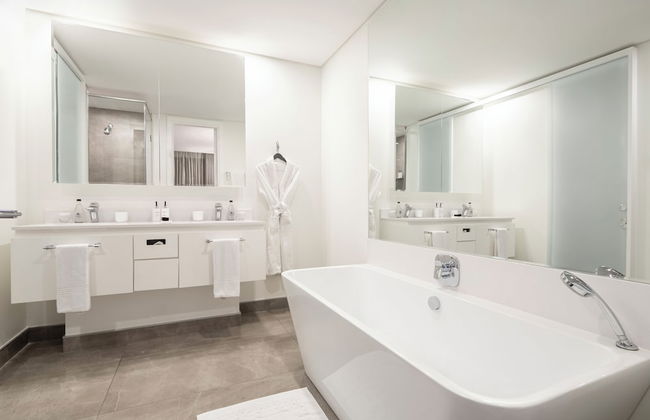
CB-ONE Luxury Stay - Foto 4
CB-ONE Luxury Stay - Foto 5
CB-ONE Luxury Stay - Foto 6
CB-ONE Luxury Stay - Foto 7
CB-ONE Luxury Stay - Foto 8
CB-ONE Luxury Stay - Foto 9
CB-ONE Luxury Stay - Foto 10
CB-ONE Luxury Stay - Foto 11
CB-ONE Luxury Stay - Foto 12
CB-ONE Luxury Stay - Foto 13
CB-ONE Luxury Stay - Foto 14
CB-ONE Luxury Stay - Foto 15
CB-ONE Luxury Stay - Foto 16
CB-ONE Luxury Stay - Foto 17
CB-ONE Luxury Stay - Foto 18
CB-ONE Luxury Stay - Foto 19
CB-ONE Luxury Stay - Foto 20
CB-ONE Luxury Stay - Foto 21
CB-ONE Luxury Stay - Foto 22
CB-ONE Luxury Stay - Foto 23
CB-ONE Luxury Stay - Foto 24
CB-ONE Luxury Stay - Foto 25
CB-ONE Luxury Stay - Foto 26
CB-ONE Luxury Stay - Foto 27
CB-ONE Luxury Stay - Foto 28
CB-ONE Luxury Stay - Foto 29
CB-ONE Luxury Stay - Foto 30

CB-ONE Luxury Stay

Ciudad del Cabo - A 5.6 km del centro

  • 140 M2
  • 4 personas
  • Cocina pequeña
  • Aire acondicionado
  • Calefacción
  • Terraza
  • Piscina
  • Parking
  • Ascensor
  • Balcón
  • Jardín
  • Televisión
  • Lavadora
  • Chimenea
  • Toallas
  • Sábanas
10Magnífico | 22 reseñas
Kunjani Villas - Foto 1
Kunjani Villas - Foto 2
Kunjani Villas - Foto 3
Kunjani Villas - Foto 4
Kunjani Villas - Foto 5
Kunjani Villas - Foto 6
Kunjani Villas - Foto 7
Kunjani Villas - Foto 8
Kunjani Villas - Foto 9
Kunjani Villas - Foto 10
Kunjani Villas - Foto 11
Kunjani Villas - Foto 12
Kunjani Villas - Foto 13
Kunjani Villas - Foto 14
Kunjani Villas - Foto 15
Kunjani Villas - Foto 16
Kunjani Villas - Foto 17
Kunjani Villas - Foto 18
Kunjani Villas - Foto 19
Kunjani Villas - Foto 20
Kunjani Villas - Foto 21
Kunjani Villas - Foto 22
Kunjani Villas - Foto 23
Kunjani Villas - Foto 24
Kunjani Villas - Foto 25
Kunjani Villas - Foto 26
Kunjani Villas - Foto 27
Kunjani Villas - Foto 28
Kunjani Villas - Foto 29
Kunjani Villas - Foto 30
Kunjani Villas - Foto 31
Kunjani Villas - Foto 32
Kunjani Villas - Foto 33
Kunjani Villas - Foto 34
Kunjani Villas - Foto 35
Kunjani Villas - Foto 36
Kunjani Villas - Foto 37
Kunjani Villas - Foto 38
Kunjani Villas - Foto 39
Kunjani Villas - Foto 40
Kunjani Villas - Foto 41
Kunjani Villas - Foto 42
Kunjani Villas - Foto 43
Kunjani Villas - Foto 44
Kunjani Villas - Foto 45
Kunjani Villas - Foto 46
Kunjani Villas - Foto 47
Kunjani Villas - Foto 48
Kunjani Villas - Foto 49
Kunjani Villas - Foto 50
Kunjani Villas - Foto 51
Kunjani Villas - Foto 52
Kunjani Villas - Foto 53
Kunjani Villas - Foto 54
Kunjani Villas - Foto 55
Kunjani Villas - Foto 56
Kunjani Villas - Foto 57
Kunjani Villas - Foto 58
Kunjani Villas - Foto 59
Kunjani Villas - Foto 60
Kunjani Villas - Foto 61
Kunjani Villas - Foto 62
Kunjani Villas - Foto 63
Kunjani Villas - Foto 64
Kunjani Villas - Foto 65
Kunjani Villas - Foto 66
Kunjani Villas - Foto 67
Kunjani Villas - Foto 68
Kunjani Villas - Foto 69
Kunjani Villas - Foto 70
Kunjani Villas - Foto 71
Kunjani Villas - Foto 72
Kunjani Villas - Foto 73

Kunjani Villas

Stellenbosch - A 6.4 km del centro

  • 120 M2
  • 4 personas
  • Aire acondicionado
  • Calefacción
  • Terraza
  • Piscina
  • Parking
  • Ascensor
  • Jardín
  • Televisión
  • Lavadora
  • Chimenea
  • Barbacoa
  • Toallas
  • Sábanas
9.8Excepcional | 14 reseñas
Bleu Cobalt Cottage - Foto 1
Bleu Cobalt Cottage - Foto 2
Bleu Cobalt Cottage - Foto 3
Bleu Cobalt Cottage - Foto 4
Bleu Cobalt Cottage - Foto 5
Bleu Cobalt Cottage - Foto 6
Bleu Cobalt Cottage - Foto 7
Bleu Cobalt Cottage - Foto 8
Bleu Cobalt Cottage - Foto 9
Bleu Cobalt Cottage - Foto 10
Bleu Cobalt Cottage - Foto 11
Bleu Cobalt Cottage - Foto 12
Bleu Cobalt Cottage - Foto 13
Bleu Cobalt Cottage - Foto 14
Bleu Cobalt Cottage - Foto 15
Bleu Cobalt Cottage - Foto 16

Bleu Cobalt Cottage

Franschhoek

  • 10 M2
  • 2 personas
  • Cocina pequeña
  • Aire acondicionado
  • Calefacción
  • Terraza
  • Piscina
  • Parking
  • Jardín
  • Televisión
  • Barbacoa
  • Toallas
  • Sábanas
10Magnífico | 19 reseñas
Koetsiershuis - Foto 1
Koetsiershuis - Foto 2
Koetsiershuis - Foto 3
Koetsiershuis - Foto 4
Koetsiershuis - Foto 5
Koetsiershuis - Foto 6
Koetsiershuis - Foto 7
Koetsiershuis - Foto 8
Koetsiershuis - Foto 9
Koetsiershuis - Foto 10
Koetsiershuis - Foto 11
Koetsiershuis - Foto 12
Koetsiershuis - Foto 13
Koetsiershuis - Foto 14
Koetsiershuis - Foto 15
Koetsiershuis - Foto 16
Koetsiershuis - Foto 17
Koetsiershuis - Foto 18
Koetsiershuis - Foto 19
Koetsiershuis - Foto 20
Koetsiershuis - Foto 21
Koetsiershuis - Foto 22

Koetsiershuis

Stellenbosch - A 280 m del centro

  • 2 personas
  • Aire acondicionado
  • Calefacción
  • Terraza
  • Parking
  • Ascensor
  • Balcón
  • Televisión
  • Lavadora
  • Toallas
  • Sábanas
10Magnífico | 10 reseñas
Petit Plaisir Cottage - Foto 1
Petit Plaisir Cottage - Foto 2
Petit Plaisir Cottage - Foto 3
Petit Plaisir Cottage - Foto 4
Petit Plaisir Cottage - Foto 5
Petit Plaisir Cottage - Foto 6
Petit Plaisir Cottage - Foto 7
Petit Plaisir Cottage - Foto 8
Petit Plaisir Cottage - Foto 9
Petit Plaisir Cottage - Foto 10
Petit Plaisir Cottage - Foto 11
Petit Plaisir Cottage - Foto 12
Petit Plaisir Cottage - Foto 13
Petit Plaisir Cottage - Foto 14
Petit Plaisir Cottage - Foto 15
Petit Plaisir Cottage - Foto 16
Petit Plaisir Cottage - Foto 17
Petit Plaisir Cottage - Foto 18
Petit Plaisir Cottage - Foto 19
Petit Plaisir Cottage - Foto 20
Petit Plaisir Cottage - Foto 21
Petit Plaisir Cottage - Foto 22
Petit Plaisir Cottage - Foto 23
Petit Plaisir Cottage - Foto 24
Petit Plaisir Cottage - Foto 25
Petit Plaisir Cottage - Foto 26
Petit Plaisir Cottage - Foto 27
Petit Plaisir Cottage - Foto 28
Petit Plaisir Cottage - Foto 29
Petit Plaisir Cottage - Foto 30
Petit Plaisir Cottage - Foto 31
Petit Plaisir Cottage - Foto 32
Petit Plaisir Cottage - Foto 33
Petit Plaisir Cottage - Foto 34
Petit Plaisir Cottage - Foto 35
Petit Plaisir Cottage - Foto 36
Petit Plaisir Cottage - Foto 37
Petit Plaisir Cottage - Foto 38
Petit Plaisir Cottage - Foto 39
Petit Plaisir Cottage - Foto 40
Petit Plaisir Cottage - Foto 41
Petit Plaisir Cottage - Foto 42

Petit Plaisir Cottage

Franschhoek

  • 69 M2
  • 2 personas
  • Aire acondicionado
  • Calefacción
  • Terraza
  • Piscina
  • Parking
  • Jardín
  • Televisión
  • Chimenea
  • Barbacoa
  • Toallas
  • Sábanas
10Magnífico | 24 reseñas
The Cliffside Boutique Getaway - Foto 1
The Cliffside Boutique Getaway - Foto 2
The Cliffside Boutique Getaway - Foto 3
The Cliffside Boutique Getaway - Foto 4
The Cliffside Boutique Getaway - Foto 5
The Cliffside Boutique Getaway - Foto 6
The Cliffside Boutique Getaway - Foto 7
The Cliffside Boutique Getaway - Foto 8
The Cliffside Boutique Getaway - Foto 9
The Cliffside Boutique Getaway - Foto 10
The Cliffside Boutique Getaway - Foto 11
The Cliffside Boutique Getaway - Foto 12
The Cliffside Boutique Getaway - Foto 13
The Cliffside Boutique Getaway - Foto 14
The Cliffside Boutique Getaway - Foto 15
The Cliffside Boutique Getaway - Foto 16
The Cliffside Boutique Getaway - Foto 17
The Cliffside Boutique Getaway - Foto 18
The Cliffside Boutique Getaway - Foto 19
The Cliffside Boutique Getaway - Foto 20
The Cliffside Boutique Getaway - Foto 21
The Cliffside Boutique Getaway - Foto 22
The Cliffside Boutique Getaway - Foto 23
The Cliffside Boutique Getaway - Foto 24
The Cliffside Boutique Getaway - Foto 25
The Cliffside Boutique Getaway - Foto 26
The Cliffside Boutique Getaway - Foto 27
The Cliffside Boutique Getaway - Foto 28
The Cliffside Boutique Getaway - Foto 29
The Cliffside Boutique Getaway - Foto 30
The Cliffside Boutique Getaway - Foto 31
The Cliffside Boutique Getaway - Foto 32
The Cliffside Boutique Getaway - Foto 33
The Cliffside Boutique Getaway - Foto 34
The Cliffside Boutique Getaway - Foto 35
The Cliffside Boutique Getaway - Foto 36
The Cliffside Boutique Getaway - Foto 37
The Cliffside Boutique Getaway - Foto 38
The Cliffside Boutique Getaway - Foto 39
The Cliffside Boutique Getaway - Foto 40
The Cliffside Boutique Getaway - Foto 41
The Cliffside Boutique Getaway - Foto 42
The Cliffside Boutique Getaway - Foto 43
The Cliffside Boutique Getaway - Foto 44
The Cliffside Boutique Getaway - Foto 45
The Cliffside Boutique Getaway - Foto 46
The Cliffside Boutique Getaway - Foto 47
The Cliffside Boutique Getaway - Foto 48
The Cliffside Boutique Getaway - Foto 49
The Cliffside Boutique Getaway - Foto 50
The Cliffside Boutique Getaway - Foto 51
The Cliffside Boutique Getaway - Foto 52
The Cliffside Boutique Getaway - Foto 53
The Cliffside Boutique Getaway - Foto 54
The Cliffside Boutique Getaway - Foto 55
The Cliffside Boutique Getaway - Foto 56
The Cliffside Boutique Getaway - Foto 57
The Cliffside Boutique Getaway - Foto 58
The Cliffside Boutique Getaway - Foto 59
The Cliffside Boutique Getaway - Foto 60
The Cliffside Boutique Getaway - Foto 61
The Cliffside Boutique Getaway - Foto 62
The Cliffside Boutique Getaway - Foto 63
The Cliffside Boutique Getaway - Foto 64
The Cliffside Boutique Getaway - Foto 65
The Cliffside Boutique Getaway - Foto 66
The Cliffside Boutique Getaway - Foto 67
The Cliffside Boutique Getaway - Foto 68

The Cliffside Boutique Getaway

Northcliff - A 640 m del centro

  • 37 M2
  • 3 personas
  • Aire acondicionado
  • Calefacción
  • Terraza
  • Piscina
  • Parking
  • Balcón
  • Jardín
  • Televisión
  • Barbacoa
  • Toallas
  • Sábanas
10Magnífico | 10 reseñas
La Clé Village - Foto 1
La Clé Village - Foto 2
La Clé Village - Foto 3
La Clé Village - Foto 4
La Clé Village - Foto 5
La Clé Village - Foto 6
La Clé Village - Foto 7
La Clé Village - Foto 8
La Clé Village - Foto 9
La Clé Village - Foto 10
La Clé Village - Foto 11
La Clé Village - Foto 12
La Clé Village - Foto 13
La Clé Village - Foto 14
La Clé Village - Foto 15
La Clé Village - Foto 16
La Clé Village - Foto 17
La Clé Village - Foto 18
La Clé Village - Foto 19
La Clé Village - Foto 20
La Clé Village - Foto 21
La Clé Village - Foto 22
La Clé Village - Foto 23
La Clé Village - Foto 24
La Clé Village - Foto 25
La Clé Village - Foto 26
La Clé Village - Foto 27
La Clé Village - Foto 28
La Clé Village - Foto 29
La Clé Village - Foto 30
La Clé Village - Foto 31
La Clé Village - Foto 32
La Clé Village - Foto 33
La Clé Village - Foto 34
La Clé Village - Foto 35
La Clé Village - Foto 36
La Clé Village - Foto 37
La Clé Village - Foto 38
La Clé Village - Foto 39
La Clé Village - Foto 40
La Clé Village - Foto 41
La Clé Village - Foto 42
La Clé Village - Foto 43
La Clé Village - Foto 44
La Clé Village - Foto 45
La Clé Village - Foto 46
La Clé Village - Foto 47
La Clé Village - Foto 48
La Clé Village - Foto 49
La Clé Village - Foto 50
La Clé Village - Foto 51
La Clé Village - Foto 52
La Clé Village - Foto 53
La Clé Village - Foto 54
La Clé Village - Foto 55
La Clé Village - Foto 56
La Clé Village - Foto 57
La Clé Village - Foto 58
La Clé Village - Foto 59
La Clé Village - Foto 60
La Clé Village - Foto 61
La Clé Village - Foto 62
La Clé Village - Foto 63
La Clé Village - Foto 64
La Clé Village - Foto 65
La Clé Village - Foto 66
La Clé Village - Foto 67
La Clé Village - Foto 68
La Clé Village - Foto 69
La Clé Village - Foto 70
La Clé Village - Foto 71
La Clé Village - Foto 72
La Clé Village - Foto 73
La Clé Village - Foto 74
La Clé Village - Foto 75
La Clé Village - Foto 76

La Clé Village

Franschhoek

  • 8 personas
  • Aire acondicionado
  • Calefacción
  • Terraza
  • Piscina
  • Parking
  • Jardín
  • Televisión
  • Barbacoa
  • Toallas
  • Sábanas
10Magnífico | 14 reseñas
Hermanus Luxury Apartments - Foto 1
Hermanus Luxury Apartments - Foto 2
Hermanus Luxury Apartments - Foto 3
Hermanus Luxury Apartments - Foto 4
Hermanus Luxury Apartments - Foto 5
Hermanus Luxury Apartments - Foto 6
Hermanus Luxury Apartments - Foto 7
Hermanus Luxury Apartments - Foto 8
Hermanus Luxury Apartments - Foto 9
Hermanus Luxury Apartments - Foto 10
Hermanus Luxury Apartments - Foto 11
Hermanus Luxury Apartments - Foto 12
Hermanus Luxury Apartments - Foto 13
Hermanus Luxury Apartments - Foto 14
Hermanus Luxury Apartments - Foto 15
Hermanus Luxury Apartments - Foto 16
Hermanus Luxury Apartments - Foto 17
Hermanus Luxury Apartments - Foto 18
Hermanus Luxury Apartments - Foto 19
Hermanus Luxury Apartments - Foto 20
Hermanus Luxury Apartments - Foto 21
Hermanus Luxury Apartments - Foto 22
Hermanus Luxury Apartments - Foto 23
Hermanus Luxury Apartments - Foto 24
Hermanus Luxury Apartments - Foto 25
Hermanus Luxury Apartments - Foto 26
Hermanus Luxury Apartments - Foto 27
Hermanus Luxury Apartments - Foto 28
Hermanus Luxury Apartments - Foto 29
Hermanus Luxury Apartments - Foto 30
Hermanus Luxury Apartments - Foto 31
Hermanus Luxury Apartments - Foto 32
Hermanus Luxury Apartments - Foto 33
Hermanus Luxury Apartments - Foto 34
Hermanus Luxury Apartments - Foto 35
Hermanus Luxury Apartments - Foto 36
Hermanus Luxury Apartments - Foto 37
Hermanus Luxury Apartments - Foto 38
Hermanus Luxury Apartments - Foto 39
Hermanus Luxury Apartments - Foto 40
Hermanus Luxury Apartments - Foto 41
Hermanus Luxury Apartments - Foto 42
Hermanus Luxury Apartments - Foto 43
Hermanus Luxury Apartments - Foto 44
Hermanus Luxury Apartments - Foto 45
Hermanus Luxury Apartments - Foto 46
Hermanus Luxury Apartments - Foto 47
Hermanus Luxury Apartments - Foto 48
Hermanus Luxury Apartments - Foto 49
Hermanus Luxury Apartments - Foto 50
Hermanus Luxury Apartments - Foto 51
Hermanus Luxury Apartments - Foto 52
Hermanus Luxury Apartments - Foto 53
Hermanus Luxury Apartments - Foto 54
Hermanus Luxury Apartments - Foto 55
Hermanus Luxury Apartments - Foto 56
Hermanus Luxury Apartments - Foto 57
Hermanus Luxury Apartments - Foto 58
Hermanus Luxury Apartments - Foto 59
Hermanus Luxury Apartments - Foto 60
Hermanus Luxury Apartments - Foto 61
Hermanus Luxury Apartments - Foto 62
Hermanus Luxury Apartments - Foto 63
Hermanus Luxury Apartments - Foto 64
Hermanus Luxury Apartments - Foto 65
Hermanus Luxury Apartments - Foto 66
Hermanus Luxury Apartments - Foto 67
Hermanus Luxury Apartments - Foto 68
Hermanus Luxury Apartments - Foto 69
Hermanus Luxury Apartments - Foto 70
Hermanus Luxury Apartments - Foto 71
Hermanus Luxury Apartments - Foto 72
Hermanus Luxury Apartments - Foto 73
Hermanus Luxury Apartments - Foto 74
Hermanus Luxury Apartments - Foto 75
Hermanus Luxury Apartments - Foto 76
Hermanus Luxury Apartments - Foto 77
Hermanus Luxury Apartments - Foto 78
Hermanus Luxury Apartments - Foto 79
Hermanus Luxury Apartments - Foto 80

Hermanus Luxury Apartments

Hermanus

  • 4 personas
  • Aire acondicionado
  • Calefacción
  • Terraza
  • Piscina
  • Parking
  • Balcón
  • Jardín
  • Televisión
  • Lavadora
  • Chimenea
  • Barbacoa
  • Toallas
  • Sábanas
10Magnífico | 14 reseñas
809 Umdloti Resort - Foto 1
809 Umdloti Resort - Foto 2
809 Umdloti Resort - Foto 3
809 Umdloti Resort - Foto 4
809 Umdloti Resort - Foto 5
809 Umdloti Resort - Foto 6
809 Umdloti Resort - Foto 7
809 Umdloti Resort - Foto 8
809 Umdloti Resort - Foto 9
809 Umdloti Resort - Foto 10
809 Umdloti Resort - Foto 11
809 Umdloti Resort - Foto 12
809 Umdloti Resort - Foto 13
809 Umdloti Resort - Foto 14
809 Umdloti Resort - Foto 15
809 Umdloti Resort - Foto 16
809 Umdloti Resort - Foto 17
809 Umdloti Resort - Foto 18
809 Umdloti Resort - Foto 19
809 Umdloti Resort - Foto 20
809 Umdloti Resort - Foto 21
809 Umdloti Resort - Foto 22
809 Umdloti Resort - Foto 23
809 Umdloti Resort - Foto 24
809 Umdloti Resort - Foto 25
809 Umdloti Resort - Foto 26
809 Umdloti Resort - Foto 27
809 Umdloti Resort - Foto 28
809 Umdloti Resort - Foto 29
809 Umdloti Resort - Foto 30
809 Umdloti Resort - Foto 31
809 Umdloti Resort - Foto 32
809 Umdloti Resort - Foto 33
809 Umdloti Resort - Foto 34
809 Umdloti Resort - Foto 35
809 Umdloti Resort - Foto 36
809 Umdloti Resort - Foto 37
809 Umdloti Resort - Foto 38
809 Umdloti Resort - Foto 39
809 Umdloti Resort - Foto 40
809 Umdloti Resort - Foto 41
809 Umdloti Resort - Foto 42
809 Umdloti Resort - Foto 43
809 Umdloti Resort - Foto 44
809 Umdloti Resort - Foto 45
809 Umdloti Resort - Foto 46
809 Umdloti Resort - Foto 47
809 Umdloti Resort - Foto 48
809 Umdloti Resort - Foto 49
809 Umdloti Resort - Foto 50
809 Umdloti Resort - Foto 51
809 Umdloti Resort - Foto 52
809 Umdloti Resort - Foto 53
809 Umdloti Resort - Foto 54
809 Umdloti Resort - Foto 55
809 Umdloti Resort - Foto 56
809 Umdloti Resort - Foto 57
809 Umdloti Resort - Foto 58
809 Umdloti Resort - Foto 59
809 Umdloti Resort - Foto 60
809 Umdloti Resort - Foto 61
809 Umdloti Resort - Foto 62
809 Umdloti Resort - Foto 63
809 Umdloti Resort - Foto 64
809 Umdloti Resort - Foto 65
809 Umdloti Resort - Foto 66
809 Umdloti Resort - Foto 67
809 Umdloti Resort - Foto 68
809 Umdloti Resort - Foto 69
809 Umdloti Resort - Foto 70
809 Umdloti Resort - Foto 71
809 Umdloti Resort - Foto 72
809 Umdloti Resort - Foto 73
809 Umdloti Resort - Foto 74
809 Umdloti Resort - Foto 75
809 Umdloti Resort - Foto 76
809 Umdloti Resort - Foto 77

809 Umdloti Resort

Newsel Beach

  • 110 M2
  • 4 personas
  • Aire acondicionado
  • Calefacción
  • Terraza
  • Piscina
  • Parking
  • Televisión
  • Lavadora
  • Barbacoa
  • Toallas
  • Sábanas
10Magnífico | 11 reseñas
A Riverbed Guesthouse - Foto 1
A Riverbed Guesthouse - Foto 2
A Riverbed Guesthouse - Foto 3
A Riverbed Guesthouse - Foto 4
A Riverbed Guesthouse - Foto 5
A Riverbed Guesthouse - Foto 6
A Riverbed Guesthouse - Foto 7
A Riverbed Guesthouse - Foto 8
A Riverbed Guesthouse - Foto 9
A Riverbed Guesthouse - Foto 10
A Riverbed Guesthouse - Foto 11
A Riverbed Guesthouse - Foto 12
A Riverbed Guesthouse - Foto 13
A Riverbed Guesthouse - Foto 14
A Riverbed Guesthouse - Foto 15
A Riverbed Guesthouse - Foto 16
A Riverbed Guesthouse - Foto 17
A Riverbed Guesthouse - Foto 18
A Riverbed Guesthouse - Foto 19
A Riverbed Guesthouse - Foto 20
A Riverbed Guesthouse - Foto 21
A Riverbed Guesthouse - Foto 22
A Riverbed Guesthouse - Foto 23
A Riverbed Guesthouse - Foto 24
A Riverbed Guesthouse - Foto 25
A Riverbed Guesthouse - Foto 26
A Riverbed Guesthouse - Foto 27
A Riverbed Guesthouse - Foto 28
A Riverbed Guesthouse - Foto 29
A Riverbed Guesthouse - Foto 30
A Riverbed Guesthouse - Foto 31
A Riverbed Guesthouse - Foto 32
A Riverbed Guesthouse - Foto 33
A Riverbed Guesthouse - Foto 34
A Riverbed Guesthouse - Foto 35
A Riverbed Guesthouse - Foto 36
A Riverbed Guesthouse - Foto 37
A Riverbed Guesthouse - Foto 38
A Riverbed Guesthouse - Foto 39
A Riverbed Guesthouse - Foto 40
A Riverbed Guesthouse - Foto 41
A Riverbed Guesthouse - Foto 42
A Riverbed Guesthouse - Foto 43
A Riverbed Guesthouse - Foto 44
A Riverbed Guesthouse - Foto 45
A Riverbed Guesthouse - Foto 46
A Riverbed Guesthouse - Foto 47
A Riverbed Guesthouse - Foto 48
A Riverbed Guesthouse - Foto 49
A Riverbed Guesthouse - Foto 50
A Riverbed Guesthouse - Foto 51
A Riverbed Guesthouse - Foto 52
A Riverbed Guesthouse - Foto 53
A Riverbed Guesthouse - Foto 54
A Riverbed Guesthouse - Foto 55
A Riverbed Guesthouse - Foto 56
A Riverbed Guesthouse - Foto 57
A Riverbed Guesthouse - Foto 58
A Riverbed Guesthouse - Foto 59
A Riverbed Guesthouse - Foto 60
A Riverbed Guesthouse - Foto 61
A Riverbed Guesthouse - Foto 62
A Riverbed Guesthouse - Foto 63
A Riverbed Guesthouse - Foto 64
A Riverbed Guesthouse - Foto 65
A Riverbed Guesthouse - Foto 66
A Riverbed Guesthouse - Foto 67
A Riverbed Guesthouse - Foto 68
A Riverbed Guesthouse - Foto 69
A Riverbed Guesthouse - Foto 70
A Riverbed Guesthouse - Foto 71
A Riverbed Guesthouse - Foto 72
A Riverbed Guesthouse - Foto 73
A Riverbed Guesthouse - Foto 74
A Riverbed Guesthouse - Foto 75
A Riverbed Guesthouse - Foto 76

A Riverbed Guesthouse

Swellendam

  • 20 M2
  • 2 personas
  • Cocina pequeña
  • Aire acondicionado
  • Calefacción
  • Terraza
  • Piscina
  • Parking
  • Jardín
  • Televisión
  • Chimenea
  • Barbacoa
  • Toallas
  • Sábanas
10Magnífico | 43 reseñas
South Beach Camps Bay Boutique Hotel - Foto 1
South Beach Camps Bay Boutique Hotel - Foto 2
South Beach Camps Bay Boutique Hotel - Foto 3
South Beach Camps Bay Boutique Hotel - Foto 4
South Beach Camps Bay Boutique Hotel - Foto 5
South Beach Camps Bay Boutique Hotel - Foto 6
South Beach Camps Bay Boutique Hotel - Foto 7
South Beach Camps Bay Boutique Hotel - Foto 8
South Beach Camps Bay Boutique Hotel - Foto 9
South Beach Camps Bay Boutique Hotel - Foto 10
South Beach Camps Bay Boutique Hotel - Foto 11
South Beach Camps Bay Boutique Hotel - Foto 12
South Beach Camps Bay Boutique Hotel - Foto 13
South Beach Camps Bay Boutique Hotel - Foto 14
South Beach Camps Bay Boutique Hotel - Foto 15
South Beach Camps Bay Boutique Hotel - Foto 16
South Beach Camps Bay Boutique Hotel - Foto 17
South Beach Camps Bay Boutique Hotel - Foto 18
South Beach Camps Bay Boutique Hotel - Foto 19
South Beach Camps Bay Boutique Hotel - Foto 20
South Beach Camps Bay Boutique Hotel - Foto 21
South Beach Camps Bay Boutique Hotel - Foto 22
South Beach Camps Bay Boutique Hotel - Foto 23
South Beach Camps Bay Boutique Hotel - Foto 24
South Beach Camps Bay Boutique Hotel - Foto 25
South Beach Camps Bay Boutique Hotel - Foto 26
South Beach Camps Bay Boutique Hotel - Foto 27
South Beach Camps Bay Boutique Hotel - Foto 28
South Beach Camps Bay Boutique Hotel - Foto 29
South Beach Camps Bay Boutique Hotel - Foto 30
South Beach Camps Bay Boutique Hotel - Foto 31
South Beach Camps Bay Boutique Hotel - Foto 32
South Beach Camps Bay Boutique Hotel - Foto 33
South Beach Camps Bay Boutique Hotel - Foto 34
South Beach Camps Bay Boutique Hotel - Foto 35
South Beach Camps Bay Boutique Hotel - Foto 36
South Beach Camps Bay Boutique Hotel - Foto 37
South Beach Camps Bay Boutique Hotel - Foto 38
South Beach Camps Bay Boutique Hotel - Foto 39
South Beach Camps Bay Boutique Hotel - Foto 40
South Beach Camps Bay Boutique Hotel - Foto 41
South Beach Camps Bay Boutique Hotel - Foto 42
South Beach Camps Bay Boutique Hotel - Foto 43
South Beach Camps Bay Boutique Hotel - Foto 44
South Beach Camps Bay Boutique Hotel - Foto 45
South Beach Camps Bay Boutique Hotel - Foto 46
South Beach Camps Bay Boutique Hotel - Foto 47
South Beach Camps Bay Boutique Hotel - Foto 48
South Beach Camps Bay Boutique Hotel - Foto 49
South Beach Camps Bay Boutique Hotel - Foto 50
South Beach Camps Bay Boutique Hotel - Foto 51
South Beach Camps Bay Boutique Hotel - Foto 52
South Beach Camps Bay Boutique Hotel - Foto 53
South Beach Camps Bay Boutique Hotel - Foto 54
South Beach Camps Bay Boutique Hotel - Foto 55
South Beach Camps Bay Boutique Hotel - Foto 56
South Beach Camps Bay Boutique Hotel - Foto 57
South Beach Camps Bay Boutique Hotel - Foto 58
South Beach Camps Bay Boutique Hotel - Foto 59
South Beach Camps Bay Boutique Hotel - Foto 60
South Beach Camps Bay Boutique Hotel - Foto 61
South Beach Camps Bay Boutique Hotel - Foto 62
South Beach Camps Bay Boutique Hotel - Foto 63
South Beach Camps Bay Boutique Hotel - Foto 64
South Beach Camps Bay Boutique Hotel - Foto 65
South Beach Camps Bay Boutique Hotel - Foto 66
South Beach Camps Bay Boutique Hotel - Foto 67
South Beach Camps Bay Boutique Hotel - Foto 68
South Beach Camps Bay Boutique Hotel - Foto 69
South Beach Camps Bay Boutique Hotel - Foto 70
South Beach Camps Bay Boutique Hotel - Foto 71
South Beach Camps Bay Boutique Hotel - Foto 72
South Beach Camps Bay Boutique Hotel - Foto 73
South Beach Camps Bay Boutique Hotel - Foto 74
South Beach Camps Bay Boutique Hotel - Foto 75
South Beach Camps Bay Boutique Hotel - Foto 76
South Beach Camps Bay Boutique Hotel - Foto 77
South Beach Camps Bay Boutique Hotel - Foto 78
South Beach Camps Bay Boutique Hotel - Foto 79
South Beach Camps Bay Boutique Hotel - Foto 80

South Beach Camps Bay Boutique Hotel

Ciudad del Cabo - A 5.3 km del centro

  • 89 M2
  • 3 personas
  • Aire acondicionado
  • Calefacción
  • Terraza
  • Piscina
  • Parking
  • Ascensor
  • Televisión
  • Lavadora
  • Toallas
  • Sábanas
9.6Excepcional | 289 reseñas
Hills and Dales Accommodation - Foto 1
Hills and Dales Accommodation - Foto 2
Hills and Dales Accommodation - Foto 3
Hills and Dales Accommodation - Foto 4
Hills and Dales Accommodation - Foto 5
Hills and Dales Accommodation - Foto 6
Hills and Dales Accommodation - Foto 7
Hills and Dales Accommodation - Foto 8
Hills and Dales Accommodation - Foto 9
Hills and Dales Accommodation - Foto 10
Hills and Dales Accommodation - Foto 11
Hills and Dales Accommodation - Foto 12
Hills and Dales Accommodation - Foto 13
Hills and Dales Accommodation - Foto 14
Hills and Dales Accommodation - Foto 15
Hills and Dales Accommodation - Foto 16
Hills and Dales Accommodation - Foto 17
Hills and Dales Accommodation - Foto 18
Hills and Dales Accommodation - Foto 19
Hills and Dales Accommodation - Foto 20
Hills and Dales Accommodation - Foto 21
Hills and Dales Accommodation - Foto 22
Hills and Dales Accommodation - Foto 23
Hills and Dales Accommodation - Foto 24
Hills and Dales Accommodation - Foto 25
Hills and Dales Accommodation - Foto 26
Hills and Dales Accommodation - Foto 27
Hills and Dales Accommodation - Foto 28
Hills and Dales Accommodation - Foto 29
Hills and Dales Accommodation - Foto 30
Hills and Dales Accommodation - Foto 31
Hills and Dales Accommodation - Foto 32
Hills and Dales Accommodation - Foto 33
Hills and Dales Accommodation - Foto 34
Hills and Dales Accommodation - Foto 35
Hills and Dales Accommodation - Foto 36
Hills and Dales Accommodation - Foto 37
Hills and Dales Accommodation - Foto 38
Hills and Dales Accommodation - Foto 39
Hills and Dales Accommodation - Foto 40
Hills and Dales Accommodation - Foto 41
Hills and Dales Accommodation - Foto 42
Hills and Dales Accommodation - Foto 43
Hills and Dales Accommodation - Foto 44
Hills and Dales Accommodation - Foto 45
Hills and Dales Accommodation - Foto 46
Hills and Dales Accommodation - Foto 47
Hills and Dales Accommodation - Foto 48
Hills and Dales Accommodation - Foto 49
Hills and Dales Accommodation - Foto 50
Hills and Dales Accommodation - Foto 51
Hills and Dales Accommodation - Foto 52
Hills and Dales Accommodation - Foto 53
Hills and Dales Accommodation - Foto 54
Hills and Dales Accommodation - Foto 55
Hills and Dales Accommodation - Foto 56
Hills and Dales Accommodation - Foto 57
Hills and Dales Accommodation - Foto 58
Hills and Dales Accommodation - Foto 59
Hills and Dales Accommodation - Foto 60
Hills and Dales Accommodation - Foto 61
Hills and Dales Accommodation - Foto 62
Hills and Dales Accommodation - Foto 63
Hills and Dales Accommodation - Foto 64
Hills and Dales Accommodation - Foto 65
Hills and Dales Accommodation - Foto 66
Hills and Dales Accommodation - Foto 67
Hills and Dales Accommodation - Foto 68
Hills and Dales Accommodation - Foto 69
Hills and Dales Accommodation - Foto 70
Hills and Dales Accommodation - Foto 71
Hills and Dales Accommodation - Foto 72
Hills and Dales Accommodation - Foto 73
Hills and Dales Accommodation - Foto 74
Hills and Dales Accommodation - Foto 75
Hills and Dales Accommodation - Foto 76
Hills and Dales Accommodation - Foto 77
Hills and Dales Accommodation - Foto 78
Hills and Dales Accommodation - Foto 79
Hills and Dales Accommodation - Foto 80

Hills and Dales Accommodation

Lindley AH - A 2.8 km del centro

  • 120 M2
  • 6 personas
  • Cocina pequeña
  • Aire acondicionado
  • Terraza
  • Piscina
  • Parking
  • Balcón
  • Jardín
  • Televisión
  • Chimenea
  • Barbacoa
  • Toallas
  • Sábanas
10Magnífico | 14 reseñas
De Kombuys Estate - Foto 1
De Kombuys Estate - Foto 2
De Kombuys Estate - Foto 3
De Kombuys Estate - Foto 4
De Kombuys Estate - Foto 5
De Kombuys Estate - Foto 6
De Kombuys Estate - Foto 7
De Kombuys Estate - Foto 8
De Kombuys Estate - Foto 9
De Kombuys Estate - Foto 10
De Kombuys Estate - Foto 11
De Kombuys Estate - Foto 12
De Kombuys Estate - Foto 13
De Kombuys Estate - Foto 14
De Kombuys Estate - Foto 15
De Kombuys Estate - Foto 16
De Kombuys Estate - Foto 17
De Kombuys Estate - Foto 18
De Kombuys Estate - Foto 19
De Kombuys Estate - Foto 20
De Kombuys Estate - Foto 21
De Kombuys Estate - Foto 22
De Kombuys Estate - Foto 23
De Kombuys Estate - Foto 24
De Kombuys Estate - Foto 25
De Kombuys Estate - Foto 26
De Kombuys Estate - Foto 27
De Kombuys Estate - Foto 28
De Kombuys Estate - Foto 29
De Kombuys Estate - Foto 30
De Kombuys Estate - Foto 31
De Kombuys Estate - Foto 32
De Kombuys Estate - Foto 33
De Kombuys Estate - Foto 34
De Kombuys Estate - Foto 35
De Kombuys Estate - Foto 36
De Kombuys Estate - Foto 37
De Kombuys Estate - Foto 38
De Kombuys Estate - Foto 39
De Kombuys Estate - Foto 40
De Kombuys Estate - Foto 41
De Kombuys Estate - Foto 42
De Kombuys Estate - Foto 43
De Kombuys Estate - Foto 44
De Kombuys Estate - Foto 45
De Kombuys Estate - Foto 46
De Kombuys Estate - Foto 47
De Kombuys Estate - Foto 48
De Kombuys Estate - Foto 49
De Kombuys Estate - Foto 50
De Kombuys Estate - Foto 51
De Kombuys Estate - Foto 52
De Kombuys Estate - Foto 53
De Kombuys Estate - Foto 54
De Kombuys Estate - Foto 55
De Kombuys Estate - Foto 56
De Kombuys Estate - Foto 57
De Kombuys Estate - Foto 58
De Kombuys Estate - Foto 59
De Kombuys Estate - Foto 60
De Kombuys Estate - Foto 61
De Kombuys Estate - Foto 62
De Kombuys Estate - Foto 63
De Kombuys Estate - Foto 64
De Kombuys Estate - Foto 65
De Kombuys Estate - Foto 66
De Kombuys Estate - Foto 67
De Kombuys Estate - Foto 68
De Kombuys Estate - Foto 69
De Kombuys Estate - Foto 70
De Kombuys Estate - Foto 71
De Kombuys Estate - Foto 72
De Kombuys Estate - Foto 73
De Kombuys Estate - Foto 74
De Kombuys Estate - Foto 75
De Kombuys Estate - Foto 76
De Kombuys Estate - Foto 77
De Kombuys Estate - Foto 78
De Kombuys Estate - Foto 79
De Kombuys Estate - Foto 80

De Kombuys Estate

Oudtshoorn

  • 80 M2
  • 4 personas
  • Cocina pequeña
  • Aire acondicionado
  • Terraza
  • Piscina
  • Jardín
  • Televisión
  • Chimenea
  • Barbacoa
  • Toallas
10Magnífico | 22 reseñas
Middedorp Villa and Apartments - Foto 1
Middedorp Villa and Apartments - Foto 2
Middedorp Villa and Apartments - Foto 3
Middedorp Villa and Apartments - Foto 4
Middedorp Villa and Apartments - Foto 5
Middedorp Villa and Apartments - Foto 6
Middedorp Villa and Apartments - Foto 7
Middedorp Villa and Apartments - Foto 8
Middedorp Villa and Apartments - Foto 9
Middedorp Villa and Apartments - Foto 10
Middedorp Villa and Apartments - Foto 11
Middedorp Villa and Apartments - Foto 12
Middedorp Villa and Apartments - Foto 13
Middedorp Villa and Apartments - Foto 14
Middedorp Villa and Apartments - Foto 15
Middedorp Villa and Apartments - Foto 16
Middedorp Villa and Apartments - Foto 17
Middedorp Villa and Apartments - Foto 18
Middedorp Villa and Apartments - Foto 19
Middedorp Villa and Apartments - Foto 20
Middedorp Villa and Apartments - Foto 21
Middedorp Villa and Apartments - Foto 22
Middedorp Villa and Apartments - Foto 23
Middedorp Villa and Apartments - Foto 24
Middedorp Villa and Apartments - Foto 25
Middedorp Villa and Apartments - Foto 26
Middedorp Villa and Apartments - Foto 27
Middedorp Villa and Apartments - Foto 28
Middedorp Villa and Apartments - Foto 29
Middedorp Villa and Apartments - Foto 30
Middedorp Villa and Apartments - Foto 31
Middedorp Villa and Apartments - Foto 32
Middedorp Villa and Apartments - Foto 33
Middedorp Villa and Apartments - Foto 34
Middedorp Villa and Apartments - Foto 35
Middedorp Villa and Apartments - Foto 36
Middedorp Villa and Apartments - Foto 37
Middedorp Villa and Apartments - Foto 38
Middedorp Villa and Apartments - Foto 39
Middedorp Villa and Apartments - Foto 40
Middedorp Villa and Apartments - Foto 41
Middedorp Villa and Apartments - Foto 42
Middedorp Villa and Apartments - Foto 43
Middedorp Villa and Apartments - Foto 44
Middedorp Villa and Apartments - Foto 45
Middedorp Villa and Apartments - Foto 46
Middedorp Villa and Apartments - Foto 47
Middedorp Villa and Apartments - Foto 48
Middedorp Villa and Apartments - Foto 49
Middedorp Villa and Apartments - Foto 50
Middedorp Villa and Apartments - Foto 51
Middedorp Villa and Apartments - Foto 52
Middedorp Villa and Apartments - Foto 53
Middedorp Villa and Apartments - Foto 54
Middedorp Villa and Apartments - Foto 55
Middedorp Villa and Apartments - Foto 56
Middedorp Villa and Apartments - Foto 57
Middedorp Villa and Apartments - Foto 58
Middedorp Villa and Apartments - Foto 59
Middedorp Villa and Apartments - Foto 60
Middedorp Villa and Apartments - Foto 61
Middedorp Villa and Apartments - Foto 62
Middedorp Villa and Apartments - Foto 63
Middedorp Villa and Apartments - Foto 64
Middedorp Villa and Apartments - Foto 65
Middedorp Villa and Apartments - Foto 66
Middedorp Villa and Apartments - Foto 67
Middedorp Villa and Apartments - Foto 68
Middedorp Villa and Apartments - Foto 69
Middedorp Villa and Apartments - Foto 70
Middedorp Villa and Apartments - Foto 71
Middedorp Villa and Apartments - Foto 72
Middedorp Villa and Apartments - Foto 73
Middedorp Villa and Apartments - Foto 74
Middedorp Villa and Apartments - Foto 75
Middedorp Villa and Apartments - Foto 76

Middedorp Villa and Apartments

Stellenbosch - En el centro

  • 270 M2
  • 6 personas
  • Cocina pequeña
  • Aire acondicionado
  • Terraza
  • Piscina
  • Parking
  • Jardín
  • Televisión
  • Toallas
  • Sábanas
10Magnífico | 12 reseñas
A Place in Thyme - Foto 1
A Place in Thyme - Foto 2
A Place in Thyme - Foto 3
A Place in Thyme - Foto 4
A Place in Thyme - Foto 5
A Place in Thyme - Foto 6
A Place in Thyme - Foto 7
A Place in Thyme - Foto 8
A Place in Thyme - Foto 9
A Place in Thyme - Foto 10
A Place in Thyme - Foto 11
A Place in Thyme - Foto 12
A Place in Thyme - Foto 13
A Place in Thyme - Foto 14
A Place in Thyme - Foto 15
A Place in Thyme - Foto 16
A Place in Thyme - Foto 17
A Place in Thyme - Foto 18
A Place in Thyme - Foto 19
A Place in Thyme - Foto 20
A Place in Thyme - Foto 21
A Place in Thyme - Foto 22
A Place in Thyme - Foto 23
A Place in Thyme - Foto 24
A Place in Thyme - Foto 25
A Place in Thyme - Foto 26
A Place in Thyme - Foto 27
A Place in Thyme - Foto 28
A Place in Thyme - Foto 29
A Place in Thyme - Foto 30
A Place in Thyme - Foto 31
A Place in Thyme - Foto 32
A Place in Thyme - Foto 33
A Place in Thyme - Foto 34
A Place in Thyme - Foto 35
A Place in Thyme - Foto 36
A Place in Thyme - Foto 37
A Place in Thyme - Foto 38
A Place in Thyme - Foto 39

A Place in Thyme

Fish Hoek

  • 89 M2
  • 5 personas
  • Cocina pequeña
  • Calefacción
  • Terraza
  • Piscina
  • Parking
  • Balcón
  • Jardín
  • Televisión
  • Lavadora
  • Barbacoa
  • Toallas
10Magnífico | 11 reseñas
Elephant Point - Foto 1
Elephant Point - Foto 2
Elephant Point - Foto 3
Elephant Point - Foto 4
Elephant Point - Foto 5
Elephant Point - Foto 6
Elephant Point - Foto 7
Elephant Point - Foto 8
Elephant Point - Foto 9
Elephant Point - Foto 10
Elephant Point - Foto 11
Elephant Point - Foto 12
Elephant Point - Foto 13
Elephant Point - Foto 14
Elephant Point - Foto 15
Elephant Point - Foto 16
Elephant Point - Foto 17
Elephant Point - Foto 18
Elephant Point - Foto 19
Elephant Point - Foto 20
Elephant Point - Foto 21
Elephant Point - Foto 22
Elephant Point - Foto 23
Elephant Point - Foto 24
Elephant Point - Foto 25
Elephant Point - Foto 26
Elephant Point - Foto 27
Elephant Point - Foto 28
Elephant Point - Foto 29
Elephant Point - Foto 30
Elephant Point - Foto 31
Elephant Point - Foto 32
Elephant Point - Foto 33
Elephant Point - Foto 34
Elephant Point - Foto 35
Elephant Point - Foto 36
Elephant Point - Foto 37
Elephant Point - Foto 38
Elephant Point - Foto 39
Elephant Point - Foto 40
Elephant Point - Foto 41
Elephant Point - Foto 42
Elephant Point - Foto 43
Elephant Point - Foto 44
Elephant Point - Foto 45
Elephant Point - Foto 46
Elephant Point - Foto 47
Elephant Point - Foto 48
Elephant Point - Foto 49
Elephant Point - Foto 50
Elephant Point - Foto 51
Elephant Point - Foto 52
Elephant Point - Foto 53
Elephant Point - Foto 54
Elephant Point - Foto 55
Elephant Point - Foto 56
Elephant Point - Foto 57
Elephant Point - Foto 58
Elephant Point - Foto 59
Elephant Point - Foto 60
Elephant Point - Foto 61
Elephant Point - Foto 62
Elephant Point - Foto 63
Elephant Point - Foto 64
Elephant Point - Foto 65
Elephant Point - Foto 66
Elephant Point - Foto 67
Elephant Point - Foto 68
Elephant Point - Foto 69
Elephant Point - Foto 70
Elephant Point - Foto 71
Elephant Point - Foto 72
Elephant Point - Foto 73
Elephant Point - Foto 74
Elephant Point - Foto 75
Elephant Point - Foto 76
Elephant Point - Foto 77
Elephant Point - Foto 78
Elephant Point - Foto 79
Elephant Point - Foto 80

Elephant Point

Bushbuckridge

  • 592 M2
  • 11 personas
  • Aire acondicionado
  • Terraza
  • Piscina
  • Parking
  • Balcón
  • Televisión
  • Lavadora
  • Chimenea
  • Barbacoa
  • Toallas
  • Sábanas
10Magnífico | 11 reseñas
Berluda Farmhouse & Cottages - Foto 1
Berluda Farmhouse & Cottages - Foto 2
Berluda Farmhouse & Cottages - Foto 3
Berluda Farmhouse & Cottages - Foto 4
Berluda Farmhouse & Cottages - Foto 5
Berluda Farmhouse & Cottages - Foto 6
Berluda Farmhouse & Cottages - Foto 7
Berluda Farmhouse & Cottages - Foto 8
Berluda Farmhouse & Cottages - Foto 9
Berluda Farmhouse & Cottages - Foto 10
Berluda Farmhouse & Cottages - Foto 11
Berluda Farmhouse & Cottages - Foto 12
Berluda Farmhouse & Cottages - Foto 13
Berluda Farmhouse & Cottages - Foto 14
Berluda Farmhouse & Cottages - Foto 15
Berluda Farmhouse & Cottages - Foto 16
Berluda Farmhouse & Cottages - Foto 17
Berluda Farmhouse & Cottages - Foto 18
Berluda Farmhouse & Cottages - Foto 19
Berluda Farmhouse & Cottages - Foto 20
Berluda Farmhouse & Cottages - Foto 21
Berluda Farmhouse & Cottages - Foto 22
Berluda Farmhouse & Cottages - Foto 23
Berluda Farmhouse & Cottages - Foto 24
Berluda Farmhouse & Cottages - Foto 25
Berluda Farmhouse & Cottages - Foto 26
Berluda Farmhouse & Cottages - Foto 27
Berluda Farmhouse & Cottages - Foto 28
Berluda Farmhouse & Cottages - Foto 29
Berluda Farmhouse & Cottages - Foto 30
Berluda Farmhouse & Cottages - Foto 31
Berluda Farmhouse & Cottages - Foto 32
Berluda Farmhouse & Cottages - Foto 33
Berluda Farmhouse & Cottages - Foto 34
Berluda Farmhouse & Cottages - Foto 35
Berluda Farmhouse & Cottages - Foto 36
Berluda Farmhouse & Cottages - Foto 37
Berluda Farmhouse & Cottages - Foto 38
Berluda Farmhouse & Cottages - Foto 39
Berluda Farmhouse & Cottages - Foto 40
Berluda Farmhouse & Cottages - Foto 41
Berluda Farmhouse & Cottages - Foto 42
Berluda Farmhouse & Cottages - Foto 43
Berluda Farmhouse & Cottages - Foto 44
Berluda Farmhouse & Cottages - Foto 45
Berluda Farmhouse & Cottages - Foto 46
Berluda Farmhouse & Cottages - Foto 47
Berluda Farmhouse & Cottages - Foto 48
Berluda Farmhouse & Cottages - Foto 49
Berluda Farmhouse & Cottages - Foto 50
Berluda Farmhouse & Cottages - Foto 51
Berluda Farmhouse & Cottages - Foto 52
Berluda Farmhouse & Cottages - Foto 53
Berluda Farmhouse & Cottages - Foto 54
Berluda Farmhouse & Cottages - Foto 55
Berluda Farmhouse & Cottages - Foto 56
Berluda Farmhouse & Cottages - Foto 57
Berluda Farmhouse & Cottages - Foto 58
Berluda Farmhouse & Cottages - Foto 59
Berluda Farmhouse & Cottages - Foto 60
Berluda Farmhouse & Cottages - Foto 61
Berluda Farmhouse & Cottages - Foto 62
Berluda Farmhouse & Cottages - Foto 63
Berluda Farmhouse & Cottages - Foto 64
Berluda Farmhouse & Cottages - Foto 65
Berluda Farmhouse & Cottages - Foto 66
Berluda Farmhouse & Cottages - Foto 67
Berluda Farmhouse & Cottages - Foto 68
Berluda Farmhouse & Cottages - Foto 69
Berluda Farmhouse & Cottages - Foto 70
Berluda Farmhouse & Cottages - Foto 71
Berluda Farmhouse & Cottages - Foto 72
Berluda Farmhouse & Cottages - Foto 73
Berluda Farmhouse & Cottages - Foto 74
Berluda Farmhouse & Cottages - Foto 75
Berluda Farmhouse & Cottages - Foto 76
Berluda Farmhouse & Cottages - Foto 77
Berluda Farmhouse & Cottages - Foto 78
Berluda Farmhouse & Cottages - Foto 79
Berluda Farmhouse & Cottages - Foto 80

Berluda Farmhouse & Cottages

Oudtshoorn

  • 4 personas
  • Aire acondicionado
  • Calefacción
  • Terraza
  • Piscina
  • Parking
  • Jardín
  • Televisión
  • Chimenea
  • Barbacoa
  • Toallas
  • Sábanas
9.8Excepcional | 22 reseñas
Sea Mount - Foto 1
Sea Mount - Foto 2
Sea Mount - Foto 3
Sea Mount - Foto 4
Sea Mount - Foto 5
Sea Mount - Foto 6
Sea Mount - Foto 7
Sea Mount - Foto 8
Sea Mount - Foto 9
Sea Mount - Foto 10
Sea Mount - Foto 11
Sea Mount - Foto 12
Sea Mount - Foto 13
Sea Mount - Foto 14
Sea Mount - Foto 15
Sea Mount - Foto 16
Sea Mount - Foto 17
Sea Mount - Foto 18
Sea Mount - Foto 19
Sea Mount - Foto 20
Sea Mount - Foto 21
Sea Mount - Foto 22
Sea Mount - Foto 23
Sea Mount - Foto 24
Sea Mount - Foto 25
Sea Mount - Foto 26
Sea Mount - Foto 27
Sea Mount - Foto 28
Sea Mount - Foto 29
Sea Mount - Foto 30
Sea Mount - Foto 31
Sea Mount - Foto 32
Sea Mount - Foto 33
Sea Mount - Foto 34
Sea Mount - Foto 35
Sea Mount - Foto 36
Sea Mount - Foto 37
Sea Mount - Foto 38
Sea Mount - Foto 39
Sea Mount - Foto 40
Sea Mount - Foto 41
Sea Mount - Foto 42
Sea Mount - Foto 43
Sea Mount - Foto 44
Sea Mount - Foto 45
Sea Mount - Foto 46
Sea Mount - Foto 47
Sea Mount - Foto 48
Sea Mount - Foto 49
Sea Mount - Foto 50
Sea Mount - Foto 51
Sea Mount - Foto 52
Sea Mount - Foto 53
Sea Mount - Foto 54
Sea Mount - Foto 55
Sea Mount - Foto 56
Sea Mount - Foto 57
Sea Mount - Foto 58
Sea Mount - Foto 59
Sea Mount - Foto 60
Sea Mount - Foto 61
Sea Mount - Foto 62
Sea Mount - Foto 63
Sea Mount - Foto 64
Sea Mount - Foto 65
Sea Mount - Foto 66
Sea Mount - Foto 67
Sea Mount - Foto 68
Sea Mount - Foto 69
Sea Mount - Foto 70
Sea Mount - Foto 71
Sea Mount - Foto 72
Sea Mount - Foto 73
Sea Mount - Foto 74
Sea Mount - Foto 75
Sea Mount - Foto 76
Sea Mount - Foto 77
Sea Mount - Foto 78
Sea Mount - Foto 79
Sea Mount - Foto 80

Sea Mount

Ciudad del Cabo - A 5.8 km del centro

  • 35 M2
  • 2 personas
  • Cocina pequeña
  • Aire acondicionado
  • Calefacción
  • Terraza
  • Piscina
  • Parking
  • Balcón
  • Jardín
  • Televisión
  • Lavadora
  • Barbacoa
  • Toallas
  • Sábanas
9.8Excepcional | 71 reseñas
First Group La Cote D'Azur - Foto 1
First Group La Cote D'Azur - Foto 2
First Group La Cote D'Azur - Foto 3
First Group La Cote D'Azur - Foto 4
First Group La Cote D'Azur - Foto 5
First Group La Cote D'Azur - Foto 6
First Group La Cote D'Azur - Foto 7
First Group La Cote D'Azur - Foto 8
First Group La Cote D'Azur - Foto 9
First Group La Cote D'Azur - Foto 10
First Group La Cote D'Azur - Foto 11
First Group La Cote D'Azur - Foto 12
First Group La Cote D'Azur - Foto 13
First Group La Cote D'Azur - Foto 14
First Group La Cote D'Azur - Foto 15
First Group La Cote D'Azur - Foto 16
First Group La Cote D'Azur - Foto 17
First Group La Cote D'Azur - Foto 18
First Group La Cote D'Azur - Foto 19
First Group La Cote D'Azur - Foto 20
First Group La Cote D'Azur - Foto 21
First Group La Cote D'Azur - Foto 22
First Group La Cote D'Azur - Foto 23
First Group La Cote D'Azur - Foto 24
First Group La Cote D'Azur - Foto 25
First Group La Cote D'Azur - Foto 26
First Group La Cote D'Azur - Foto 27
First Group La Cote D'Azur - Foto 28
First Group La Cote D'Azur - Foto 29
First Group La Cote D'Azur - Foto 30
First Group La Cote D'Azur - Foto 31
First Group La Cote D'Azur - Foto 32
First Group La Cote D'Azur - Foto 33
First Group La Cote D'Azur - Foto 34
First Group La Cote D'Azur - Foto 35
First Group La Cote D'Azur - Foto 36
First Group La Cote D'Azur - Foto 37
First Group La Cote D'Azur - Foto 38
First Group La Cote D'Azur - Foto 39
First Group La Cote D'Azur - Foto 40
First Group La Cote D'Azur - Foto 41
First Group La Cote D'Azur - Foto 42
First Group La Cote D'Azur - Foto 43
First Group La Cote D'Azur - Foto 44
First Group La Cote D'Azur - Foto 45
First Group La Cote D'Azur - Foto 46
First Group La Cote D'Azur - Foto 47
First Group La Cote D'Azur - Foto 48
First Group La Cote D'Azur - Foto 49
First Group La Cote D'Azur - Foto 50
First Group La Cote D'Azur - Foto 51
First Group La Cote D'Azur - Foto 52
First Group La Cote D'Azur - Foto 53
First Group La Cote D'Azur - Foto 54
First Group La Cote D'Azur - Foto 55
First Group La Cote D'Azur - Foto 56
First Group La Cote D'Azur - Foto 57
First Group La Cote D'Azur - Foto 58
First Group La Cote D'Azur - Foto 59
First Group La Cote D'Azur - Foto 60
First Group La Cote D'Azur - Foto 61
First Group La Cote D'Azur - Foto 62
First Group La Cote D'Azur - Foto 63
First Group La Cote D'Azur - Foto 64
First Group La Cote D'Azur - Foto 65
First Group La Cote D'Azur - Foto 66
First Group La Cote D'Azur - Foto 67
First Group La Cote D'Azur - Foto 68
First Group La Cote D'Azur - Foto 69
First Group La Cote D'Azur - Foto 70
First Group La Cote D'Azur - Foto 71
First Group La Cote D'Azur - Foto 72
First Group La Cote D'Azur - Foto 73
First Group La Cote D'Azur - Foto 74
First Group La Cote D'Azur - Foto 75
First Group La Cote D'Azur - Foto 76
First Group La Cote D'Azur - Foto 77
First Group La Cote D'Azur - Foto 78
First Group La Cote D'Azur - Foto 79
First Group La Cote D'Azur - Foto 80

First Group La Cote D'Azur

Margate North Beach

  • 105 M2
  • 6 personas
  • Aire acondicionado
  • Terraza
  • Piscina
  • Parking
  • Ascensor
  • Balcón
  • Jardín
  • Televisión
  • Barbacoa
  • Toallas
  • Sábanas
9.6Excepcional | 22 reseñas
The Leonardo - Foto 1
The Leonardo - Foto 2
The Leonardo - Foto 3
The Leonardo - Foto 4
The Leonardo - Foto 5
The Leonardo - Foto 6
The Leonardo - Foto 7
The Leonardo - Foto 8
The Leonardo - Foto 9
The Leonardo - Foto 10
The Leonardo - Foto 11
The Leonardo - Foto 12
The Leonardo - Foto 13
The Leonardo - Foto 14
The Leonardo - Foto 15
The Leonardo - Foto 16
The Leonardo - Foto 17
The Leonardo - Foto 18
The Leonardo - Foto 19
The Leonardo - Foto 20
The Leonardo - Foto 21
The Leonardo - Foto 22
The Leonardo - Foto 23
The Leonardo - Foto 24
The Leonardo - Foto 25
The Leonardo - Foto 26
The Leonardo - Foto 27
The Leonardo - Foto 28
The Leonardo - Foto 29
The Leonardo - Foto 30
The Leonardo - Foto 31
The Leonardo - Foto 32
The Leonardo - Foto 33
The Leonardo - Foto 34
The Leonardo - Foto 35
The Leonardo - Foto 36
The Leonardo - Foto 37
The Leonardo - Foto 38
The Leonardo - Foto 39
The Leonardo - Foto 40
The Leonardo - Foto 41
The Leonardo - Foto 42
The Leonardo - Foto 43
The Leonardo - Foto 44
The Leonardo - Foto 45
The Leonardo - Foto 46
The Leonardo - Foto 47
The Leonardo - Foto 48
The Leonardo - Foto 49
The Leonardo - Foto 50
The Leonardo - Foto 51
The Leonardo - Foto 52
The Leonardo - Foto 53
The Leonardo - Foto 54
The Leonardo - Foto 55
The Leonardo - Foto 56
The Leonardo - Foto 57
The Leonardo - Foto 58
The Leonardo - Foto 59
The Leonardo - Foto 60
The Leonardo - Foto 61
The Leonardo - Foto 62
The Leonardo - Foto 63
The Leonardo - Foto 64
The Leonardo - Foto 65
The Leonardo - Foto 66
The Leonardo - Foto 67
The Leonardo - Foto 68
The Leonardo - Foto 69
The Leonardo - Foto 70
The Leonardo - Foto 71
The Leonardo - Foto 72
The Leonardo - Foto 73
The Leonardo - Foto 74
The Leonardo - Foto 75
The Leonardo - Foto 76
The Leonardo - Foto 77
The Leonardo - Foto 78
The Leonardo - Foto 79
The Leonardo - Foto 80

The Leonardo

Sandown

  • 545 M2
  • 8 personas
  • Aire acondicionado
  • Calefacción
  • Terraza
  • Piscina
  • Parking
  • Ascensor
  • Balcón
  • Televisión
  • Lavadora
  • Toallas
  • Sábanas
9.4Excepcional | 76 reseñas

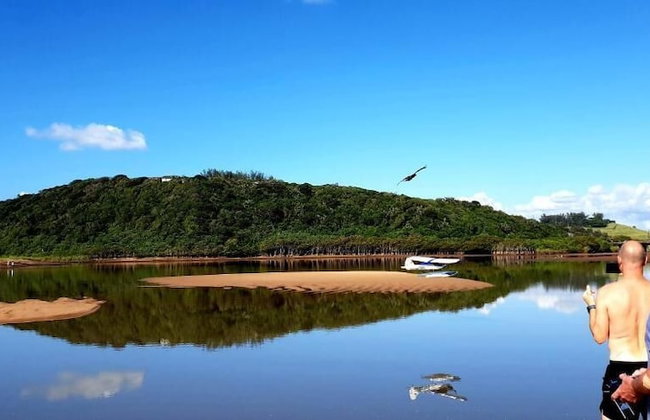
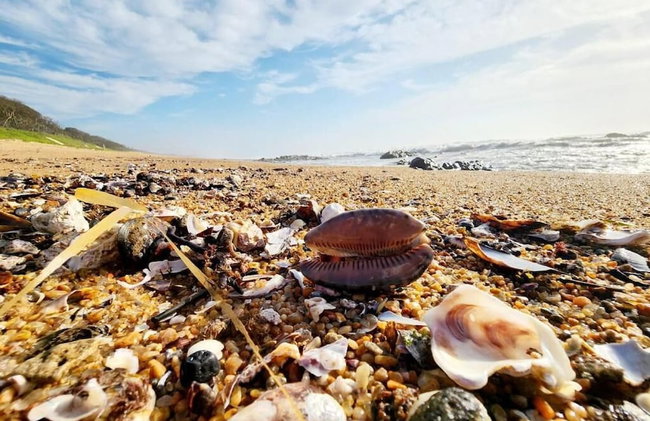
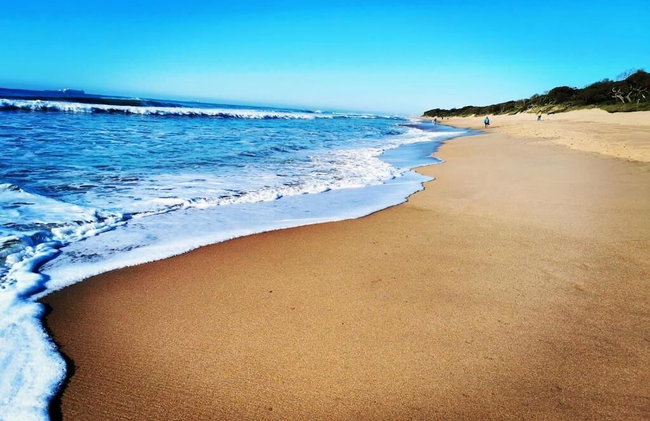
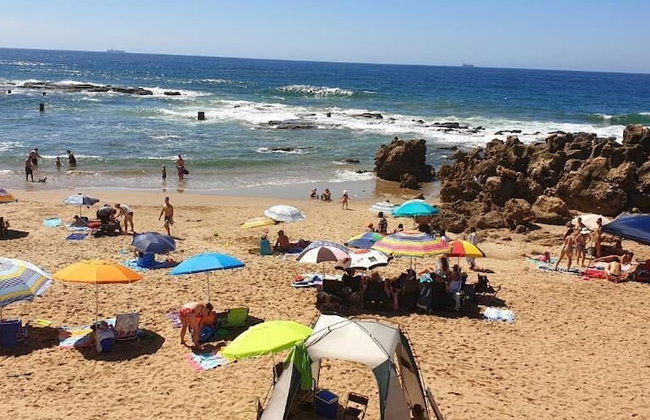
Sudáfrica es un país con multitud de posibilidades, desde los ya clásicos safaris con los que se pueden visitar los numerosos parques y reservas de animales, hasta poder disfrutar de los magníficos paisajes relajándose bajo el sol en espléndidas playas o realizar senderismo en las montañas con vistas espectaculares sobre el país. En el interior, se extienden las inmensas mesetas del Veld que constituyen el 40% del territorio. Muy cerca de allí se encuentra Johannesburgo, una ciudad con grandes contrastes culturales. En la costa destaca Ciudad del Cabo, una de las tres capitales del país conocida por el carácter afable de sus habitantes y sus playas de arena blanca.
Destinos relacionados