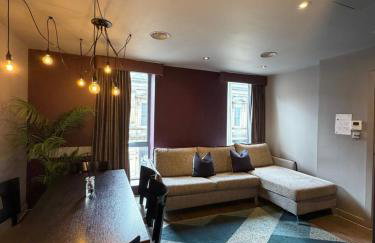
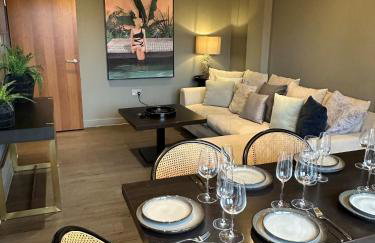
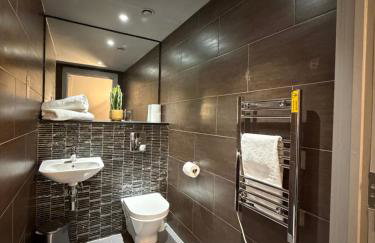
116 Apartamentos en Ropewalks
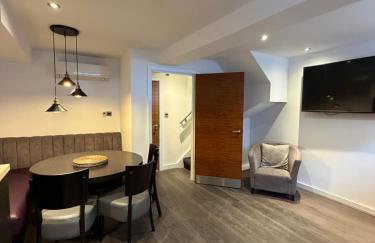
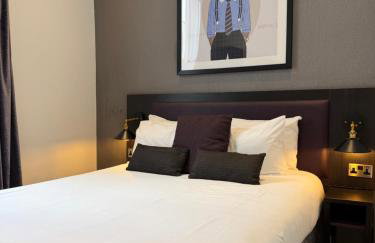
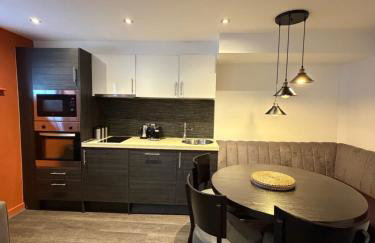
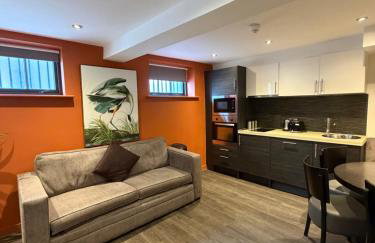
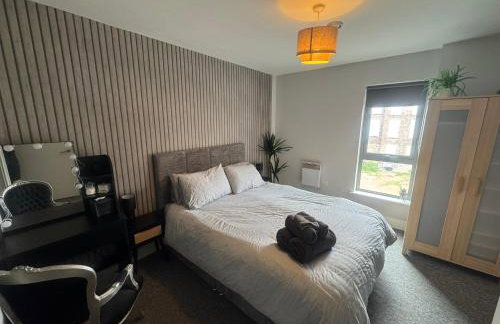
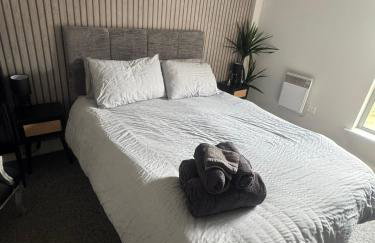
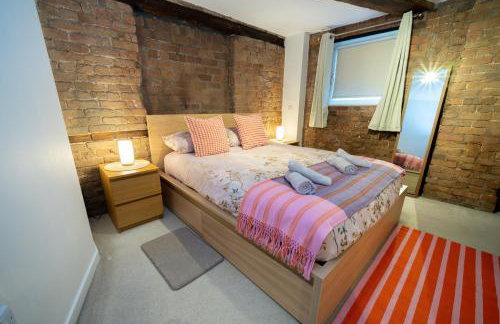
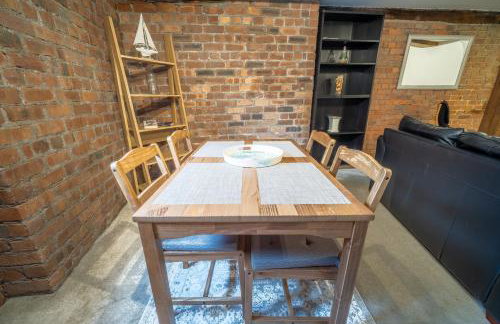
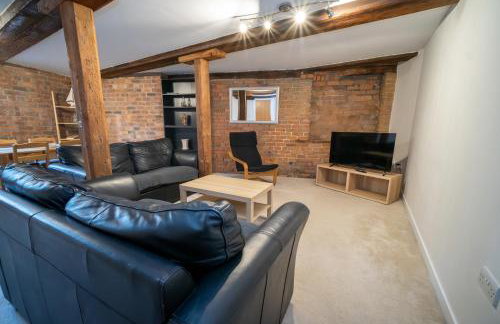
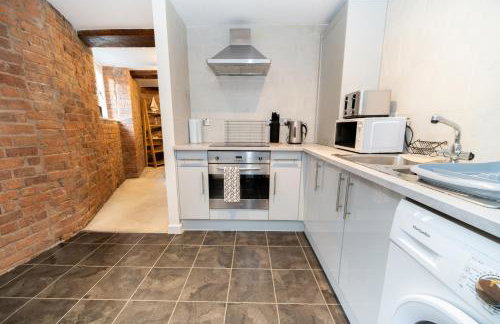
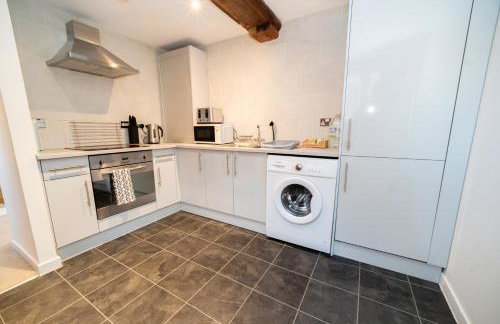
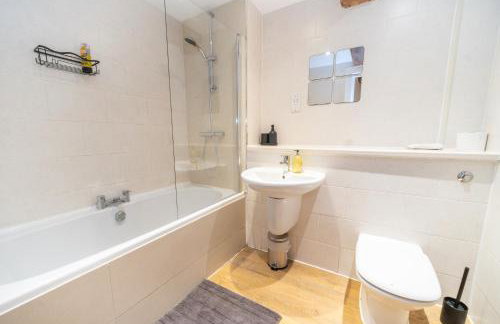
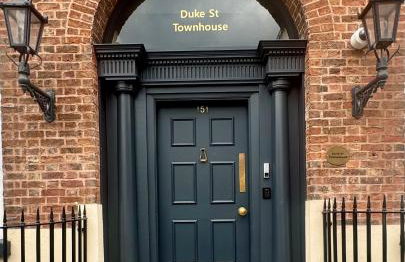
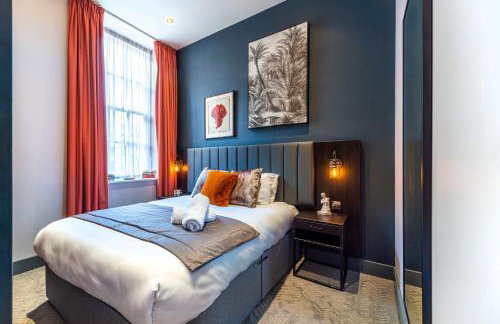
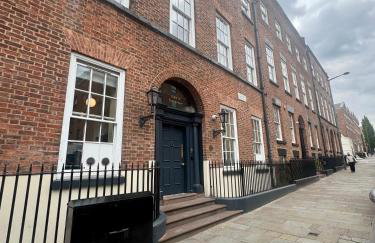
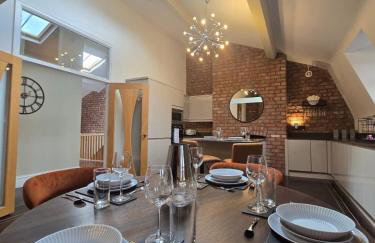
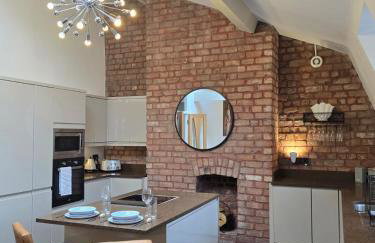
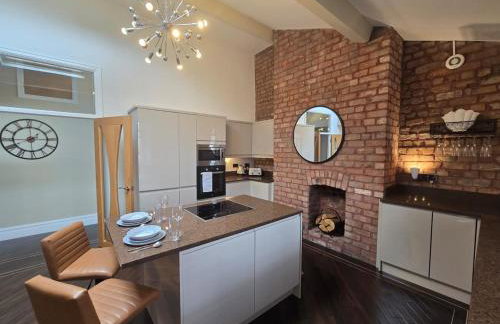
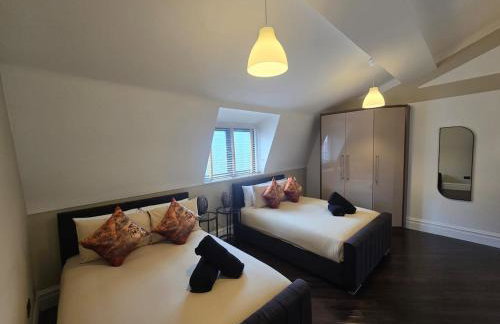
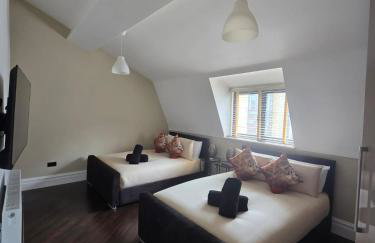
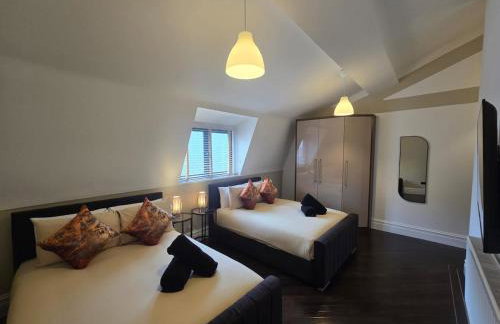
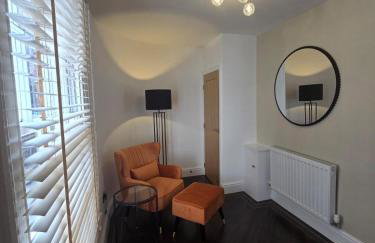
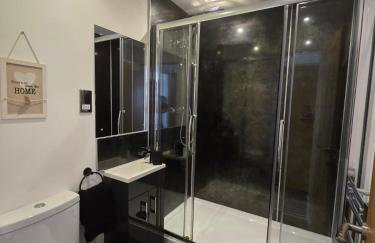
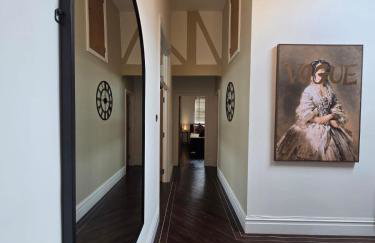
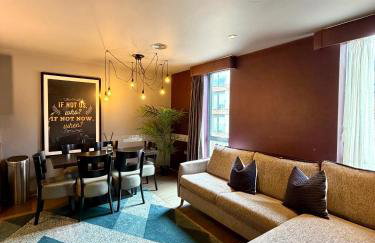
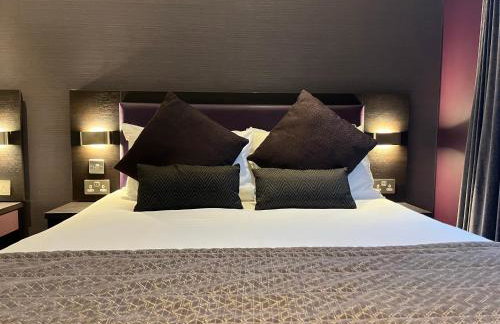
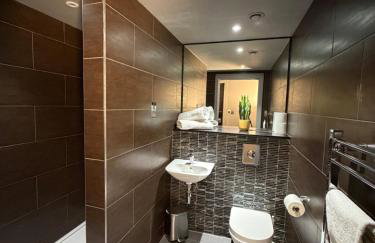
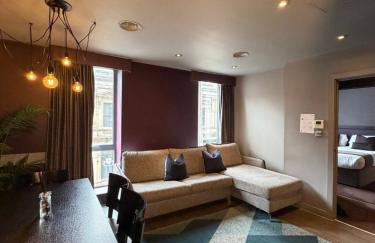
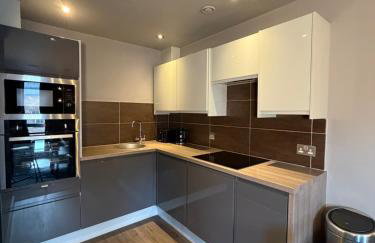
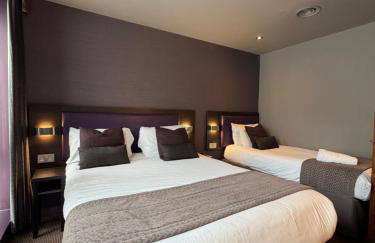
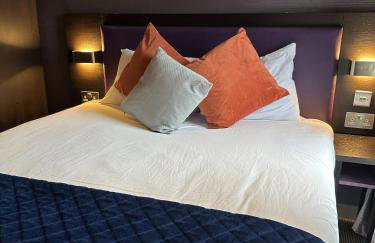
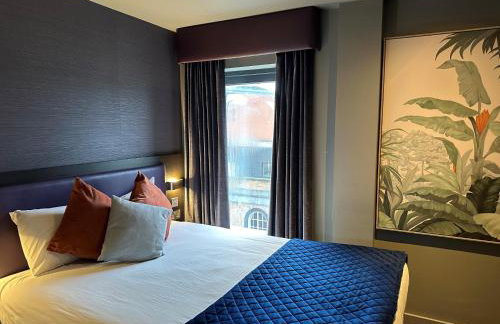
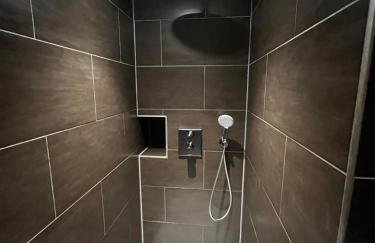
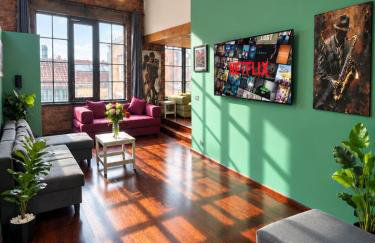
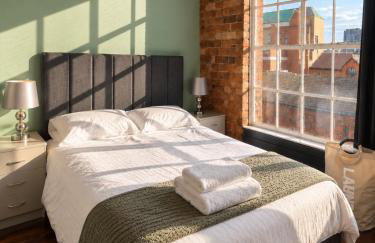
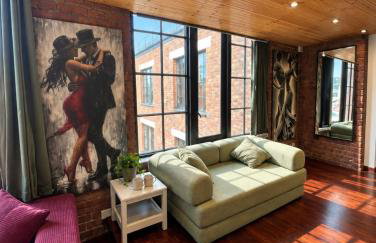
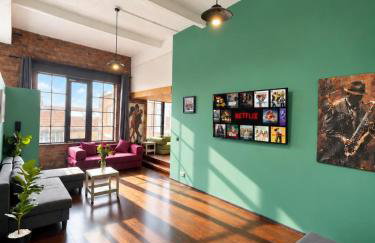
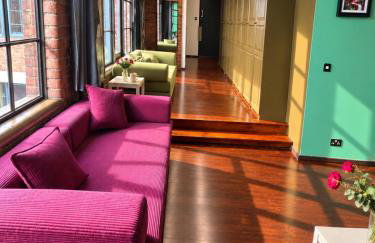
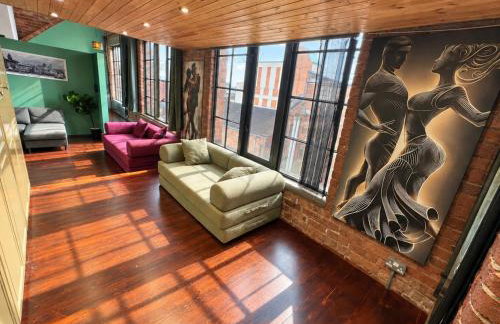
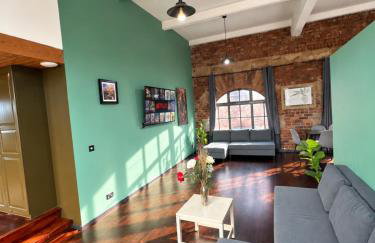
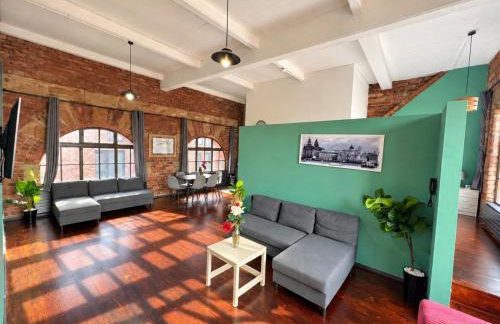
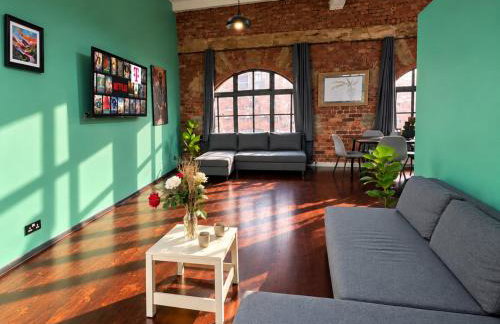
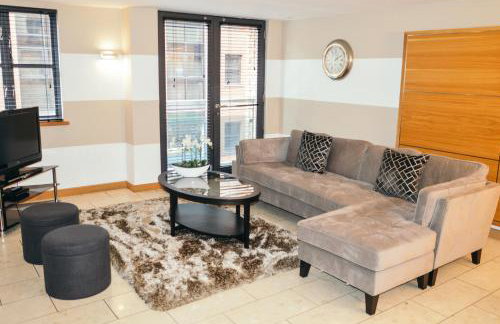
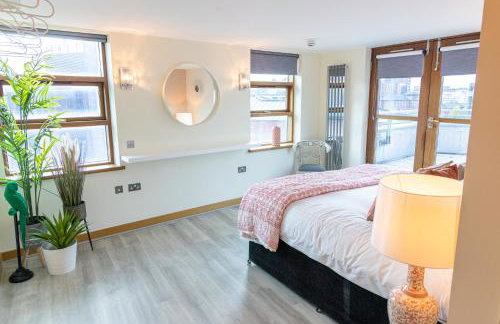
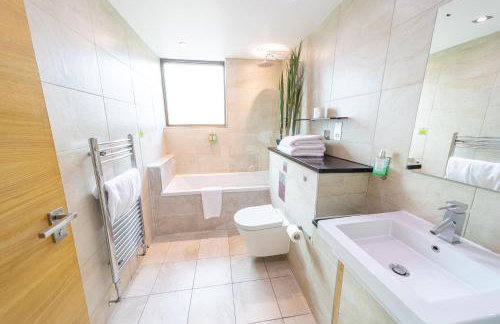
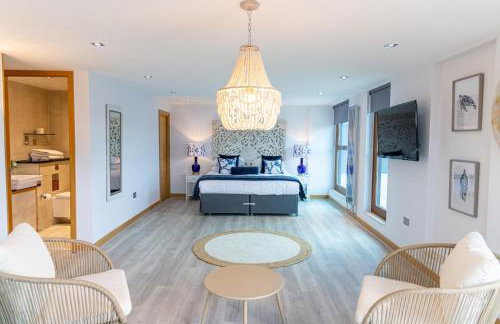
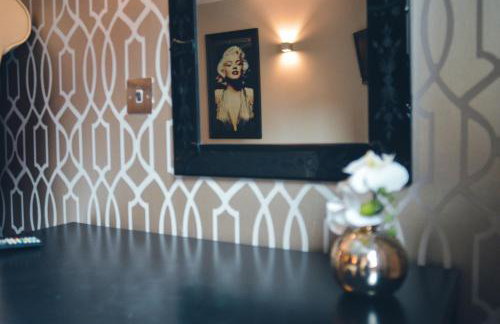
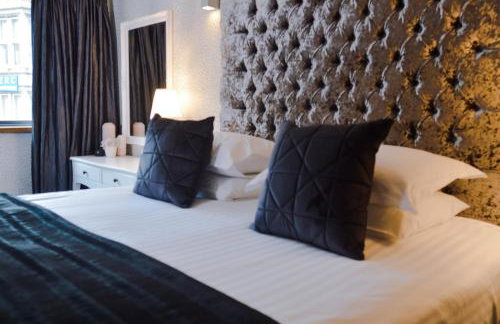
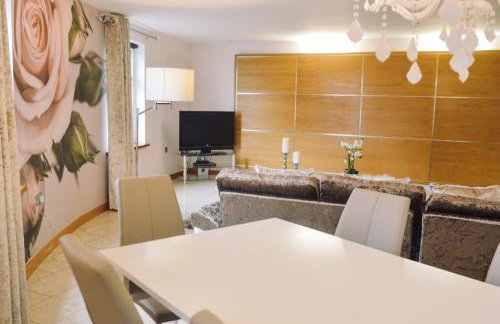
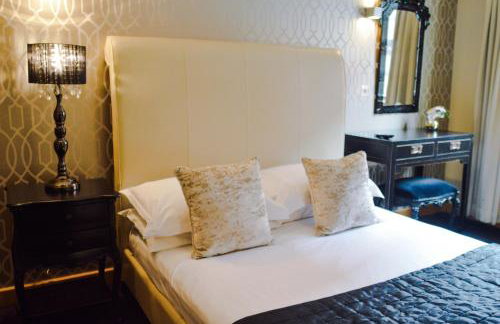
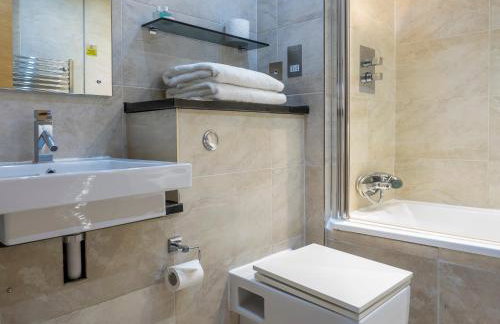
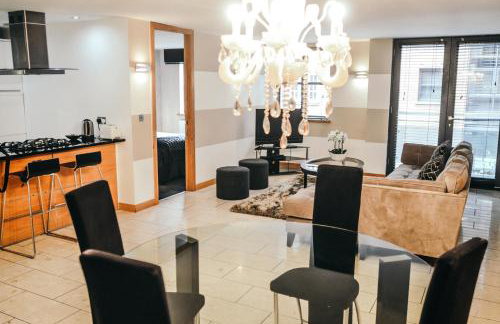
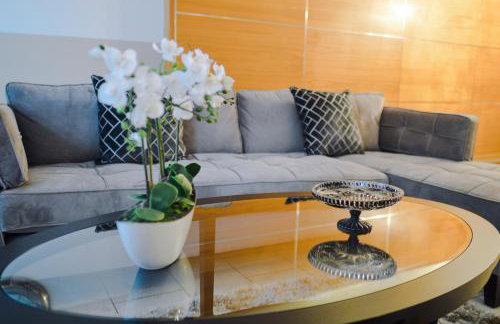
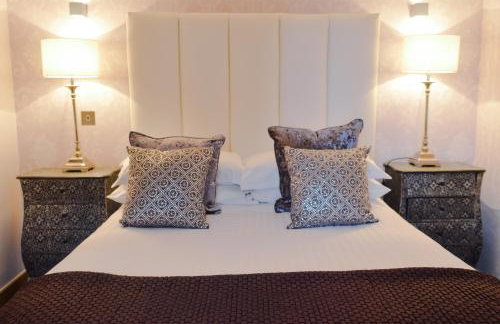
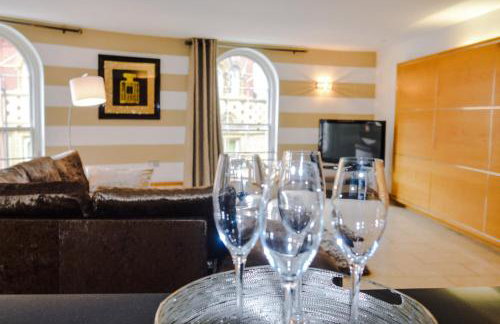
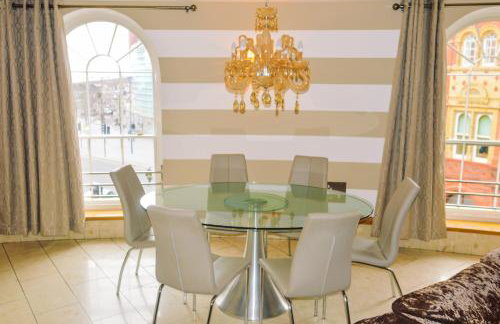
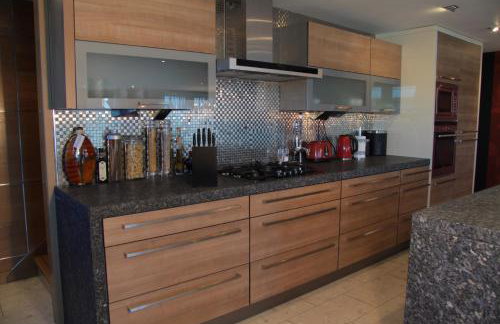
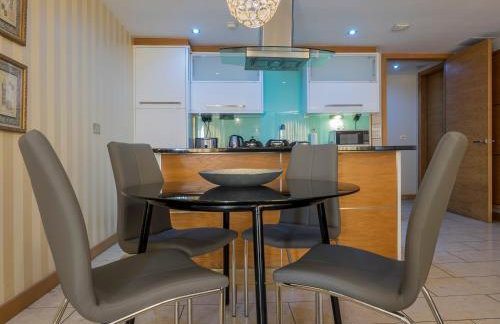
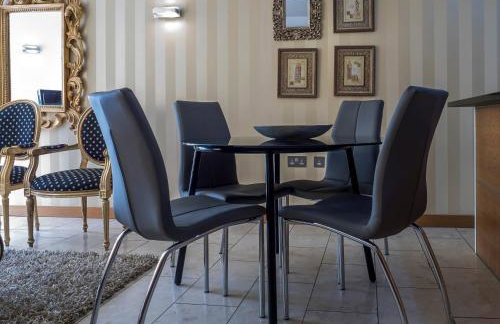
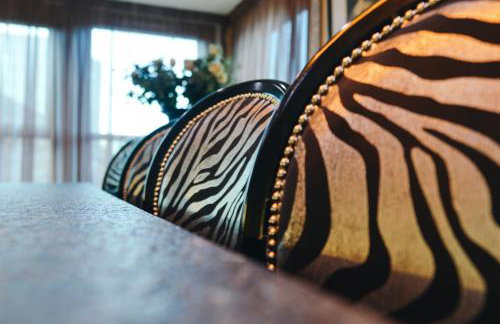
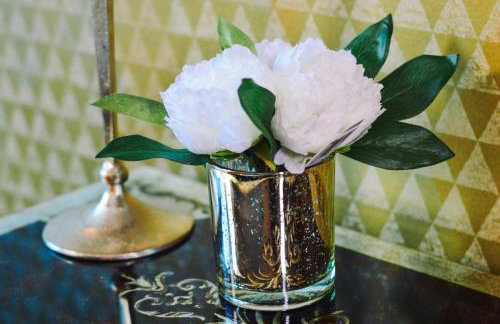
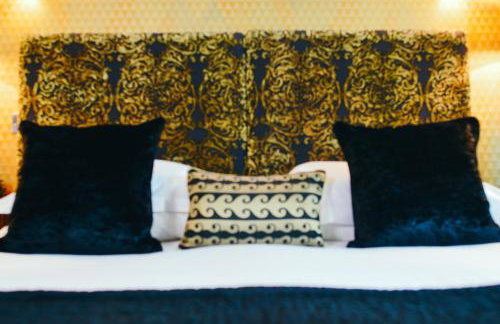
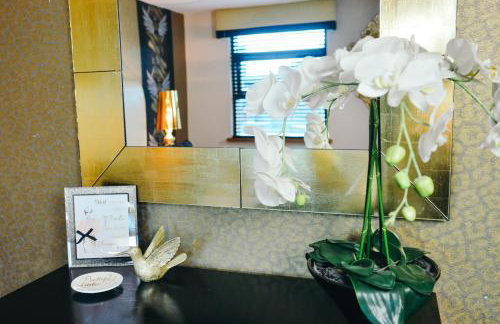
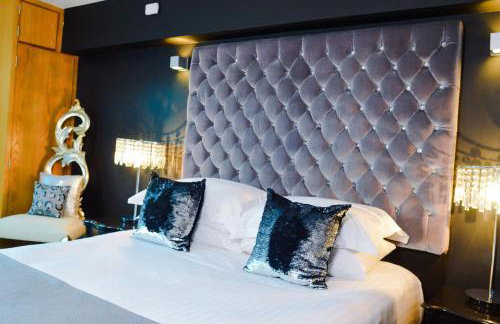
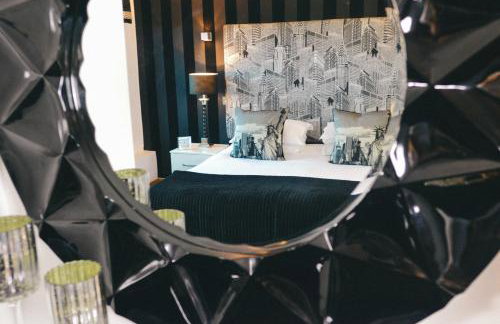
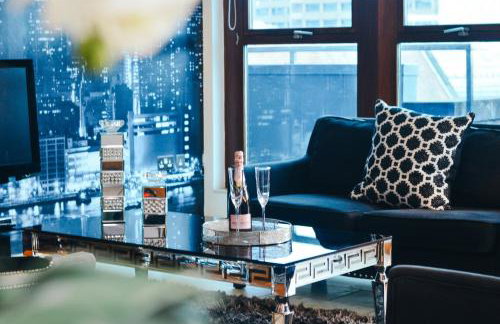
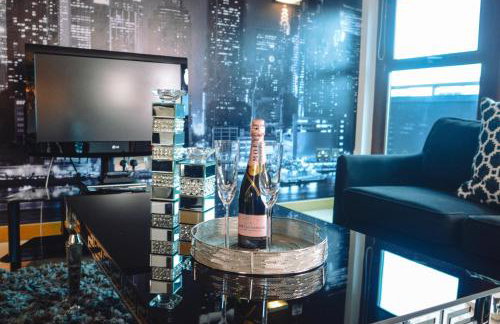
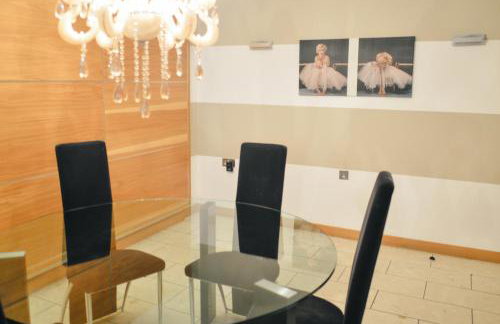
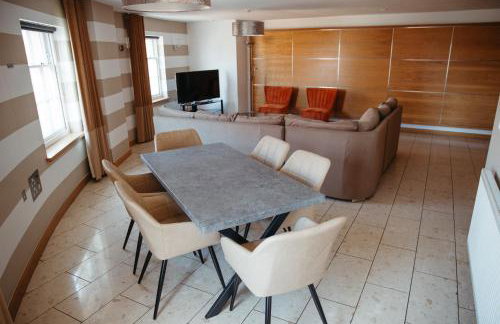
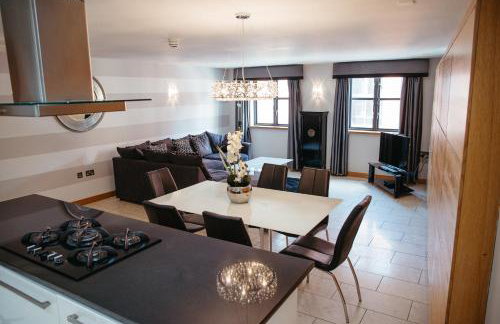
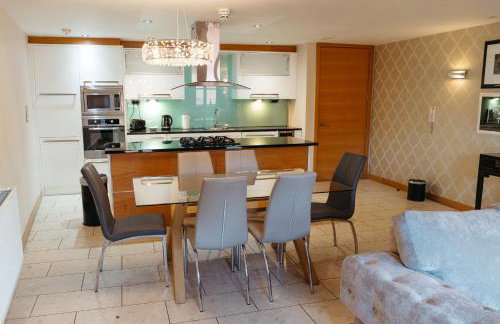
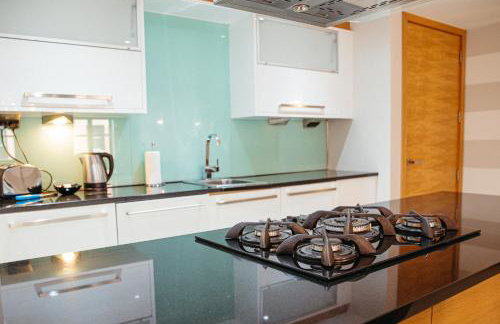
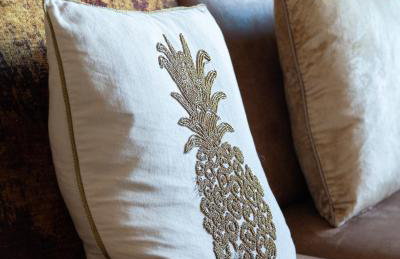
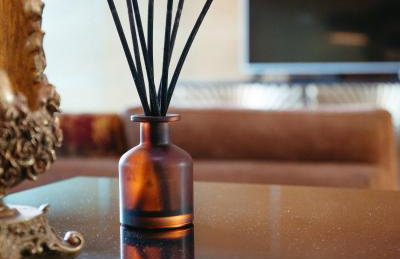
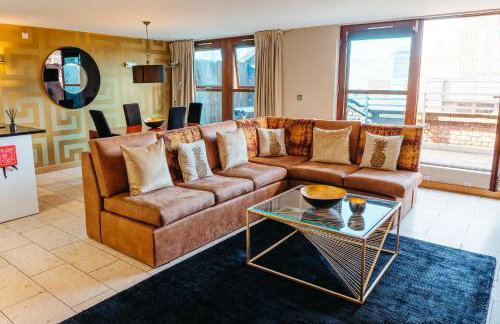
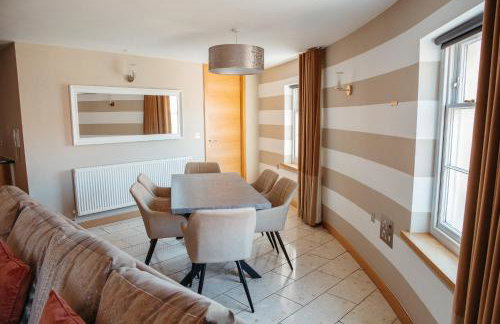
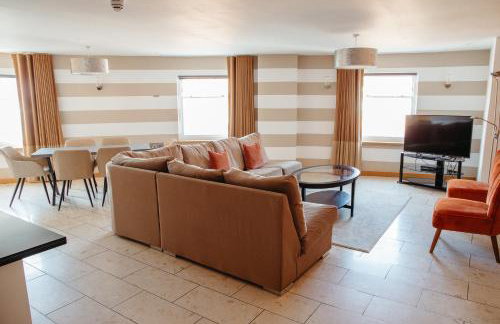
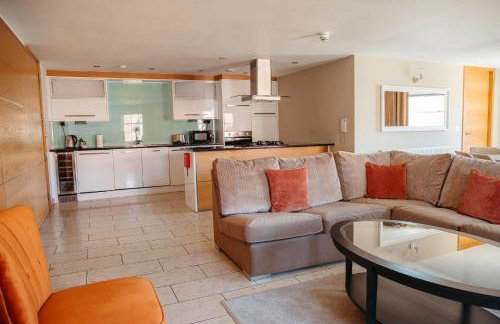
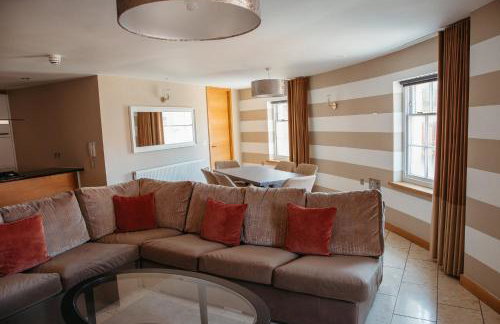
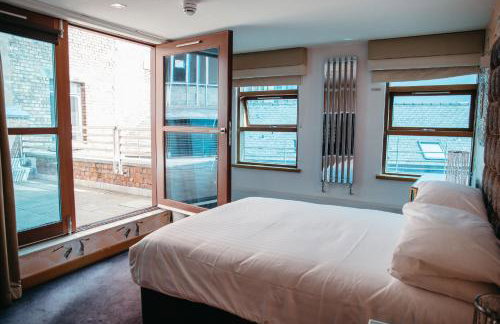
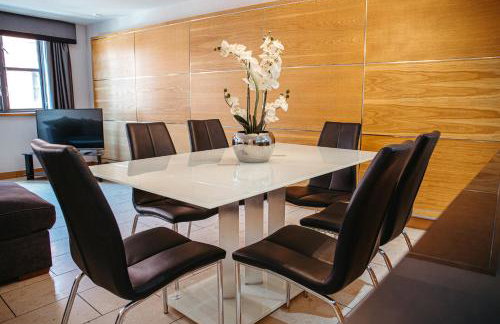
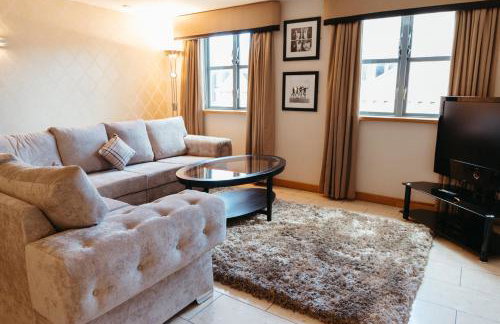
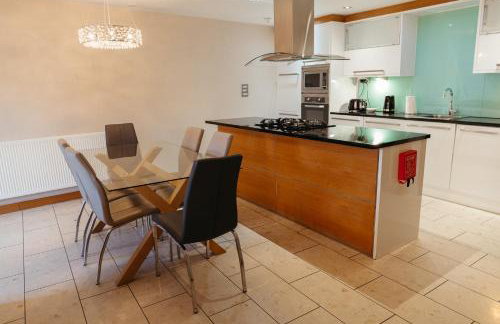
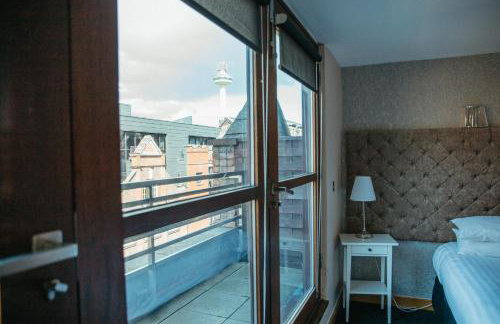
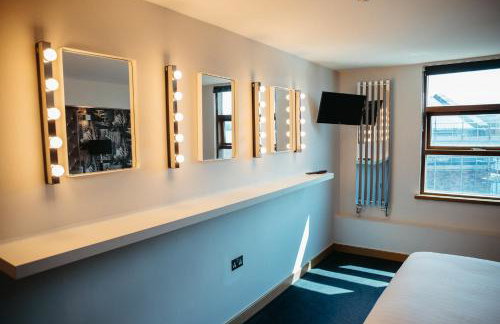
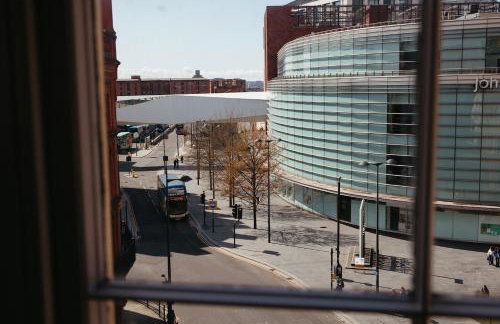
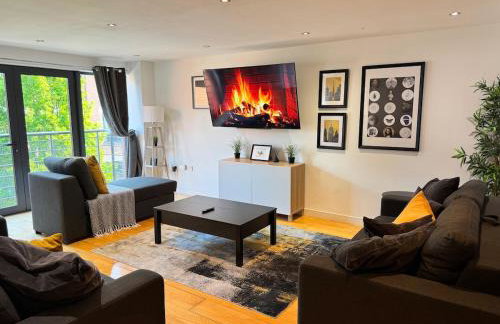
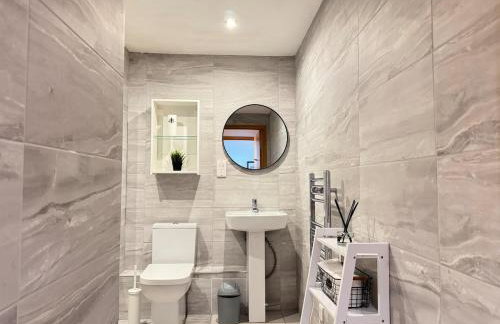
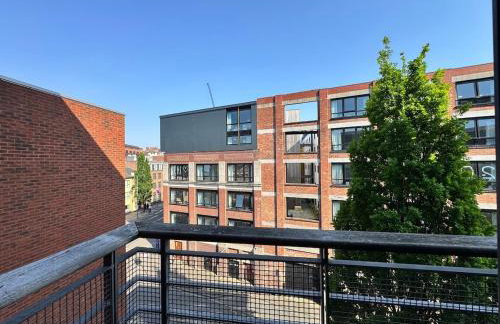
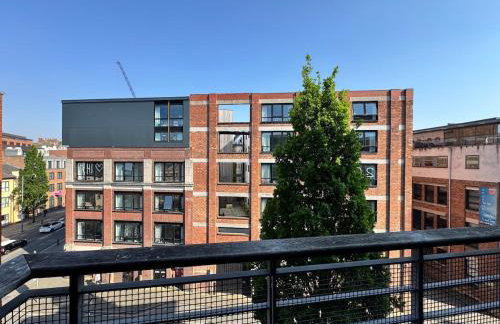
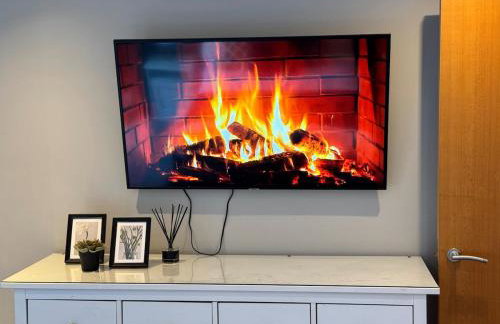
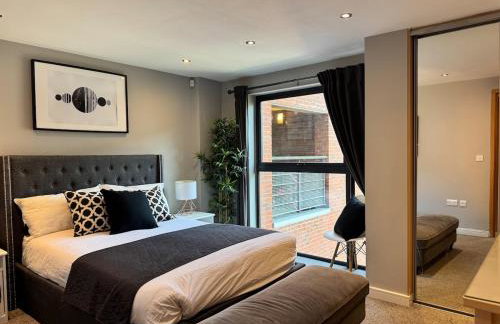
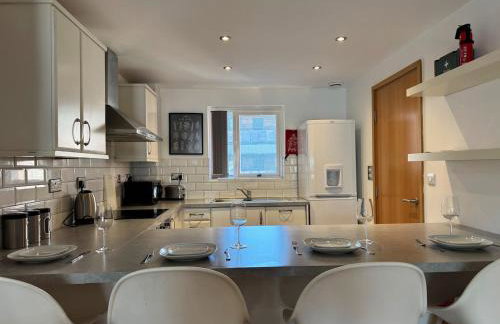
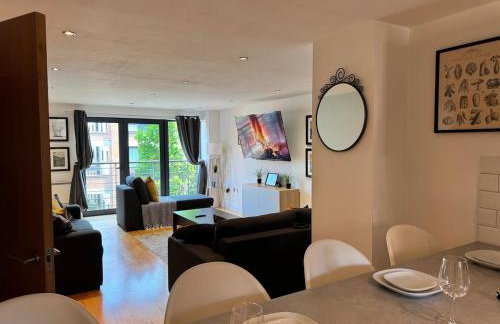
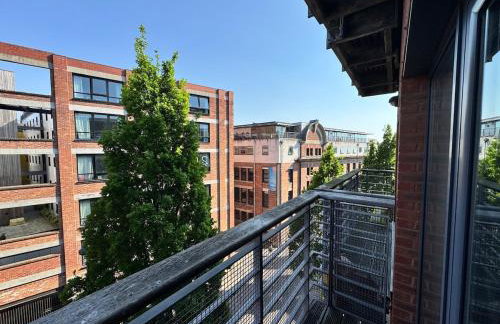
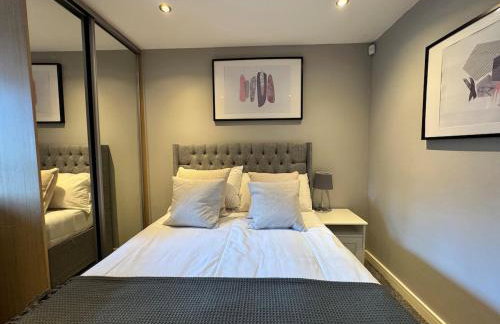
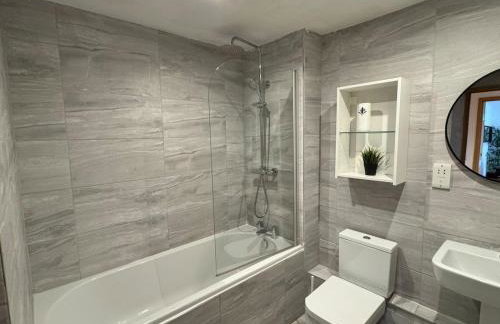
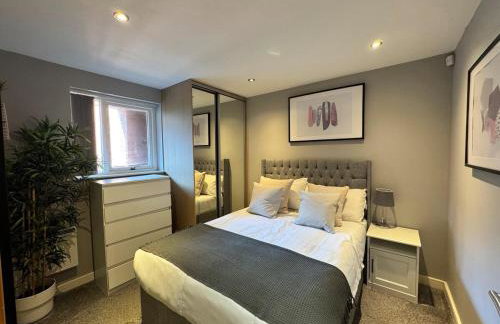
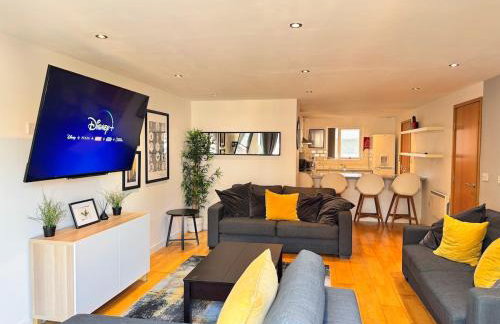
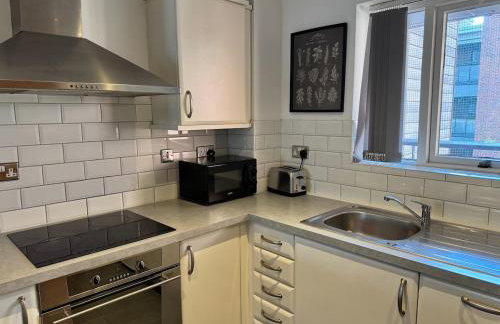
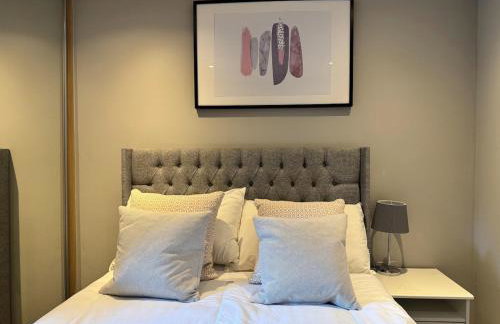
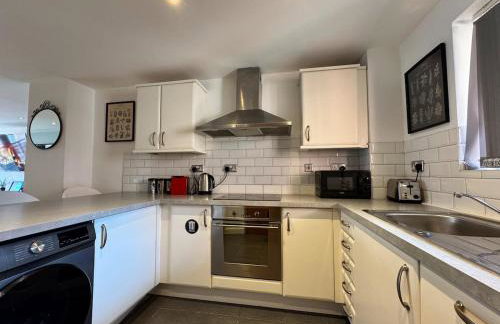
Base Serviced Apartments - Duke Street - Foto 1
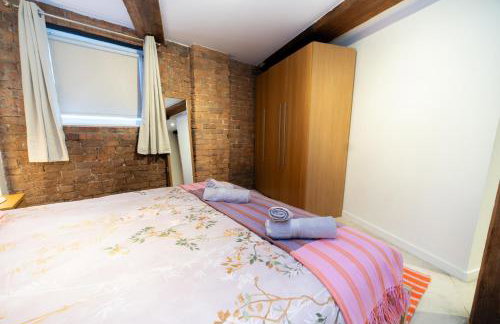
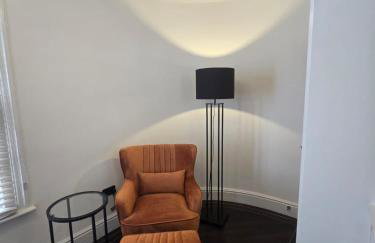
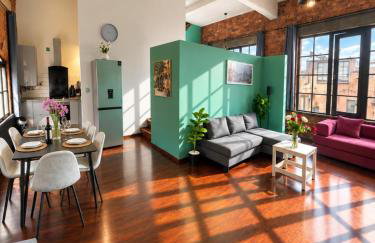
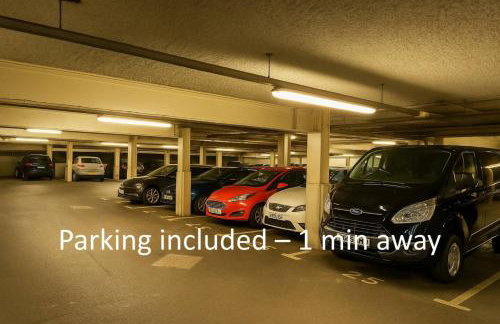
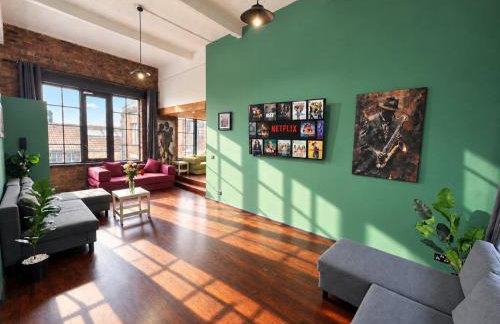
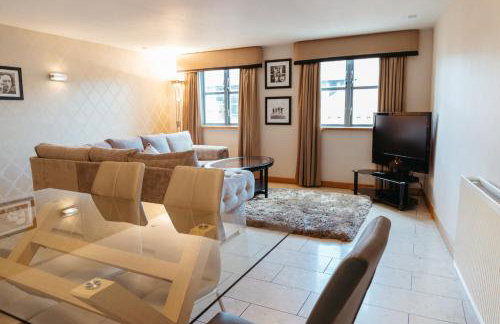
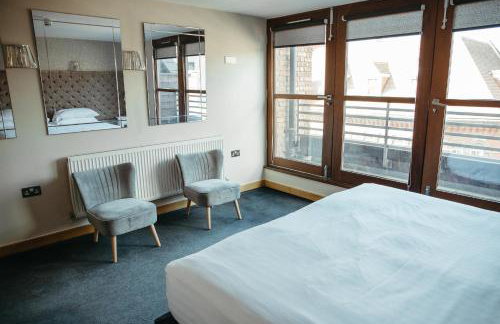
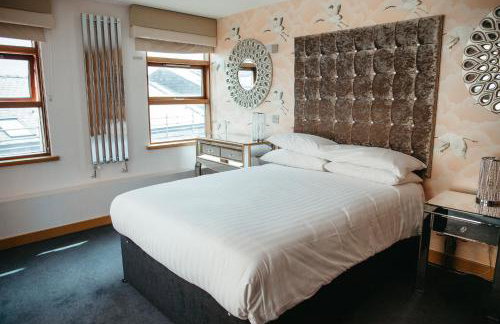
Base Serviced Apartments - Duke Street - Foto 2
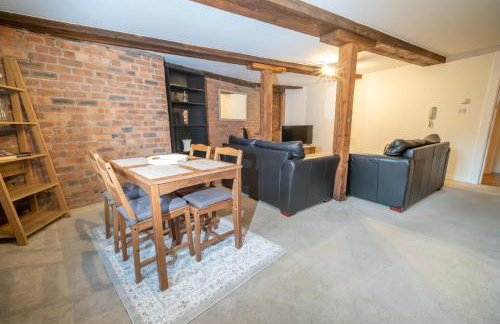
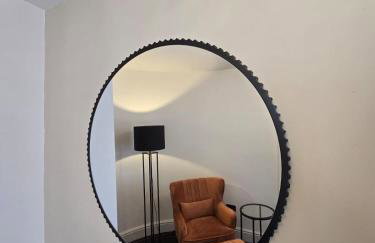
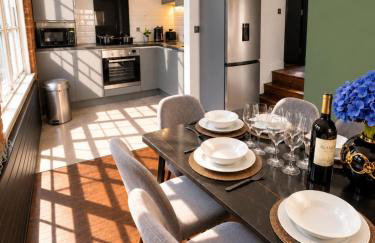
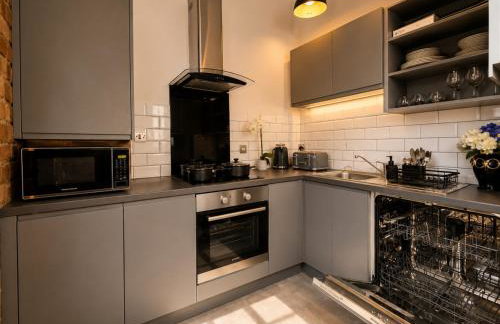
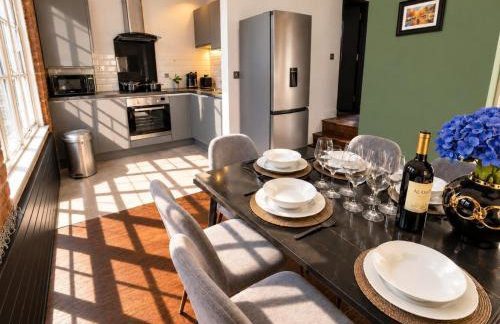
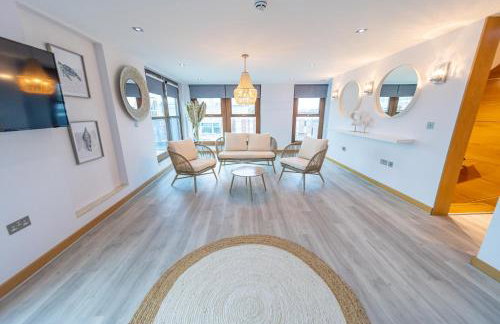
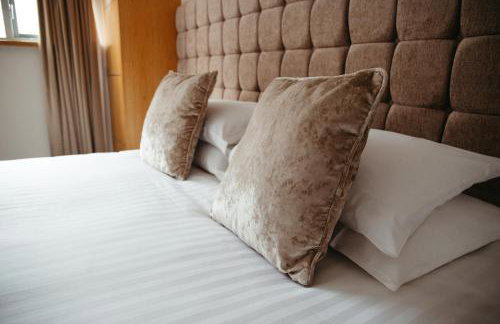
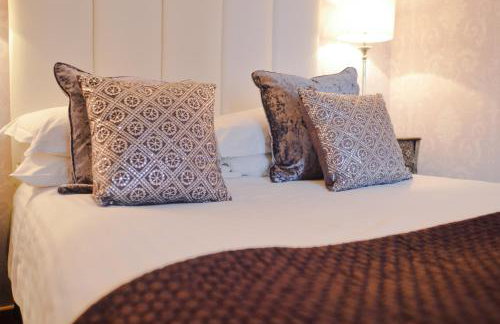
Base Serviced Apartments - Duke Street - Foto 3
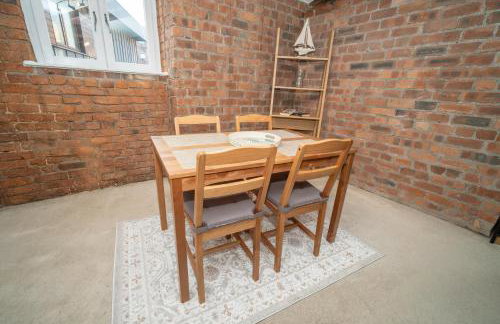
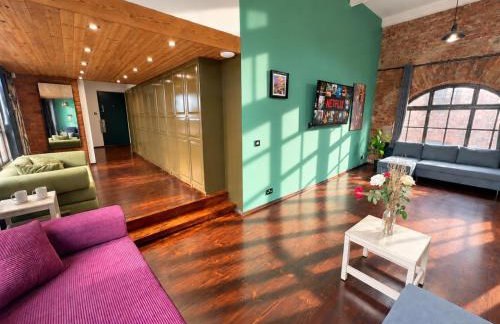
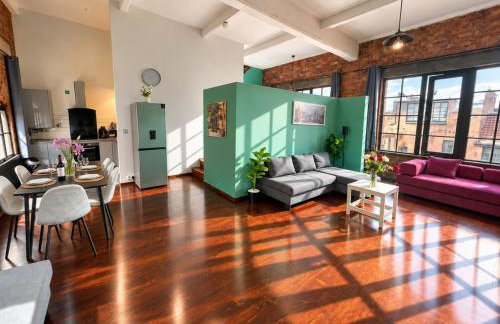
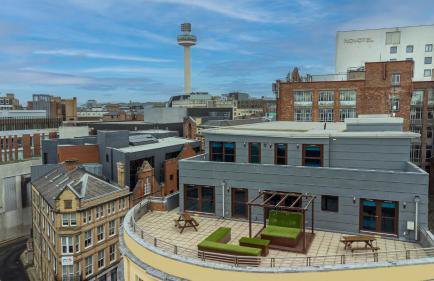
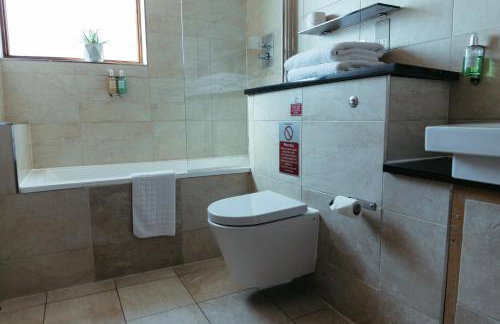
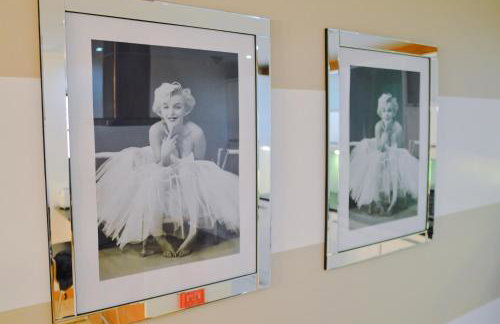
Base Serviced Apartments - Duke Street - Foto 4
Base Serviced Apartments - Duke Street - Foto 5
Base Serviced Apartments - Duke Street - Foto 6
Base Serviced Apartments - Duke Street - Foto 7
Base Serviced Apartments - Duke Street - Foto 8
Base Serviced Apartments - Duke Street - Foto 9
Base Serviced Apartments - Duke Street - Foto 10
Base Serviced Apartments - Duke Street - Foto 11
Base Serviced Apartments - Duke Street - Foto 12
Base Serviced Apartments - Duke Street - Foto 13
Base Serviced Apartments - Duke Street - Foto 14
Base Serviced Apartments - Duke Street - Foto 15
Base Serviced Apartments - Duke Street - Foto 16
Base Serviced Apartments - Duke Street - Foto 17
Base Serviced Apartments - Duke Street - Foto 18
Base Serviced Apartments - Duke Street - Foto 19
Base Serviced Apartments - Duke Street - Foto 20
Base Serviced Apartments - Duke Street - Foto 21
Base Serviced Apartments - Duke Street - Foto 22
Base Serviced Apartments - Duke Street - Foto 23
Base Serviced Apartments - Duke Street - Foto 24
Base Serviced Apartments - Duke Street - Foto 25
Base Serviced Apartments - Duke Street - Foto 26
Base Serviced Apartments - Duke Street - Foto 27
Base Serviced Apartments - Duke Street - Foto 28
Base Serviced Apartments - Duke Street - Foto 29
Base Serviced Apartments - Duke Street - Foto 30
Base Serviced Apartments - Duke Street - Foto 31
Base Serviced Apartments - Duke Street - Foto 32
Base Serviced Apartments - Duke Street - Foto 33
Base Serviced Apartments - Duke Street - Foto 34
Base Serviced Apartments - Duke Street - Foto 35
Base Serviced Apartments - Duke Street - Foto 36
Base Serviced Apartments - Duke Street - Foto 37
Base Serviced Apartments - Duke Street - Foto 38
Base Serviced Apartments - Duke Street - Foto 39
Base Serviced Apartments - Duke Street - Foto 40
Base Serviced Apartments - Duke Street - Foto 41
Base Serviced Apartments - Duke Street - Foto 42
Base Serviced Apartments - Duke Street - Foto 43
Base Serviced Apartments - Duke Street - Foto 44
Base Serviced Apartments - Duke Street - Foto 45
Base Serviced Apartments - Duke Street - Foto 46
Base Serviced Apartments - Duke Street - Foto 47
Base Serviced Apartments - Duke Street - Foto 48
Base Serviced Apartments - Duke Street - Foto 49
Base Serviced Apartments - Duke Street - Foto 50
Base Serviced Apartments - Duke Street - Foto 51
Base Serviced Apartments - Duke Street - Foto 52
Base Serviced Apartments - Duke Street - Foto 53
Base Serviced Apartments - Duke Street - Foto 54
Base Serviced Apartments - Duke Street - Foto 55
Base Serviced Apartments - Duke Street - Foto 56
Base Serviced Apartments - Duke Street - Foto 57
Base Serviced Apartments - Duke Street - Foto 58
Base Serviced Apartments - Duke Street - Foto 59
Base Serviced Apartments - Duke Street - Foto 60
Base Serviced Apartments - Duke Street - Foto 61
Base Serviced Apartments - Duke Street - Foto 62
Base Serviced Apartments - Duke Street - Foto 63
Base Serviced Apartments - Duke Street - Foto 64
Base Serviced Apartments - Duke Street - Foto 65
Base Serviced Apartments - Duke Street - Foto 66
Base Serviced Apartments - Duke Street - Foto 67
Base Serviced Apartments - Duke Street - Foto 68
Base Serviced Apartments - Duke Street - Foto 69
Base Serviced Apartments - Duke Street - Foto 70
Base Serviced Apartments - Duke Street - Foto 71
Base Serviced Apartments - Duke Street - Foto 72
Base Serviced Apartments - Duke Street - Foto 73
Base Serviced Apartments - Duke Street - Foto 74
Base Serviced Apartments - Duke Street - Foto 75
Base Serviced Apartments - Duke Street - Foto 76
Base Serviced Apartments - Duke Street - Foto 77
Base Serviced Apartments - Duke Street - Foto 78
Base Serviced Apartments - Duke Street - Foto 79
Base Serviced Apartments - Duke Street - Foto 80
Base Serviced Apartments - Duke Street - Foto 81
Base Serviced Apartments - Duke Street - Foto 82
Base Serviced Apartments - Duke Street - Foto 83
Base Serviced Apartments - Duke Street - Foto 84
Base Serviced Apartments - Duke Street - Foto 85
Base Serviced Apartments - Duke Street - Foto 86
Base Serviced Apartments - Duke Street - Foto 87
Base Serviced Apartments - Duke Street - Foto 88
Base Serviced Apartments - Duke Street - Foto 89
Base Serviced Apartments - Duke Street - Foto 90
Base Serviced Apartments - Duke Street - Foto 91
Base Serviced Apartments - Duke Street - Foto 92
Base Serviced Apartments - Duke Street - Foto 93
Base Serviced Apartments - Duke Street - Foto 94
Base Serviced Apartments - Duke Street - Foto 95
Base Serviced Apartments - Duke Street - Foto 96
Base Serviced Apartments - Duke Street - Foto 97
Base Serviced Apartments - Duke Street - Foto 98
Base Serviced Apartments - Duke Street - Foto 99
Base Serviced Apartments - Duke Street - Foto 100
Base Serviced Apartments - Duke Street - Foto 101
Base Serviced Apartments - Duke Street - Foto 102
Base Serviced Apartments - Duke Street - Foto 103
Base Serviced Apartments - Duke Street - Foto 104
Base Serviced Apartments - Duke Street - Foto 105
Base Serviced Apartments - Duke Street - Foto 106
Base Serviced Apartments - Duke Street - Foto 107
Base Serviced Apartments - Duke Street - Foto 108
Base Serviced Apartments - Duke Street - Foto 109
Base Serviced Apartments - Duke Street - Foto 110
Base Serviced Apartments - Duke Street - Foto 111
Base Serviced Apartments - Duke Street - Foto 112
Base Serviced Apartments - Duke Street - Foto 113
Base Serviced Apartments - Duke Street - Foto 114
Base Serviced Apartments - Duke Street - Foto 115
Base Serviced Apartments - Duke Street - Foto 116
Base Serviced Apartments - Duke Street - Foto 117
Base Serviced Apartments - Duke Street - Foto 118
Base Serviced Apartments - Duke Street - Foto 119
Base Serviced Apartments - Duke Street - Foto 120
Base Serviced Apartments - Duke Street - Foto 121
Base Serviced Apartments - Duke Street - Foto 122
Base Serviced Apartments - Duke Street - Foto 123
Base Serviced Apartments - Duke Street - Foto 124
Base Serviced Apartments - Duke Street - Foto 125
Base Serviced Apartments - Duke Street - Foto 126
Base Serviced Apartments - Duke Street - Foto 127
Base Serviced Apartments - Duke Street - Foto 128
Base Serviced Apartments - Duke Street - Foto 129
Base Serviced Apartments - Duke Street - Foto 130
Base Serviced Apartments - Duke Street - Foto 131
Base Serviced Apartments - Duke Street - Foto 132
Base Serviced Apartments - Duke Street - Foto 133
Base Serviced Apartments - Duke Street - Foto 134
Base Serviced Apartments - Duke Street - Foto 135
Base Serviced Apartments - Duke Street - Foto 136
Base Serviced Apartments - Duke Street - Foto 137

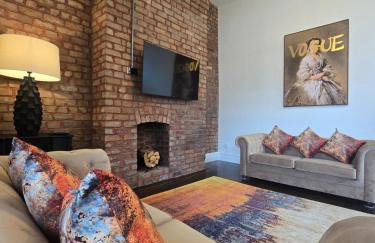
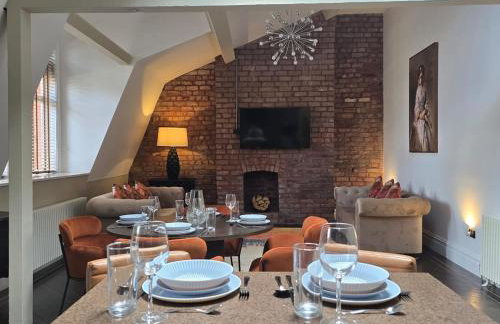
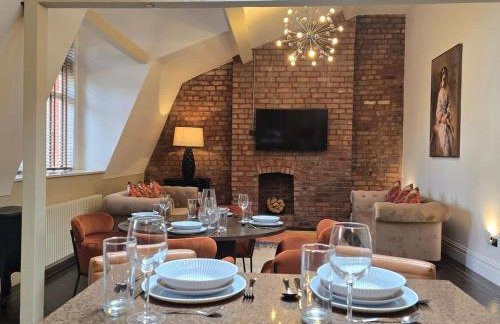
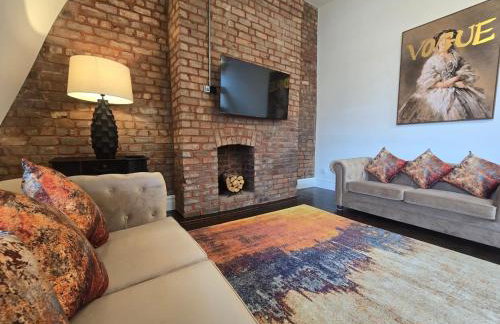
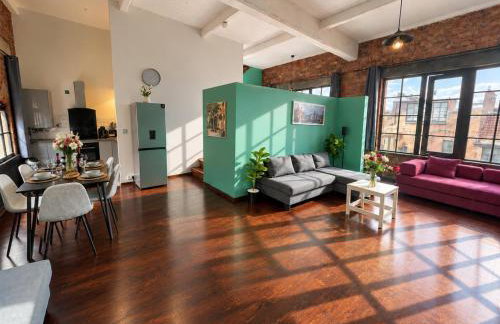
Base Serviced Apartments - Duke Street

Liverpool - Ropewalks - A 510 m del centro

  • 111 M2
  • 3 habitaciones
  • 8 personas
  • Calefacción
  • Parking
  • Ascensor
  • Balcón
  • Televisión
  • Lavadora
  • Toallas
  • Sábanas
8.4Muy bueno | 318 reseñas
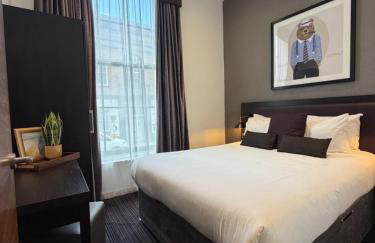
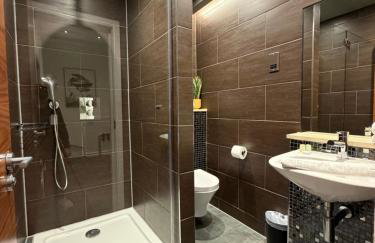
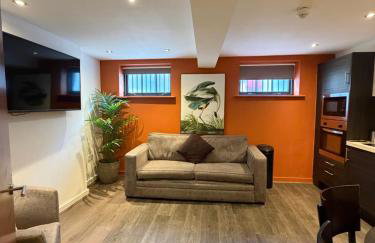
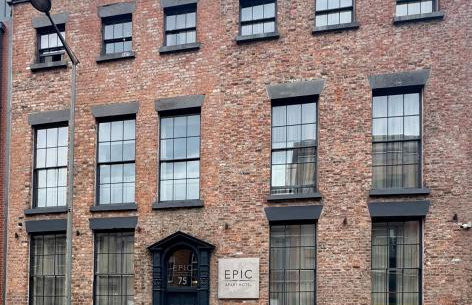
EPIC Apart Hotel, Duke Street, Central Liverpool Apartments Near Liverpool ONE - Foto 1
EPIC Apart Hotel, Duke Street, Central Liverpool Apartments Near Liverpool ONE - Foto 2
EPIC Apart Hotel, Duke Street, Central Liverpool Apartments Near Liverpool ONE - Foto 3
EPIC Apart Hotel, Duke Street, Central Liverpool Apartments Near Liverpool ONE - Foto 4
EPIC Apart Hotel, Duke Street, Central Liverpool Apartments Near Liverpool ONE - Foto 5
EPIC Apart Hotel, Duke Street, Central Liverpool Apartments Near Liverpool ONE - Foto 6
EPIC Apart Hotel, Duke Street, Central Liverpool Apartments Near Liverpool ONE - Foto 7
EPIC Apart Hotel, Duke Street, Central Liverpool Apartments Near Liverpool ONE - Foto 8
EPIC Apart Hotel, Duke Street, Central Liverpool Apartments Near Liverpool ONE - Foto 9
EPIC Apart Hotel, Duke Street, Central Liverpool Apartments Near Liverpool ONE - Foto 10
EPIC Apart Hotel, Duke Street, Central Liverpool Apartments Near Liverpool ONE - Foto 11
EPIC Apart Hotel, Duke Street, Central Liverpool Apartments Near Liverpool ONE - Foto 12
EPIC Apart Hotel, Duke Street, Central Liverpool Apartments Near Liverpool ONE - Foto 13
EPIC Apart Hotel, Duke Street, Central Liverpool Apartments Near Liverpool ONE - Foto 14
EPIC Apart Hotel, Duke Street, Central Liverpool Apartments Near Liverpool ONE - Foto 15
EPIC Apart Hotel, Duke Street, Central Liverpool Apartments Near Liverpool ONE - Foto 16
EPIC Apart Hotel, Duke Street, Central Liverpool Apartments Near Liverpool ONE - Foto 17
EPIC Apart Hotel, Duke Street, Central Liverpool Apartments Near Liverpool ONE - Foto 18
EPIC Apart Hotel, Duke Street, Central Liverpool Apartments Near Liverpool ONE - Foto 19
EPIC Apart Hotel, Duke Street, Central Liverpool Apartments Near Liverpool ONE - Foto 20
EPIC Apart Hotel, Duke Street, Central Liverpool Apartments Near Liverpool ONE - Foto 21
EPIC Apart Hotel, Duke Street, Central Liverpool Apartments Near Liverpool ONE - Foto 22
EPIC Apart Hotel, Duke Street, Central Liverpool Apartments Near Liverpool ONE - Foto 23
EPIC Apart Hotel, Duke Street, Central Liverpool Apartments Near Liverpool ONE - Foto 24
EPIC Apart Hotel, Duke Street, Central Liverpool Apartments Near Liverpool ONE - Foto 25
EPIC Apart Hotel, Duke Street, Central Liverpool Apartments Near Liverpool ONE - Foto 26
EPIC Apart Hotel, Duke Street, Central Liverpool Apartments Near Liverpool ONE - Foto 27
EPIC Apart Hotel, Duke Street, Central Liverpool Apartments Near Liverpool ONE - Foto 28
EPIC Apart Hotel, Duke Street, Central Liverpool Apartments Near Liverpool ONE - Foto 29
EPIC Apart Hotel, Duke Street, Central Liverpool Apartments Near Liverpool ONE - Foto 30
EPIC Apart Hotel, Duke Street, Central Liverpool Apartments Near Liverpool ONE - Foto 31
EPIC Apart Hotel, Duke Street, Central Liverpool Apartments Near Liverpool ONE - Foto 32
EPIC Apart Hotel, Duke Street, Central Liverpool Apartments Near Liverpool ONE - Foto 33
EPIC Apart Hotel, Duke Street, Central Liverpool Apartments Near Liverpool ONE - Foto 34
EPIC Apart Hotel, Duke Street, Central Liverpool Apartments Near Liverpool ONE - Foto 35
EPIC Apart Hotel, Duke Street, Central Liverpool Apartments Near Liverpool ONE - Foto 36
EPIC Apart Hotel, Duke Street, Central Liverpool Apartments Near Liverpool ONE - Foto 37
EPIC Apart Hotel, Duke Street, Central Liverpool Apartments Near Liverpool ONE - Foto 38
EPIC Apart Hotel, Duke Street, Central Liverpool Apartments Near Liverpool ONE - Foto 39
EPIC Apart Hotel, Duke Street, Central Liverpool Apartments Near Liverpool ONE - Foto 40
EPIC Apart Hotel, Duke Street, Central Liverpool Apartments Near Liverpool ONE - Foto 41
EPIC Apart Hotel, Duke Street, Central Liverpool Apartments Near Liverpool ONE - Foto 42
EPIC Apart Hotel, Duke Street, Central Liverpool Apartments Near Liverpool ONE - Foto 43
EPIC Apart Hotel, Duke Street, Central Liverpool Apartments Near Liverpool ONE - Foto 44
EPIC Apart Hotel, Duke Street, Central Liverpool Apartments Near Liverpool ONE - Foto 45
EPIC Apart Hotel, Duke Street, Central Liverpool Apartments Near Liverpool ONE - Foto 46
EPIC Apart Hotel, Duke Street, Central Liverpool Apartments Near Liverpool ONE - Foto 47
EPIC Apart Hotel, Duke Street, Central Liverpool Apartments Near Liverpool ONE - Foto 48
EPIC Apart Hotel, Duke Street, Central Liverpool Apartments Near Liverpool ONE - Foto 49
EPIC Apart Hotel, Duke Street, Central Liverpool Apartments Near Liverpool ONE - Foto 50
EPIC Apart Hotel, Duke Street, Central Liverpool Apartments Near Liverpool ONE - Foto 51
EPIC Apart Hotel, Duke Street, Central Liverpool Apartments Near Liverpool ONE - Foto 52
EPIC Apart Hotel, Duke Street, Central Liverpool Apartments Near Liverpool ONE - Foto 53
EPIC Apart Hotel, Duke Street, Central Liverpool Apartments Near Liverpool ONE - Foto 54
EPIC Apart Hotel, Duke Street, Central Liverpool Apartments Near Liverpool ONE - Foto 55
EPIC Apart Hotel, Duke Street, Central Liverpool Apartments Near Liverpool ONE - Foto 56
EPIC Apart Hotel, Duke Street, Central Liverpool Apartments Near Liverpool ONE - Foto 57
EPIC Apart Hotel, Duke Street, Central Liverpool Apartments Near Liverpool ONE - Foto 58
EPIC Apart Hotel, Duke Street, Central Liverpool Apartments Near Liverpool ONE - Foto 59
EPIC Apart Hotel, Duke Street, Central Liverpool Apartments Near Liverpool ONE - Foto 60
EPIC Apart Hotel, Duke Street, Central Liverpool Apartments Near Liverpool ONE - Foto 61
EPIC Apart Hotel, Duke Street, Central Liverpool Apartments Near Liverpool ONE - Foto 62
EPIC Apart Hotel, Duke Street, Central Liverpool Apartments Near Liverpool ONE - Foto 63
EPIC Apart Hotel, Duke Street, Central Liverpool Apartments Near Liverpool ONE - Foto 64
EPIC Apart Hotel, Duke Street, Central Liverpool Apartments Near Liverpool ONE - Foto 65
EPIC Apart Hotel, Duke Street, Central Liverpool Apartments Near Liverpool ONE - Foto 66
EPIC Apart Hotel, Duke Street, Central Liverpool Apartments Near Liverpool ONE - Foto 67
EPIC Apart Hotel, Duke Street, Central Liverpool Apartments Near Liverpool ONE - Foto 68
EPIC Apart Hotel, Duke Street, Central Liverpool Apartments Near Liverpool ONE - Foto 69
EPIC Apart Hotel, Duke Street, Central Liverpool Apartments Near Liverpool ONE - Foto 70
EPIC Apart Hotel, Duke Street, Central Liverpool Apartments Near Liverpool ONE - Foto 71
EPIC Apart Hotel, Duke Street, Central Liverpool Apartments Near Liverpool ONE - Foto 72
EPIC Apart Hotel, Duke Street, Central Liverpool Apartments Near Liverpool ONE - Foto 73
EPIC Apart Hotel, Duke Street, Central Liverpool Apartments Near Liverpool ONE - Foto 74
EPIC Apart Hotel, Duke Street, Central Liverpool Apartments Near Liverpool ONE - Foto 75
EPIC Apart Hotel, Duke Street, Central Liverpool Apartments Near Liverpool ONE - Foto 76
EPIC Apart Hotel, Duke Street, Central Liverpool Apartments Near Liverpool ONE - Foto 77
EPIC Apart Hotel, Duke Street, Central Liverpool Apartments Near Liverpool ONE - Foto 78
EPIC Apart Hotel, Duke Street, Central Liverpool Apartments Near Liverpool ONE - Foto 79
EPIC Apart Hotel, Duke Street, Central Liverpool Apartments Near Liverpool ONE - Foto 80
EPIC Apart Hotel, Duke Street, Central Liverpool Apartments Near Liverpool ONE - Foto 81
EPIC Apart Hotel, Duke Street, Central Liverpool Apartments Near Liverpool ONE - Foto 82
EPIC Apart Hotel, Duke Street, Central Liverpool Apartments Near Liverpool ONE - Foto 83
EPIC Apart Hotel, Duke Street, Central Liverpool Apartments Near Liverpool ONE - Foto 84
EPIC Apart Hotel, Duke Street, Central Liverpool Apartments Near Liverpool ONE - Foto 85
EPIC Apart Hotel, Duke Street, Central Liverpool Apartments Near Liverpool ONE - Foto 86
EPIC Apart Hotel, Duke Street, Central Liverpool Apartments Near Liverpool ONE - Foto 87
EPIC Apart Hotel, Duke Street, Central Liverpool Apartments Near Liverpool ONE - Foto 88
EPIC Apart Hotel, Duke Street, Central Liverpool Apartments Near Liverpool ONE - Foto 89
EPIC Apart Hotel, Duke Street, Central Liverpool Apartments Near Liverpool ONE - Foto 90
EPIC Apart Hotel, Duke Street, Central Liverpool Apartments Near Liverpool ONE - Foto 91
EPIC Apart Hotel, Duke Street, Central Liverpool Apartments Near Liverpool ONE - Foto 92
EPIC Apart Hotel, Duke Street, Central Liverpool Apartments Near Liverpool ONE - Foto 93

EPIC Apart Hotel, Duke Street, Central Liverpool Apartments Near Liverpool ONE

Liverpool - Ropewalks - A 330 m del centro

  • 70 M2
  • 2 habitaciones
  • 10 personas
  • Calefacción
  • Parking
  • Ascensor
  • Televisión
  • Toallas
  • Sábanas
8.2Muy bueno | 534 reseñas
Host & Stay - Henry Street Chambers - Foto 1
Host & Stay - Henry Street Chambers - Foto 2
Host & Stay - Henry Street Chambers - Foto 3
Host & Stay - Henry Street Chambers - Foto 4
Host & Stay - Henry Street Chambers - Foto 5
Host & Stay - Henry Street Chambers - Foto 6
Host & Stay - Henry Street Chambers - Foto 7
Host & Stay - Henry Street Chambers - Foto 8
Host & Stay - Henry Street Chambers - Foto 9
Host & Stay - Henry Street Chambers - Foto 10
Host & Stay - Henry Street Chambers - Foto 11
Host & Stay - Henry Street Chambers - Foto 12
Host & Stay - Henry Street Chambers - Foto 13
Host & Stay - Henry Street Chambers - Foto 14
Host & Stay - Henry Street Chambers - Foto 15
Host & Stay - Henry Street Chambers - Foto 16
Host & Stay - Henry Street Chambers - Foto 17
Host & Stay - Henry Street Chambers - Foto 18
Host & Stay - Henry Street Chambers - Foto 19
Host & Stay - Henry Street Chambers - Foto 20
Host & Stay - Henry Street Chambers - Foto 21
Host & Stay - Henry Street Chambers - Foto 22
Host & Stay - Henry Street Chambers - Foto 23
Host & Stay - Henry Street Chambers - Foto 24
Host & Stay - Henry Street Chambers - Foto 25
Host & Stay - Henry Street Chambers - Foto 26
Host & Stay - Henry Street Chambers - Foto 27
Host & Stay - Henry Street Chambers - Foto 28
Host & Stay - Henry Street Chambers - Foto 29
Host & Stay - Henry Street Chambers - Foto 30
Host & Stay - Henry Street Chambers - Foto 31
Host & Stay - Henry Street Chambers - Foto 32
Host & Stay - Henry Street Chambers - Foto 33
Host & Stay - Henry Street Chambers - Foto 34
Host & Stay - Henry Street Chambers - Foto 35
Host & Stay - Henry Street Chambers - Foto 36
Host & Stay - Henry Street Chambers - Foto 37
Host & Stay - Henry Street Chambers - Foto 38
Host & Stay - Henry Street Chambers - Foto 39
Host & Stay - Henry Street Chambers - Foto 40

Host & Stay - Henry Street Chambers

Liverpool - Ropewalks - A 560 m del centro

  • 77 M2
  • 2 habitaciones
  • 6 personas
  • Calefacción
  • Ascensor
  • Televisión
  • Lavadora
  • Toallas
  • Sábanas
8.2Muy bueno | 51 reseñas
Impressive 1 Bed Apartment - Chavasse Apartments - Foto 1
Impressive 1 Bed Apartment - Chavasse Apartments - Foto 2
Impressive 1 Bed Apartment - Chavasse Apartments - Foto 3
Impressive 1 Bed Apartment - Chavasse Apartments - Foto 4
Impressive 1 Bed Apartment - Chavasse Apartments - Foto 5
Impressive 1 Bed Apartment - Chavasse Apartments - Foto 6
Impressive 1 Bed Apartment - Chavasse Apartments - Foto 7
Impressive 1 Bed Apartment - Chavasse Apartments - Foto 8
Impressive 1 Bed Apartment - Chavasse Apartments - Foto 9
Impressive 1 Bed Apartment - Chavasse Apartments - Foto 10
Impressive 1 Bed Apartment - Chavasse Apartments - Foto 11
Impressive 1 Bed Apartment - Chavasse Apartments - Foto 12
Impressive 1 Bed Apartment - Chavasse Apartments - Foto 13
Impressive 1 Bed Apartment - Chavasse Apartments - Foto 14
Impressive 1 Bed Apartment - Chavasse Apartments - Foto 15
Impressive 1 Bed Apartment - Chavasse Apartments - Foto 16
Impressive 1 Bed Apartment - Chavasse Apartments - Foto 17

Impressive 1 Bed Apartment - Chavasse Apartments

Liverpool - Ropewalks - A 540 m del centro

10Magnífico | 2 reseñas
Host & Stay - Campbell Square Roof Terrace Apartment - Foto 1
Host & Stay - Campbell Square Roof Terrace Apartment - Foto 2
Host & Stay - Campbell Square Roof Terrace Apartment - Foto 3
Host & Stay - Campbell Square Roof Terrace Apartment - Foto 4
Host & Stay - Campbell Square Roof Terrace Apartment - Foto 5
Host & Stay - Campbell Square Roof Terrace Apartment - Foto 6
Host & Stay - Campbell Square Roof Terrace Apartment - Foto 7
Host & Stay - Campbell Square Roof Terrace Apartment - Foto 8
Host & Stay - Campbell Square Roof Terrace Apartment - Foto 9
Host & Stay - Campbell Square Roof Terrace Apartment - Foto 10
Host & Stay - Campbell Square Roof Terrace Apartment - Foto 11
Host & Stay - Campbell Square Roof Terrace Apartment - Foto 12
Host & Stay - Campbell Square Roof Terrace Apartment - Foto 13
Host & Stay - Campbell Square Roof Terrace Apartment - Foto 14
Host & Stay - Campbell Square Roof Terrace Apartment - Foto 15
Host & Stay - Campbell Square Roof Terrace Apartment - Foto 16
Host & Stay - Campbell Square Roof Terrace Apartment - Foto 17
Host & Stay - Campbell Square Roof Terrace Apartment - Foto 18
Host & Stay - Campbell Square Roof Terrace Apartment - Foto 19
Host & Stay - Campbell Square Roof Terrace Apartment - Foto 20
Host & Stay - Campbell Square Roof Terrace Apartment - Foto 21
Host & Stay - Campbell Square Roof Terrace Apartment - Foto 22
Host & Stay - Campbell Square Roof Terrace Apartment - Foto 23
Host & Stay - Campbell Square Roof Terrace Apartment - Foto 24
Host & Stay - Campbell Square Roof Terrace Apartment - Foto 25
Host & Stay - Campbell Square Roof Terrace Apartment - Foto 26
Host & Stay - Campbell Square Roof Terrace Apartment - Foto 27
Host & Stay - Campbell Square Roof Terrace Apartment - Foto 28
Host & Stay - Campbell Square Roof Terrace Apartment - Foto 29
Host & Stay - Campbell Square Roof Terrace Apartment - Foto 30
Host & Stay - Campbell Square Roof Terrace Apartment - Foto 31
Host & Stay - Campbell Square Roof Terrace Apartment - Foto 32
Host & Stay - Campbell Square Roof Terrace Apartment - Foto 33
Host & Stay - Campbell Square Roof Terrace Apartment - Foto 34
Host & Stay - Campbell Square Roof Terrace Apartment - Foto 35
Host & Stay - Campbell Square Roof Terrace Apartment - Foto 36
Host & Stay - Campbell Square Roof Terrace Apartment - Foto 37
Host & Stay - Campbell Square Roof Terrace Apartment - Foto 38
Host & Stay - Campbell Square Roof Terrace Apartment - Foto 39
Host & Stay - Campbell Square Roof Terrace Apartment - Foto 40
Host & Stay - Campbell Square Roof Terrace Apartment - Foto 41
Host & Stay - Campbell Square Roof Terrace Apartment - Foto 42
Host & Stay - Campbell Square Roof Terrace Apartment - Foto 43
Host & Stay - Campbell Square Roof Terrace Apartment - Foto 44
Host & Stay - Campbell Square Roof Terrace Apartment - Foto 45
Host & Stay - Campbell Square Roof Terrace Apartment - Foto 46
Host & Stay - Campbell Square Roof Terrace Apartment - Foto 47
Host & Stay - Campbell Square Roof Terrace Apartment - Foto 48
Host & Stay - Campbell Square Roof Terrace Apartment - Foto 49
Host & Stay - Campbell Square Roof Terrace Apartment - Foto 50
Host & Stay - Campbell Square Roof Terrace Apartment - Foto 51
Host & Stay - Campbell Square Roof Terrace Apartment - Foto 52
Host & Stay - Campbell Square Roof Terrace Apartment - Foto 53
Host & Stay - Campbell Square Roof Terrace Apartment - Foto 54
Host & Stay - Campbell Square Roof Terrace Apartment - Foto 55
Host & Stay - Campbell Square Roof Terrace Apartment - Foto 56

Host & Stay - Campbell Square Roof Terrace Apartment

Liverpool - Ropewalks - A 520 m del centro

  • 5 M2
  • 1 habitación
  • 4 personas
  • Calefacción
  • Balcón
  • Televisión
  • Toallas
  • Sábanas
8.2Muy bueno | 55 reseñas
2 Bedroom Apartment - Henry St Central Liverpool - Foto 1
2 Bedroom Apartment - Henry St Central Liverpool - Foto 2
2 Bedroom Apartment - Henry St Central Liverpool - Foto 3
2 Bedroom Apartment - Henry St Central Liverpool - Foto 4
2 Bedroom Apartment - Henry St Central Liverpool - Foto 5
2 Bedroom Apartment - Henry St Central Liverpool - Foto 6
2 Bedroom Apartment - Henry St Central Liverpool - Foto 7
2 Bedroom Apartment - Henry St Central Liverpool - Foto 8
2 Bedroom Apartment - Henry St Central Liverpool - Foto 9
2 Bedroom Apartment - Henry St Central Liverpool - Foto 10
2 Bedroom Apartment - Henry St Central Liverpool - Foto 11
2 Bedroom Apartment - Henry St Central Liverpool - Foto 12
2 Bedroom Apartment - Henry St Central Liverpool - Foto 13
2 Bedroom Apartment - Henry St Central Liverpool - Foto 14
2 Bedroom Apartment - Henry St Central Liverpool - Foto 15
2 Bedroom Apartment - Henry St Central Liverpool - Foto 16
2 Bedroom Apartment - Henry St Central Liverpool - Foto 17
2 Bedroom Apartment - Henry St Central Liverpool - Foto 18
2 Bedroom Apartment - Henry St Central Liverpool - Foto 19
2 Bedroom Apartment - Henry St Central Liverpool - Foto 20
2 Bedroom Apartment - Henry St Central Liverpool - Foto 21
2 Bedroom Apartment - Henry St Central Liverpool - Foto 22
2 Bedroom Apartment - Henry St Central Liverpool - Foto 23
2 Bedroom Apartment - Henry St Central Liverpool - Foto 24
2 Bedroom Apartment - Henry St Central Liverpool - Foto 25
2 Bedroom Apartment - Henry St Central Liverpool - Foto 26

2 Bedroom Apartment - Henry St Central Liverpool

Liverpool - Ropewalks - A 570 m del centro

  • 865 M2
  • 2 habitaciones
  • 4 personas
  • Calefacción
  • Ascensor
9.5Excepcional | 73 reseñas
Concert Square - Party Apartment in Liverpool City Centre - Foto 1
Concert Square - Party Apartment in Liverpool City Centre - Foto 2
Concert Square - Party Apartment in Liverpool City Centre - Foto 3
Concert Square - Party Apartment in Liverpool City Centre - Foto 4
Concert Square - Party Apartment in Liverpool City Centre - Foto 5
Concert Square - Party Apartment in Liverpool City Centre - Foto 6
Concert Square - Party Apartment in Liverpool City Centre - Foto 7
Concert Square - Party Apartment in Liverpool City Centre - Foto 8
Concert Square - Party Apartment in Liverpool City Centre - Foto 9
Concert Square - Party Apartment in Liverpool City Centre - Foto 10
Concert Square - Party Apartment in Liverpool City Centre - Foto 11
Concert Square - Party Apartment in Liverpool City Centre - Foto 12
Concert Square - Party Apartment in Liverpool City Centre - Foto 13
Concert Square - Party Apartment in Liverpool City Centre - Foto 14
Concert Square - Party Apartment in Liverpool City Centre - Foto 15
Concert Square - Party Apartment in Liverpool City Centre - Foto 16
Concert Square - Party Apartment in Liverpool City Centre - Foto 17
Concert Square - Party Apartment in Liverpool City Centre - Foto 18
Concert Square - Party Apartment in Liverpool City Centre - Foto 19
Concert Square - Party Apartment in Liverpool City Centre - Foto 20
Concert Square - Party Apartment in Liverpool City Centre - Foto 21
Concert Square - Party Apartment in Liverpool City Centre - Foto 22
Concert Square - Party Apartment in Liverpool City Centre - Foto 23
Concert Square - Party Apartment in Liverpool City Centre - Foto 24
Concert Square - Party Apartment in Liverpool City Centre - Foto 25
Concert Square - Party Apartment in Liverpool City Centre - Foto 26
Concert Square - Party Apartment in Liverpool City Centre - Foto 27
Concert Square - Party Apartment in Liverpool City Centre - Foto 28
Concert Square - Party Apartment in Liverpool City Centre - Foto 29
Concert Square - Party Apartment in Liverpool City Centre - Foto 30
Concert Square - Party Apartment in Liverpool City Centre - Foto 31
Concert Square - Party Apartment in Liverpool City Centre - Foto 32
Concert Square - Party Apartment in Liverpool City Centre - Foto 33
Concert Square - Party Apartment in Liverpool City Centre - Foto 34
Concert Square - Party Apartment in Liverpool City Centre - Foto 35
Concert Square - Party Apartment in Liverpool City Centre - Foto 36
Concert Square - Party Apartment in Liverpool City Centre - Foto 37
Concert Square - Party Apartment in Liverpool City Centre - Foto 38
Concert Square - Party Apartment in Liverpool City Centre - Foto 39
Concert Square - Party Apartment in Liverpool City Centre - Foto 40
Concert Square - Party Apartment in Liverpool City Centre - Foto 41
Concert Square - Party Apartment in Liverpool City Centre - Foto 42
Concert Square - Party Apartment in Liverpool City Centre - Foto 43
Concert Square - Party Apartment in Liverpool City Centre - Foto 44
Concert Square - Party Apartment in Liverpool City Centre - Foto 45
Concert Square - Party Apartment in Liverpool City Centre - Foto 46
Concert Square - Party Apartment in Liverpool City Centre - Foto 47
Concert Square - Party Apartment in Liverpool City Centre - Foto 48
Concert Square - Party Apartment in Liverpool City Centre - Foto 49
Concert Square - Party Apartment in Liverpool City Centre - Foto 50
Concert Square - Party Apartment in Liverpool City Centre - Foto 51
Concert Square - Party Apartment in Liverpool City Centre - Foto 52
Concert Square - Party Apartment in Liverpool City Centre - Foto 53
Concert Square - Party Apartment in Liverpool City Centre - Foto 54
Concert Square - Party Apartment in Liverpool City Centre - Foto 55
Concert Square - Party Apartment in Liverpool City Centre - Foto 56
Concert Square - Party Apartment in Liverpool City Centre - Foto 57
Concert Square - Party Apartment in Liverpool City Centre - Foto 58
Concert Square - Party Apartment in Liverpool City Centre - Foto 59
Concert Square - Party Apartment in Liverpool City Centre - Foto 60
Concert Square - Party Apartment in Liverpool City Centre - Foto 61
Concert Square - Party Apartment in Liverpool City Centre - Foto 62
Concert Square - Party Apartment in Liverpool City Centre - Foto 63
Concert Square - Party Apartment in Liverpool City Centre - Foto 64
Concert Square - Party Apartment in Liverpool City Centre - Foto 65
Concert Square - Party Apartment in Liverpool City Centre - Foto 66
Concert Square - Party Apartment in Liverpool City Centre - Foto 67
Concert Square - Party Apartment in Liverpool City Centre - Foto 68
Concert Square - Party Apartment in Liverpool City Centre - Foto 69

Concert Square - Party Apartment in Liverpool City Centre

Liverpool - Ropewalks - A 330 m del centro

  • 160 M2
  • 7 habitaciones
  • 16 personas
  • Calefacción
9.8Excepcional | 10 reseñas
Rustic 2BR Loft Exposed Brick & Beams - Foto 1
Rustic 2BR Loft Exposed Brick & Beams - Foto 2
Rustic 2BR Loft Exposed Brick & Beams - Foto 3
Rustic 2BR Loft Exposed Brick & Beams - Foto 4
Rustic 2BR Loft Exposed Brick & Beams - Foto 5
Rustic 2BR Loft Exposed Brick & Beams - Foto 6
Rustic 2BR Loft Exposed Brick & Beams - Foto 7
Rustic 2BR Loft Exposed Brick & Beams - Foto 8
Rustic 2BR Loft Exposed Brick & Beams - Foto 9
Rustic 2BR Loft Exposed Brick & Beams - Foto 10
Rustic 2BR Loft Exposed Brick & Beams - Foto 11
Rustic 2BR Loft Exposed Brick & Beams - Foto 12

Rustic 2BR Loft Exposed Brick & Beams

Liverpool - Ropewalks - A 530 m del centro

  • 93 M2
  • 2 habitaciones
  • 4 personas
  • Calefacción
9.8Excepcional | 16 reseñas
EPIC Duke Street Townhouse, City Centre Apartments - Foto 1
EPIC Duke Street Townhouse, City Centre Apartments - Foto 2
EPIC Duke Street Townhouse, City Centre Apartments - Foto 3
EPIC Duke Street Townhouse, City Centre Apartments - Foto 4
EPIC Duke Street Townhouse, City Centre Apartments - Foto 5
EPIC Duke Street Townhouse, City Centre Apartments - Foto 6
EPIC Duke Street Townhouse, City Centre Apartments - Foto 7
EPIC Duke Street Townhouse, City Centre Apartments - Foto 8
EPIC Duke Street Townhouse, City Centre Apartments - Foto 9
EPIC Duke Street Townhouse, City Centre Apartments - Foto 10
EPIC Duke Street Townhouse, City Centre Apartments - Foto 11
EPIC Duke Street Townhouse, City Centre Apartments - Foto 12
EPIC Duke Street Townhouse, City Centre Apartments - Foto 13
EPIC Duke Street Townhouse, City Centre Apartments - Foto 14
EPIC Duke Street Townhouse, City Centre Apartments - Foto 15
EPIC Duke Street Townhouse, City Centre Apartments - Foto 16
EPIC Duke Street Townhouse, City Centre Apartments - Foto 17
EPIC Duke Street Townhouse, City Centre Apartments - Foto 18
EPIC Duke Street Townhouse, City Centre Apartments - Foto 19
EPIC Duke Street Townhouse, City Centre Apartments - Foto 20
EPIC Duke Street Townhouse, City Centre Apartments - Foto 21
EPIC Duke Street Townhouse, City Centre Apartments - Foto 22
EPIC Duke Street Townhouse, City Centre Apartments - Foto 23
EPIC Duke Street Townhouse, City Centre Apartments - Foto 24
EPIC Duke Street Townhouse, City Centre Apartments - Foto 25
EPIC Duke Street Townhouse, City Centre Apartments - Foto 26
EPIC Duke Street Townhouse, City Centre Apartments - Foto 27
EPIC Duke Street Townhouse, City Centre Apartments - Foto 28
EPIC Duke Street Townhouse, City Centre Apartments - Foto 29
EPIC Duke Street Townhouse, City Centre Apartments - Foto 30
EPIC Duke Street Townhouse, City Centre Apartments - Foto 31
EPIC Duke Street Townhouse, City Centre Apartments - Foto 32
EPIC Duke Street Townhouse, City Centre Apartments - Foto 33
EPIC Duke Street Townhouse, City Centre Apartments - Foto 34
EPIC Duke Street Townhouse, City Centre Apartments - Foto 35
EPIC Duke Street Townhouse, City Centre Apartments - Foto 36
EPIC Duke Street Townhouse, City Centre Apartments - Foto 37
EPIC Duke Street Townhouse, City Centre Apartments - Foto 38
EPIC Duke Street Townhouse, City Centre Apartments - Foto 39
EPIC Duke Street Townhouse, City Centre Apartments - Foto 40
EPIC Duke Street Townhouse, City Centre Apartments - Foto 41
EPIC Duke Street Townhouse, City Centre Apartments - Foto 42
EPIC Duke Street Townhouse, City Centre Apartments - Foto 43
EPIC Duke Street Townhouse, City Centre Apartments - Foto 44
EPIC Duke Street Townhouse, City Centre Apartments - Foto 45
EPIC Duke Street Townhouse, City Centre Apartments - Foto 46
EPIC Duke Street Townhouse, City Centre Apartments - Foto 47
EPIC Duke Street Townhouse, City Centre Apartments - Foto 48
EPIC Duke Street Townhouse, City Centre Apartments - Foto 49
EPIC Duke Street Townhouse, City Centre Apartments - Foto 50
EPIC Duke Street Townhouse, City Centre Apartments - Foto 51
EPIC Duke Street Townhouse, City Centre Apartments - Foto 52
EPIC Duke Street Townhouse, City Centre Apartments - Foto 53
EPIC Duke Street Townhouse, City Centre Apartments - Foto 54
EPIC Duke Street Townhouse, City Centre Apartments - Foto 55
EPIC Duke Street Townhouse, City Centre Apartments - Foto 56
EPIC Duke Street Townhouse, City Centre Apartments - Foto 57
EPIC Duke Street Townhouse, City Centre Apartments - Foto 58
EPIC Duke Street Townhouse, City Centre Apartments - Foto 59
EPIC Duke Street Townhouse, City Centre Apartments - Foto 60
EPIC Duke Street Townhouse, City Centre Apartments - Foto 61
EPIC Duke Street Townhouse, City Centre Apartments - Foto 62
EPIC Duke Street Townhouse, City Centre Apartments - Foto 63
EPIC Duke Street Townhouse, City Centre Apartments - Foto 64
EPIC Duke Street Townhouse, City Centre Apartments - Foto 65
EPIC Duke Street Townhouse, City Centre Apartments - Foto 66
EPIC Duke Street Townhouse, City Centre Apartments - Foto 67
EPIC Duke Street Townhouse, City Centre Apartments - Foto 68
EPIC Duke Street Townhouse, City Centre Apartments - Foto 69
EPIC Duke Street Townhouse, City Centre Apartments - Foto 70
EPIC Duke Street Townhouse, City Centre Apartments - Foto 71
EPIC Duke Street Townhouse, City Centre Apartments - Foto 72
EPIC Duke Street Townhouse, City Centre Apartments - Foto 73
EPIC Duke Street Townhouse, City Centre Apartments - Foto 74
EPIC Duke Street Townhouse, City Centre Apartments - Foto 75
EPIC Duke Street Townhouse, City Centre Apartments - Foto 76
EPIC Duke Street Townhouse, City Centre Apartments - Foto 77

EPIC Duke Street Townhouse, City Centre Apartments

Liverpool - Ropewalks - A 530 m del centro

  • 65 M2
  • 2 habitaciones
  • 8 personas
  • Calefacción
  • Parking
  • Ascensor
  • Televisión
  • Toallas
  • Sábanas
7.8Bueno | 140 reseñas
City Centre Luxury Apartment - Foto 1
City Centre Luxury Apartment - Foto 2
City Centre Luxury Apartment - Foto 3
City Centre Luxury Apartment - Foto 4
City Centre Luxury Apartment - Foto 5
City Centre Luxury Apartment - Foto 6
City Centre Luxury Apartment - Foto 7
City Centre Luxury Apartment - Foto 8
City Centre Luxury Apartment - Foto 9
City Centre Luxury Apartment - Foto 10
City Centre Luxury Apartment - Foto 11
City Centre Luxury Apartment - Foto 12
City Centre Luxury Apartment - Foto 13
City Centre Luxury Apartment - Foto 14
City Centre Luxury Apartment - Foto 15
City Centre Luxury Apartment - Foto 16
City Centre Luxury Apartment - Foto 17
City Centre Luxury Apartment - Foto 18
City Centre Luxury Apartment - Foto 19
City Centre Luxury Apartment - Foto 20
City Centre Luxury Apartment - Foto 21
City Centre Luxury Apartment - Foto 22
City Centre Luxury Apartment - Foto 23
City Centre Luxury Apartment - Foto 24
City Centre Luxury Apartment - Foto 25
City Centre Luxury Apartment - Foto 26
City Centre Luxury Apartment - Foto 27
City Centre Luxury Apartment - Foto 28
City Centre Luxury Apartment - Foto 29
City Centre Luxury Apartment - Foto 30

City Centre Luxury Apartment

Liverpool - Ropewalks - A 360 m del centro

  • 106 M2
  • 2 habitaciones
  • 8 personas
  • Calefacción
9.7Excepcional | 6 reseñas
Centrally located apartment in Duke Street- free parking- two bathrooms - Foto 1
Centrally located apartment in Duke Street- free parking- two bathrooms - Foto 2
Centrally located apartment in Duke Street- free parking- two bathrooms - Foto 3
Centrally located apartment in Duke Street- free parking- two bathrooms - Foto 4
Centrally located apartment in Duke Street- free parking- two bathrooms - Foto 5
Centrally located apartment in Duke Street- free parking- two bathrooms - Foto 6
Centrally located apartment in Duke Street- free parking- two bathrooms - Foto 7
Centrally located apartment in Duke Street- free parking- two bathrooms - Foto 8
Centrally located apartment in Duke Street- free parking- two bathrooms - Foto 9
Centrally located apartment in Duke Street- free parking- two bathrooms - Foto 10
Centrally located apartment in Duke Street- free parking- two bathrooms - Foto 11
Centrally located apartment in Duke Street- free parking- two bathrooms - Foto 12
Centrally located apartment in Duke Street- free parking- two bathrooms - Foto 13
Centrally located apartment in Duke Street- free parking- two bathrooms - Foto 14
Centrally located apartment in Duke Street- free parking- two bathrooms - Foto 15
Centrally located apartment in Duke Street- free parking- two bathrooms - Foto 16
Centrally located apartment in Duke Street- free parking- two bathrooms - Foto 17
Centrally located apartment in Duke Street- free parking- two bathrooms - Foto 18

Centrally located apartment in Duke Street- free parking- two bathrooms

Liverpool - Ropewalks - A 580 m del centro

  • 75 M2
  • 2 habitaciones
  • 5 personas
  • Calefacción
  • Parking
  • Ascensor
9.3Excepcional | 90 reseñas
Campbell Square Apartment 3 - Foto 1
Campbell Square Apartment 3 - Foto 2
Campbell Square Apartment 3 - Foto 3
Campbell Square Apartment 3 - Foto 4
Campbell Square Apartment 3 - Foto 5
Campbell Square Apartment 3 - Foto 6
Campbell Square Apartment 3 - Foto 7
Campbell Square Apartment 3 - Foto 8
Campbell Square Apartment 3 - Foto 9
Campbell Square Apartment 3 - Foto 10
Campbell Square Apartment 3 - Foto 11
Campbell Square Apartment 3 - Foto 12
Campbell Square Apartment 3 - Foto 13
Campbell Square Apartment 3 - Foto 14
Campbell Square Apartment 3 - Foto 15
Campbell Square Apartment 3 - Foto 16
Campbell Square Apartment 3 - Foto 17
Campbell Square Apartment 3 - Foto 18
Campbell Square Apartment 3 - Foto 19
Campbell Square Apartment 3 - Foto 20

Campbell Square Apartment 3

Liverpool - Ropewalks - A 510 m del centro

  • 12 M2
  • 1 habitación
  • 6 personas
  • Calefacción
  • Terraza
  • Jardín
9.2Excepcional | 92 reseñas
The Bloc - Concert Square - Party Apartments - Foto 1
The Bloc - Concert Square - Party Apartments - Foto 2
The Bloc - Concert Square - Party Apartments - Foto 3
The Bloc - Concert Square - Party Apartments - Foto 4
The Bloc - Concert Square - Party Apartments - Foto 5
The Bloc - Concert Square - Party Apartments - Foto 6
The Bloc - Concert Square - Party Apartments - Foto 7
The Bloc - Concert Square - Party Apartments - Foto 8
The Bloc - Concert Square - Party Apartments - Foto 9
The Bloc - Concert Square - Party Apartments - Foto 10
The Bloc - Concert Square - Party Apartments - Foto 11
The Bloc - Concert Square - Party Apartments - Foto 12
The Bloc - Concert Square - Party Apartments - Foto 13
The Bloc - Concert Square - Party Apartments - Foto 14
The Bloc - Concert Square - Party Apartments - Foto 15
The Bloc - Concert Square - Party Apartments - Foto 16
The Bloc - Concert Square - Party Apartments - Foto 17
The Bloc - Concert Square - Party Apartments - Foto 18
The Bloc - Concert Square - Party Apartments - Foto 19
The Bloc - Concert Square - Party Apartments - Foto 20
The Bloc - Concert Square - Party Apartments - Foto 21
The Bloc - Concert Square - Party Apartments - Foto 22
The Bloc - Concert Square - Party Apartments - Foto 23
The Bloc - Concert Square - Party Apartments - Foto 24
The Bloc - Concert Square - Party Apartments - Foto 25
The Bloc - Concert Square - Party Apartments - Foto 26
The Bloc - Concert Square - Party Apartments - Foto 27
The Bloc - Concert Square - Party Apartments - Foto 28
The Bloc - Concert Square - Party Apartments - Foto 29
The Bloc - Concert Square - Party Apartments - Foto 30
The Bloc - Concert Square - Party Apartments - Foto 31
The Bloc - Concert Square - Party Apartments - Foto 32
The Bloc - Concert Square - Party Apartments - Foto 33
The Bloc - Concert Square - Party Apartments - Foto 34
The Bloc - Concert Square - Party Apartments - Foto 35
The Bloc - Concert Square - Party Apartments - Foto 36
The Bloc - Concert Square - Party Apartments - Foto 37
The Bloc - Concert Square - Party Apartments - Foto 38
The Bloc - Concert Square - Party Apartments - Foto 39
The Bloc - Concert Square - Party Apartments - Foto 40
The Bloc - Concert Square - Party Apartments - Foto 41
The Bloc - Concert Square - Party Apartments - Foto 42
The Bloc - Concert Square - Party Apartments - Foto 43
The Bloc - Concert Square - Party Apartments - Foto 44
The Bloc - Concert Square - Party Apartments - Foto 45
The Bloc - Concert Square - Party Apartments - Foto 46
The Bloc - Concert Square - Party Apartments - Foto 47
The Bloc - Concert Square - Party Apartments - Foto 48
The Bloc - Concert Square - Party Apartments - Foto 49
The Bloc - Concert Square - Party Apartments - Foto 50
The Bloc - Concert Square - Party Apartments - Foto 51
The Bloc - Concert Square - Party Apartments - Foto 52
The Bloc - Concert Square - Party Apartments - Foto 53
The Bloc - Concert Square - Party Apartments - Foto 54
The Bloc - Concert Square - Party Apartments - Foto 55
The Bloc - Concert Square - Party Apartments - Foto 56
The Bloc - Concert Square - Party Apartments - Foto 57
The Bloc - Concert Square - Party Apartments - Foto 58
The Bloc - Concert Square - Party Apartments - Foto 59
The Bloc - Concert Square - Party Apartments - Foto 60
The Bloc - Concert Square - Party Apartments - Foto 61
The Bloc - Concert Square - Party Apartments - Foto 62
The Bloc - Concert Square - Party Apartments - Foto 63

The Bloc - Concert Square - Party Apartments

Liverpool - Ropewalks - A 300 m del centro

  • 110 M2
  • 4 habitaciones
  • 18 personas
  • Calefacción
9.5Excepcional | 22 reseñas
Tunnage Square Apartments by EPIC - Liverpool ONE - Foto 1
Tunnage Square Apartments by EPIC - Liverpool ONE - Foto 2
Tunnage Square Apartments by EPIC - Liverpool ONE - Foto 3
Tunnage Square Apartments by EPIC - Liverpool ONE - Foto 4
Tunnage Square Apartments by EPIC - Liverpool ONE - Foto 5
Tunnage Square Apartments by EPIC - Liverpool ONE - Foto 6
Tunnage Square Apartments by EPIC - Liverpool ONE - Foto 7
Tunnage Square Apartments by EPIC - Liverpool ONE - Foto 8
Tunnage Square Apartments by EPIC - Liverpool ONE - Foto 9
Tunnage Square Apartments by EPIC - Liverpool ONE - Foto 10
Tunnage Square Apartments by EPIC - Liverpool ONE - Foto 11
Tunnage Square Apartments by EPIC - Liverpool ONE - Foto 12
Tunnage Square Apartments by EPIC - Liverpool ONE - Foto 13
Tunnage Square Apartments by EPIC - Liverpool ONE - Foto 14
Tunnage Square Apartments by EPIC - Liverpool ONE - Foto 15
Tunnage Square Apartments by EPIC - Liverpool ONE - Foto 16
Tunnage Square Apartments by EPIC - Liverpool ONE - Foto 17
Tunnage Square Apartments by EPIC - Liverpool ONE - Foto 18
Tunnage Square Apartments by EPIC - Liverpool ONE - Foto 19
Tunnage Square Apartments by EPIC - Liverpool ONE - Foto 20
Tunnage Square Apartments by EPIC - Liverpool ONE - Foto 21
Tunnage Square Apartments by EPIC - Liverpool ONE - Foto 22
Tunnage Square Apartments by EPIC - Liverpool ONE - Foto 23
Tunnage Square Apartments by EPIC - Liverpool ONE - Foto 24
Tunnage Square Apartments by EPIC - Liverpool ONE - Foto 25
Tunnage Square Apartments by EPIC - Liverpool ONE - Foto 26
Tunnage Square Apartments by EPIC - Liverpool ONE - Foto 27
Tunnage Square Apartments by EPIC - Liverpool ONE - Foto 28
Tunnage Square Apartments by EPIC - Liverpool ONE - Foto 29
Tunnage Square Apartments by EPIC - Liverpool ONE - Foto 30
Tunnage Square Apartments by EPIC - Liverpool ONE - Foto 31
Tunnage Square Apartments by EPIC - Liverpool ONE - Foto 32
Tunnage Square Apartments by EPIC - Liverpool ONE - Foto 33
Tunnage Square Apartments by EPIC - Liverpool ONE - Foto 34
Tunnage Square Apartments by EPIC - Liverpool ONE - Foto 35
Tunnage Square Apartments by EPIC - Liverpool ONE - Foto 36
Tunnage Square Apartments by EPIC - Liverpool ONE - Foto 37
Tunnage Square Apartments by EPIC - Liverpool ONE - Foto 38
Tunnage Square Apartments by EPIC - Liverpool ONE - Foto 39
Tunnage Square Apartments by EPIC - Liverpool ONE - Foto 40
Tunnage Square Apartments by EPIC - Liverpool ONE - Foto 41

Tunnage Square Apartments by EPIC - Liverpool ONE

Liverpool - Ropewalks - A 440 m del centro

  • 45 M2
  • 1 habitación
  • 5 personas
  • Calefacción
  • Parking
  • Ascensor
  • Televisión
  • Lavadora
  • Toallas
  • Sábanas
8.3Muy bueno | 693 reseñas
City Centre Flat by Restaurants with Free Parking - Foto 1
City Centre Flat by Restaurants with Free Parking - Foto 2
City Centre Flat by Restaurants with Free Parking - Foto 3
City Centre Flat by Restaurants with Free Parking - Foto 4
City Centre Flat by Restaurants with Free Parking - Foto 5
City Centre Flat by Restaurants with Free Parking - Foto 6
City Centre Flat by Restaurants with Free Parking - Foto 7
City Centre Flat by Restaurants with Free Parking - Foto 8
City Centre Flat by Restaurants with Free Parking - Foto 9
City Centre Flat by Restaurants with Free Parking - Foto 10
City Centre Flat by Restaurants with Free Parking - Foto 11
City Centre Flat by Restaurants with Free Parking - Foto 12
City Centre Flat by Restaurants with Free Parking - Foto 13
City Centre Flat by Restaurants with Free Parking - Foto 14
City Centre Flat by Restaurants with Free Parking - Foto 15
City Centre Flat by Restaurants with Free Parking - Foto 16
City Centre Flat by Restaurants with Free Parking - Foto 17
City Centre Flat by Restaurants with Free Parking - Foto 18
City Centre Flat by Restaurants with Free Parking - Foto 19
City Centre Flat by Restaurants with Free Parking - Foto 20
City Centre Flat by Restaurants with Free Parking - Foto 21
City Centre Flat by Restaurants with Free Parking - Foto 22
City Centre Flat by Restaurants with Free Parking - Foto 23
City Centre Flat by Restaurants with Free Parking - Foto 24
City Centre Flat by Restaurants with Free Parking - Foto 25
City Centre Flat by Restaurants with Free Parking - Foto 26
City Centre Flat by Restaurants with Free Parking - Foto 27
City Centre Flat by Restaurants with Free Parking - Foto 28
City Centre Flat by Restaurants with Free Parking - Foto 29
City Centre Flat by Restaurants with Free Parking - Foto 30
City Centre Flat by Restaurants with Free Parking - Foto 31
City Centre Flat by Restaurants with Free Parking - Foto 32
City Centre Flat by Restaurants with Free Parking - Foto 33
City Centre Flat by Restaurants with Free Parking - Foto 34
City Centre Flat by Restaurants with Free Parking - Foto 35
City Centre Flat by Restaurants with Free Parking - Foto 36
City Centre Flat by Restaurants with Free Parking - Foto 37
City Centre Flat by Restaurants with Free Parking - Foto 38
City Centre Flat by Restaurants with Free Parking - Foto 39
City Centre Flat by Restaurants with Free Parking - Foto 40
City Centre Flat by Restaurants with Free Parking - Foto 41
City Centre Flat by Restaurants with Free Parking - Foto 42
City Centre Flat by Restaurants with Free Parking - Foto 43
City Centre Flat by Restaurants with Free Parking - Foto 44
City Centre Flat by Restaurants with Free Parking - Foto 45
City Centre Flat by Restaurants with Free Parking - Foto 46
City Centre Flat by Restaurants with Free Parking - Foto 47
City Centre Flat by Restaurants with Free Parking - Foto 48
City Centre Flat by Restaurants with Free Parking - Foto 49
City Centre Flat by Restaurants with Free Parking - Foto 50
City Centre Flat by Restaurants with Free Parking - Foto 51
City Centre Flat by Restaurants with Free Parking - Foto 52
City Centre Flat by Restaurants with Free Parking - Foto 53
City Centre Flat by Restaurants with Free Parking - Foto 54
City Centre Flat by Restaurants with Free Parking - Foto 55
City Centre Flat by Restaurants with Free Parking - Foto 56
City Centre Flat by Restaurants with Free Parking - Foto 57
City Centre Flat by Restaurants with Free Parking - Foto 58
City Centre Flat by Restaurants with Free Parking - Foto 59
City Centre Flat by Restaurants with Free Parking - Foto 60
City Centre Flat by Restaurants with Free Parking - Foto 61
City Centre Flat by Restaurants with Free Parking - Foto 62
City Centre Flat by Restaurants with Free Parking - Foto 63
City Centre Flat by Restaurants with Free Parking - Foto 64
City Centre Flat by Restaurants with Free Parking - Foto 65
City Centre Flat by Restaurants with Free Parking - Foto 66
City Centre Flat by Restaurants with Free Parking - Foto 67
City Centre Flat by Restaurants with Free Parking - Foto 68
City Centre Flat by Restaurants with Free Parking - Foto 69
City Centre Flat by Restaurants with Free Parking - Foto 70
City Centre Flat by Restaurants with Free Parking - Foto 71
City Centre Flat by Restaurants with Free Parking - Foto 72
City Centre Flat by Restaurants with Free Parking - Foto 73
City Centre Flat by Restaurants with Free Parking - Foto 74
City Centre Flat by Restaurants with Free Parking - Foto 75
City Centre Flat by Restaurants with Free Parking - Foto 76
City Centre Flat by Restaurants with Free Parking - Foto 77
City Centre Flat by Restaurants with Free Parking - Foto 78
City Centre Flat by Restaurants with Free Parking - Foto 79
City Centre Flat by Restaurants with Free Parking - Foto 80

City Centre Flat by Restaurants with Free Parking

Liverpool - Ropewalks - A 270 m del centro

  • 80 M2
  • 1 habitación
  • 8 personas
  • Calefacción
  • Parking
8.6Muy bueno | 27 reseñas
Posh Pads - Liverpool 1 - Apart-Hotel - Foto 1
Posh Pads - Liverpool 1 - Apart-Hotel - Foto 2
Posh Pads - Liverpool 1 - Apart-Hotel - Foto 3
Posh Pads - Liverpool 1 - Apart-Hotel - Foto 4
Posh Pads - Liverpool 1 - Apart-Hotel - Foto 5
Posh Pads - Liverpool 1 - Apart-Hotel - Foto 6
Posh Pads - Liverpool 1 - Apart-Hotel - Foto 7
Posh Pads - Liverpool 1 - Apart-Hotel - Foto 8
Posh Pads - Liverpool 1 - Apart-Hotel - Foto 9
Posh Pads - Liverpool 1 - Apart-Hotel - Foto 10
Posh Pads - Liverpool 1 - Apart-Hotel - Foto 11
Posh Pads - Liverpool 1 - Apart-Hotel - Foto 12
Posh Pads - Liverpool 1 - Apart-Hotel - Foto 13
Posh Pads - Liverpool 1 - Apart-Hotel - Foto 14
Posh Pads - Liverpool 1 - Apart-Hotel - Foto 15
Posh Pads - Liverpool 1 - Apart-Hotel - Foto 16
Posh Pads - Liverpool 1 - Apart-Hotel - Foto 17
Posh Pads - Liverpool 1 - Apart-Hotel - Foto 18
Posh Pads - Liverpool 1 - Apart-Hotel - Foto 19
Posh Pads - Liverpool 1 - Apart-Hotel - Foto 20
Posh Pads - Liverpool 1 - Apart-Hotel - Foto 21
Posh Pads - Liverpool 1 - Apart-Hotel - Foto 22
Posh Pads - Liverpool 1 - Apart-Hotel - Foto 23
Posh Pads - Liverpool 1 - Apart-Hotel - Foto 24
Posh Pads - Liverpool 1 - Apart-Hotel - Foto 25
Posh Pads - Liverpool 1 - Apart-Hotel - Foto 26
Posh Pads - Liverpool 1 - Apart-Hotel - Foto 27
Posh Pads - Liverpool 1 - Apart-Hotel - Foto 28
Posh Pads - Liverpool 1 - Apart-Hotel - Foto 29
Posh Pads - Liverpool 1 - Apart-Hotel - Foto 30
Posh Pads - Liverpool 1 - Apart-Hotel - Foto 31
Posh Pads - Liverpool 1 - Apart-Hotel - Foto 32
Posh Pads - Liverpool 1 - Apart-Hotel - Foto 33
Posh Pads - Liverpool 1 - Apart-Hotel - Foto 34
Posh Pads - Liverpool 1 - Apart-Hotel - Foto 35
Posh Pads - Liverpool 1 - Apart-Hotel - Foto 36
Posh Pads - Liverpool 1 - Apart-Hotel - Foto 37
Posh Pads - Liverpool 1 - Apart-Hotel - Foto 38
Posh Pads - Liverpool 1 - Apart-Hotel - Foto 39
Posh Pads - Liverpool 1 - Apart-Hotel - Foto 40
Posh Pads - Liverpool 1 - Apart-Hotel - Foto 41
Posh Pads - Liverpool 1 - Apart-Hotel - Foto 42
Posh Pads - Liverpool 1 - Apart-Hotel - Foto 43
Posh Pads - Liverpool 1 - Apart-Hotel - Foto 44
Posh Pads - Liverpool 1 - Apart-Hotel - Foto 45
Posh Pads - Liverpool 1 - Apart-Hotel - Foto 46
Posh Pads - Liverpool 1 - Apart-Hotel - Foto 47
Posh Pads - Liverpool 1 - Apart-Hotel - Foto 48
Posh Pads - Liverpool 1 - Apart-Hotel - Foto 49
Posh Pads - Liverpool 1 - Apart-Hotel - Foto 50
Posh Pads - Liverpool 1 - Apart-Hotel - Foto 51
Posh Pads - Liverpool 1 - Apart-Hotel - Foto 52
Posh Pads - Liverpool 1 - Apart-Hotel - Foto 53
Posh Pads - Liverpool 1 - Apart-Hotel - Foto 54
Posh Pads - Liverpool 1 - Apart-Hotel - Foto 55
Posh Pads - Liverpool 1 - Apart-Hotel - Foto 56
Posh Pads - Liverpool 1 - Apart-Hotel - Foto 57
Posh Pads - Liverpool 1 - Apart-Hotel - Foto 58
Posh Pads - Liverpool 1 - Apart-Hotel - Foto 59
Posh Pads - Liverpool 1 - Apart-Hotel - Foto 60
Posh Pads - Liverpool 1 - Apart-Hotel - Foto 61
Posh Pads - Liverpool 1 - Apart-Hotel - Foto 62
Posh Pads - Liverpool 1 - Apart-Hotel - Foto 63
Posh Pads - Liverpool 1 - Apart-Hotel - Foto 64
Posh Pads - Liverpool 1 - Apart-Hotel - Foto 65
Posh Pads - Liverpool 1 - Apart-Hotel - Foto 66
Posh Pads - Liverpool 1 - Apart-Hotel - Foto 67
Posh Pads - Liverpool 1 - Apart-Hotel - Foto 68
Posh Pads - Liverpool 1 - Apart-Hotel - Foto 69
Posh Pads - Liverpool 1 - Apart-Hotel - Foto 70
Posh Pads - Liverpool 1 - Apart-Hotel - Foto 71
Posh Pads - Liverpool 1 - Apart-Hotel - Foto 72
Posh Pads - Liverpool 1 - Apart-Hotel - Foto 73
Posh Pads - Liverpool 1 - Apart-Hotel - Foto 74
Posh Pads - Liverpool 1 - Apart-Hotel - Foto 75
Posh Pads - Liverpool 1 - Apart-Hotel - Foto 76
Posh Pads - Liverpool 1 - Apart-Hotel - Foto 77
Posh Pads - Liverpool 1 - Apart-Hotel - Foto 78
Posh Pads - Liverpool 1 - Apart-Hotel - Foto 79
Posh Pads - Liverpool 1 - Apart-Hotel - Foto 80
Posh Pads - Liverpool 1 - Apart-Hotel - Foto 81
Posh Pads - Liverpool 1 - Apart-Hotel - Foto 82
Posh Pads - Liverpool 1 - Apart-Hotel - Foto 83
Posh Pads - Liverpool 1 - Apart-Hotel - Foto 84
Posh Pads - Liverpool 1 - Apart-Hotel - Foto 85
Posh Pads - Liverpool 1 - Apart-Hotel - Foto 86
Posh Pads - Liverpool 1 - Apart-Hotel - Foto 87
Posh Pads - Liverpool 1 - Apart-Hotel - Foto 88
Posh Pads - Liverpool 1 - Apart-Hotel - Foto 89
Posh Pads - Liverpool 1 - Apart-Hotel - Foto 90
Posh Pads - Liverpool 1 - Apart-Hotel - Foto 91
Posh Pads - Liverpool 1 - Apart-Hotel - Foto 92
Posh Pads - Liverpool 1 - Apart-Hotel - Foto 93
Posh Pads - Liverpool 1 - Apart-Hotel - Foto 94
Posh Pads - Liverpool 1 - Apart-Hotel - Foto 95
Posh Pads - Liverpool 1 - Apart-Hotel - Foto 96
Posh Pads - Liverpool 1 - Apart-Hotel - Foto 97
Posh Pads - Liverpool 1 - Apart-Hotel - Foto 98
Posh Pads - Liverpool 1 - Apart-Hotel - Foto 99
Posh Pads - Liverpool 1 - Apart-Hotel - Foto 100

Posh Pads - Liverpool 1 - Apart-Hotel

Liverpool - Ropewalks - A 420 m del centro

  • 86 M2
  • 2 habitaciones
  • 6 personas
  • Calefacción
  • Parking
  • Ascensor
9.1Excepcional | 3421 reseñas
The Print Works Apartments - Foto 1
The Print Works Apartments - Foto 2
The Print Works Apartments - Foto 3
The Print Works Apartments - Foto 4
The Print Works Apartments - Foto 5
The Print Works Apartments - Foto 6
The Print Works Apartments - Foto 7
The Print Works Apartments - Foto 8
The Print Works Apartments - Foto 9
The Print Works Apartments - Foto 10
The Print Works Apartments - Foto 11
The Print Works Apartments - Foto 12
The Print Works Apartments - Foto 13
The Print Works Apartments - Foto 14
The Print Works Apartments - Foto 15
The Print Works Apartments - Foto 16
The Print Works Apartments - Foto 17
The Print Works Apartments - Foto 18
The Print Works Apartments - Foto 19
The Print Works Apartments - Foto 20
The Print Works Apartments - Foto 21
The Print Works Apartments - Foto 22
The Print Works Apartments - Foto 23
The Print Works Apartments - Foto 24
The Print Works Apartments - Foto 25
The Print Works Apartments - Foto 26
The Print Works Apartments - Foto 27
The Print Works Apartments - Foto 28
The Print Works Apartments - Foto 29
The Print Works Apartments - Foto 30
The Print Works Apartments - Foto 31
The Print Works Apartments - Foto 32
The Print Works Apartments - Foto 33
The Print Works Apartments - Foto 34
The Print Works Apartments - Foto 35
The Print Works Apartments - Foto 36
The Print Works Apartments - Foto 37
The Print Works Apartments - Foto 38
The Print Works Apartments - Foto 39
The Print Works Apartments - Foto 40
The Print Works Apartments - Foto 41
The Print Works Apartments - Foto 42
The Print Works Apartments - Foto 43
The Print Works Apartments - Foto 44
The Print Works Apartments - Foto 45
The Print Works Apartments - Foto 46
The Print Works Apartments - Foto 47
The Print Works Apartments - Foto 48
The Print Works Apartments - Foto 49
The Print Works Apartments - Foto 50
The Print Works Apartments - Foto 51

The Print Works Apartments

Liverpool - Ropewalks - A 530 m del centro

  • 158 M2
  • 10 personas
  • Calefacción
8.6Muy bueno | 3189 reseñas
York Street Studios - Foto 1
York Street Studios - Foto 2
York Street Studios - Foto 3
York Street Studios - Foto 4
York Street Studios - Foto 5
York Street Studios - Foto 6
York Street Studios - Foto 7
York Street Studios - Foto 8
York Street Studios - Foto 9
York Street Studios - Foto 10
York Street Studios - Foto 11
York Street Studios - Foto 12
York Street Studios - Foto 13
York Street Studios - Foto 14
York Street Studios - Foto 15
York Street Studios - Foto 16
York Street Studios - Foto 17
York Street Studios - Foto 18
York Street Studios - Foto 19
York Street Studios - Foto 20
York Street Studios - Foto 21
York Street Studios - Foto 22
York Street Studios - Foto 23
York Street Studios - Foto 24
York Street Studios - Foto 25
York Street Studios - Foto 26
York Street Studios - Foto 27
York Street Studios - Foto 28
York Street Studios - Foto 29
York Street Studios - Foto 30
York Street Studios - Foto 31
York Street Studios - Foto 32
York Street Studios - Foto 33
York Street Studios - Foto 34
York Street Studios - Foto 35
York Street Studios - Foto 36
York Street Studios - Foto 37
York Street Studios - Foto 38
York Street Studios - Foto 39
York Street Studios - Foto 40
York Street Studios - Foto 41
York Street Studios - Foto 42
York Street Studios - Foto 43
York Street Studios - Foto 44
York Street Studios - Foto 45
York Street Studios - Foto 46
York Street Studios - Foto 47
York Street Studios - Foto 48
York Street Studios - Foto 49
York Street Studios - Foto 50
York Street Studios - Foto 51
York Street Studios - Foto 52
York Street Studios - Foto 53
York Street Studios - Foto 54
York Street Studios - Foto 55
York Street Studios - Foto 56
York Street Studios - Foto 57
York Street Studios - Foto 58
York Street Studios - Foto 59
York Street Studios - Foto 60
York Street Studios - Foto 61
York Street Studios - Foto 62
York Street Studios - Foto 63

York Street Studios

Liverpool - Ropewalks - A 480 m del centro

  • 94 M2
  • 2 habitaciones
  • 12 personas
  • Calefacción
  • Parking
  • Jardín
9.4Excepcional | 655 reseñas
Balcony Free Parking Huge TV City Centre Apt - Foto 1
Balcony Free Parking Huge TV City Centre Apt - Foto 2
Balcony Free Parking Huge TV City Centre Apt - Foto 3
Balcony Free Parking Huge TV City Centre Apt - Foto 4
Balcony Free Parking Huge TV City Centre Apt - Foto 5
Balcony Free Parking Huge TV City Centre Apt - Foto 6
Balcony Free Parking Huge TV City Centre Apt - Foto 7
Balcony Free Parking Huge TV City Centre Apt - Foto 8
Balcony Free Parking Huge TV City Centre Apt - Foto 9
Balcony Free Parking Huge TV City Centre Apt - Foto 10
Balcony Free Parking Huge TV City Centre Apt - Foto 11
Balcony Free Parking Huge TV City Centre Apt - Foto 12
Balcony Free Parking Huge TV City Centre Apt - Foto 13
Balcony Free Parking Huge TV City Centre Apt - Foto 14
Balcony Free Parking Huge TV City Centre Apt - Foto 15
Balcony Free Parking Huge TV City Centre Apt - Foto 16
Balcony Free Parking Huge TV City Centre Apt - Foto 17
Balcony Free Parking Huge TV City Centre Apt - Foto 18
Balcony Free Parking Huge TV City Centre Apt - Foto 19
Balcony Free Parking Huge TV City Centre Apt - Foto 20
Balcony Free Parking Huge TV City Centre Apt - Foto 21

Balcony Free Parking Huge TV City Centre Apt

Liverpool - Ropewalks - A 580 m del centro

  • 110 M2
  • 2 habitaciones
  • 6 personas
  • Parking
  • Ascensor
9.2Excepcional | 13 reseñas
Host & Stay - Ropewalks Quarters - Foto 1
Host & Stay - Ropewalks Quarters - Foto 2
Host & Stay - Ropewalks Quarters - Foto 3
Host & Stay - Ropewalks Quarters - Foto 4
Host & Stay - Ropewalks Quarters - Foto 5
Host & Stay - Ropewalks Quarters - Foto 6
Host & Stay - Ropewalks Quarters - Foto 7
Host & Stay - Ropewalks Quarters - Foto 8
Host & Stay - Ropewalks Quarters - Foto 9
Host & Stay - Ropewalks Quarters - Foto 10
Host & Stay - Ropewalks Quarters - Foto 11
Host & Stay - Ropewalks Quarters - Foto 12
Host & Stay - Ropewalks Quarters - Foto 13
Host & Stay - Ropewalks Quarters - Foto 14
Host & Stay - Ropewalks Quarters - Foto 15
Host & Stay - Ropewalks Quarters - Foto 16
Host & Stay - Ropewalks Quarters - Foto 17
Host & Stay - Ropewalks Quarters - Foto 18
Host & Stay - Ropewalks Quarters - Foto 19
Host & Stay - Ropewalks Quarters - Foto 20
Host & Stay - Ropewalks Quarters - Foto 21
Host & Stay - Ropewalks Quarters - Foto 22
Host & Stay - Ropewalks Quarters - Foto 23
Host & Stay - Ropewalks Quarters - Foto 24
Host & Stay - Ropewalks Quarters - Foto 25
Host & Stay - Ropewalks Quarters - Foto 26
Host & Stay - Ropewalks Quarters - Foto 27
Host & Stay - Ropewalks Quarters - Foto 28
Host & Stay - Ropewalks Quarters - Foto 29
Host & Stay - Ropewalks Quarters - Foto 30
Host & Stay - Ropewalks Quarters - Foto 31
Host & Stay - Ropewalks Quarters - Foto 32
Host & Stay - Ropewalks Quarters - Foto 33
Host & Stay - Ropewalks Quarters - Foto 34
Host & Stay - Ropewalks Quarters - Foto 35
Host & Stay - Ropewalks Quarters - Foto 36
Host & Stay - Ropewalks Quarters - Foto 37
Host & Stay - Ropewalks Quarters - Foto 38
Host & Stay - Ropewalks Quarters - Foto 39
Host & Stay - Ropewalks Quarters - Foto 40
Host & Stay - Ropewalks Quarters - Foto 41
Host & Stay - Ropewalks Quarters - Foto 42
Host & Stay - Ropewalks Quarters - Foto 43
Host & Stay - Ropewalks Quarters - Foto 44
Host & Stay - Ropewalks Quarters - Foto 45
Host & Stay - Ropewalks Quarters - Foto 46
Host & Stay - Ropewalks Quarters - Foto 47
Host & Stay - Ropewalks Quarters - Foto 48
Host & Stay - Ropewalks Quarters - Foto 49
Host & Stay - Ropewalks Quarters - Foto 50
Host & Stay - Ropewalks Quarters - Foto 51
Host & Stay - Ropewalks Quarters - Foto 52
Host & Stay - Ropewalks Quarters - Foto 53
Host & Stay - Ropewalks Quarters - Foto 54
Host & Stay - Ropewalks Quarters - Foto 55
Host & Stay - Ropewalks Quarters - Foto 56
Host & Stay - Ropewalks Quarters - Foto 57
Host & Stay - Ropewalks Quarters - Foto 58
Host & Stay - Ropewalks Quarters - Foto 59
Host & Stay - Ropewalks Quarters - Foto 60
Host & Stay - Ropewalks Quarters - Foto 61
Host & Stay - Ropewalks Quarters - Foto 62
Host & Stay - Ropewalks Quarters - Foto 63
Host & Stay - Ropewalks Quarters - Foto 64
Host & Stay - Ropewalks Quarters - Foto 65
Host & Stay - Ropewalks Quarters - Foto 66
Host & Stay - Ropewalks Quarters - Foto 67
Host & Stay - Ropewalks Quarters - Foto 68
Host & Stay - Ropewalks Quarters - Foto 69
Host & Stay - Ropewalks Quarters - Foto 70
Host & Stay - Ropewalks Quarters - Foto 71
Host & Stay - Ropewalks Quarters - Foto 72
Host & Stay - Ropewalks Quarters - Foto 73
Host & Stay - Ropewalks Quarters - Foto 74
Host & Stay - Ropewalks Quarters - Foto 75
Host & Stay - Ropewalks Quarters - Foto 76
Host & Stay - Ropewalks Quarters - Foto 77
Host & Stay - Ropewalks Quarters - Foto 78
Host & Stay - Ropewalks Quarters - Foto 79
Host & Stay - Ropewalks Quarters - Foto 80

Host & Stay - Ropewalks Quarters

Liverpool - Ropewalks - A 500 m del centro

  • 91 M2
  • 2 habitaciones
  • 8 personas
  • Calefacción
  • Terraza
  • Parking
9Excepcional | 478 reseñas
Destinos relacionados